

Application Widget
The Application Widget is the applicant-facing form that Lendflow hosts. Applicants use it to provide personal and business information when they apply. This guide explains how to customize the look of the widget and of automated emails, and how to white-label widget links so they use your domain instead of Lendflow’s widget host. These customizations are optional.Generate and embed the widget
To generate a widget and copy the code that embeds it on your website, log in to Lendflow. In the left-side menu, open the Integrations tab, then open Widget Integration. On that page you choose the widget type, workflow, branding, and redirect, and then copy the widget link or the integration script. This page does not repeat those configuration steps. For the full steps to configure the widget and add it to your website, go to Embedding The Application Widget. To attach a widget to an application that already exists, including declined deals, go to Widgets for Existing Deals.Branding Your Widget
You can customize how the widget looks to applicants. That includes the color scheme, the logo, and the footer. You can also customize how automated emails from Lendflow look. That includes the header, the background, the logo, and the footer. Create branding templates in the Customize tab in the left-side menu. To use a template on a widget, go to the Integrations tab in the left-side menu, open Widget Integration, and select the template under Widget Brand or Email Brand. You do not need to set a template as default in order to use it. If no branding template exists, Lendflow branding is used. If a template exists and is selected as default, that template is used when no selection is made on the Integrations tab in the left-side menu, then Widget Integration.Create widget branding
Widget branding is the logo, colors, and footer that applicants see inside the widget. The footer can include links to your privacy policy, terms of service, and conditions. You can also require applicants to check a box in the footer. If you do not customize the widget footer, the Lendflow default footer is used.- Log in to Lendflow. In the left-side menu, open the Customize tab.
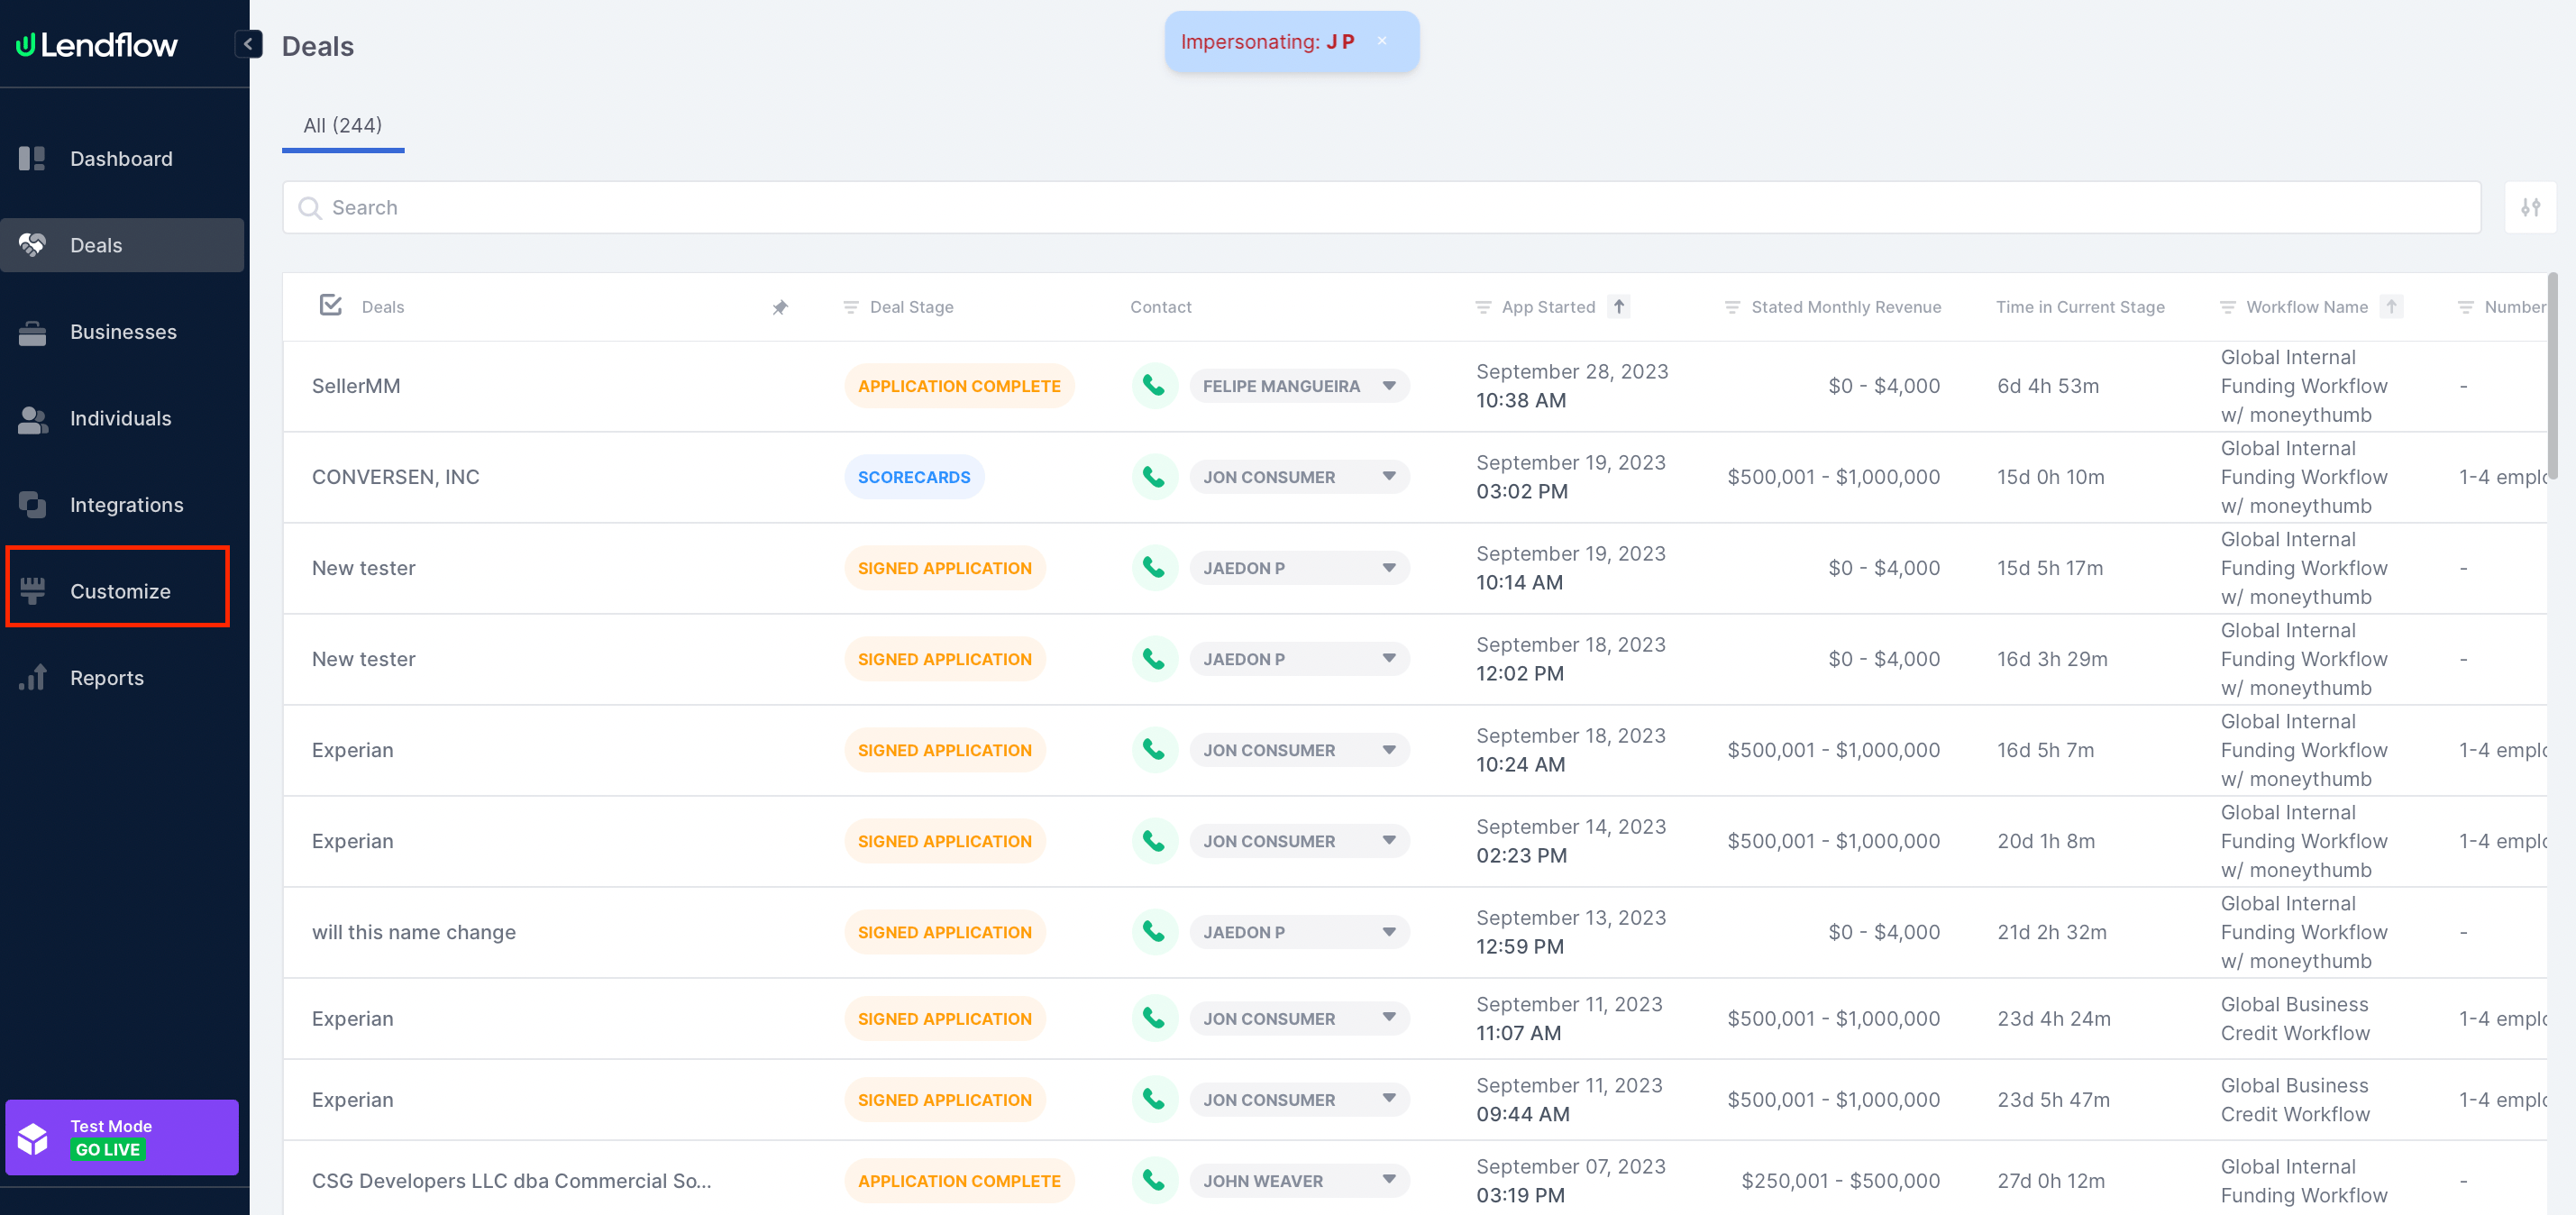
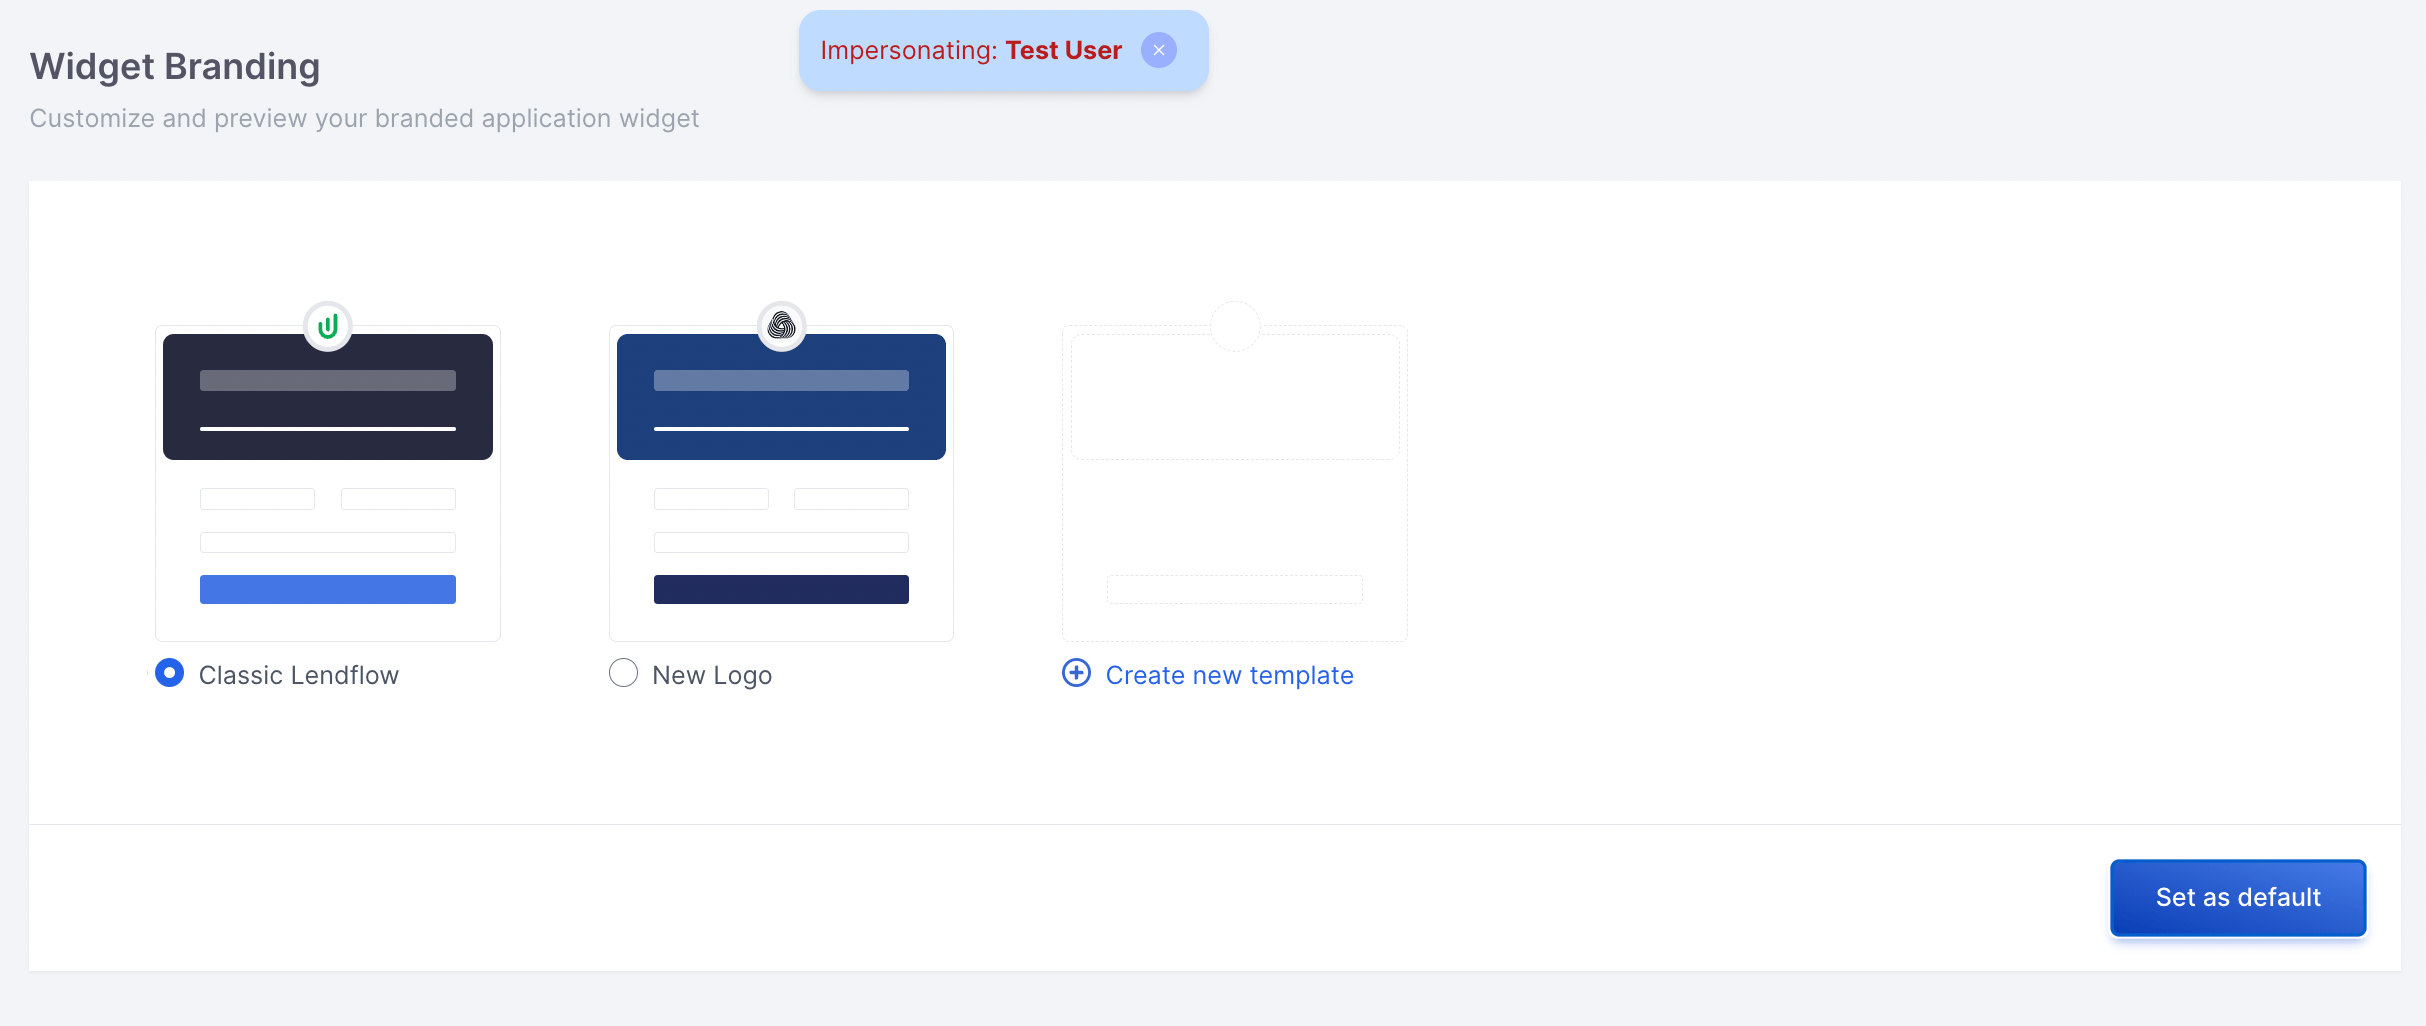
- Click Create new template. This opens the branding page.
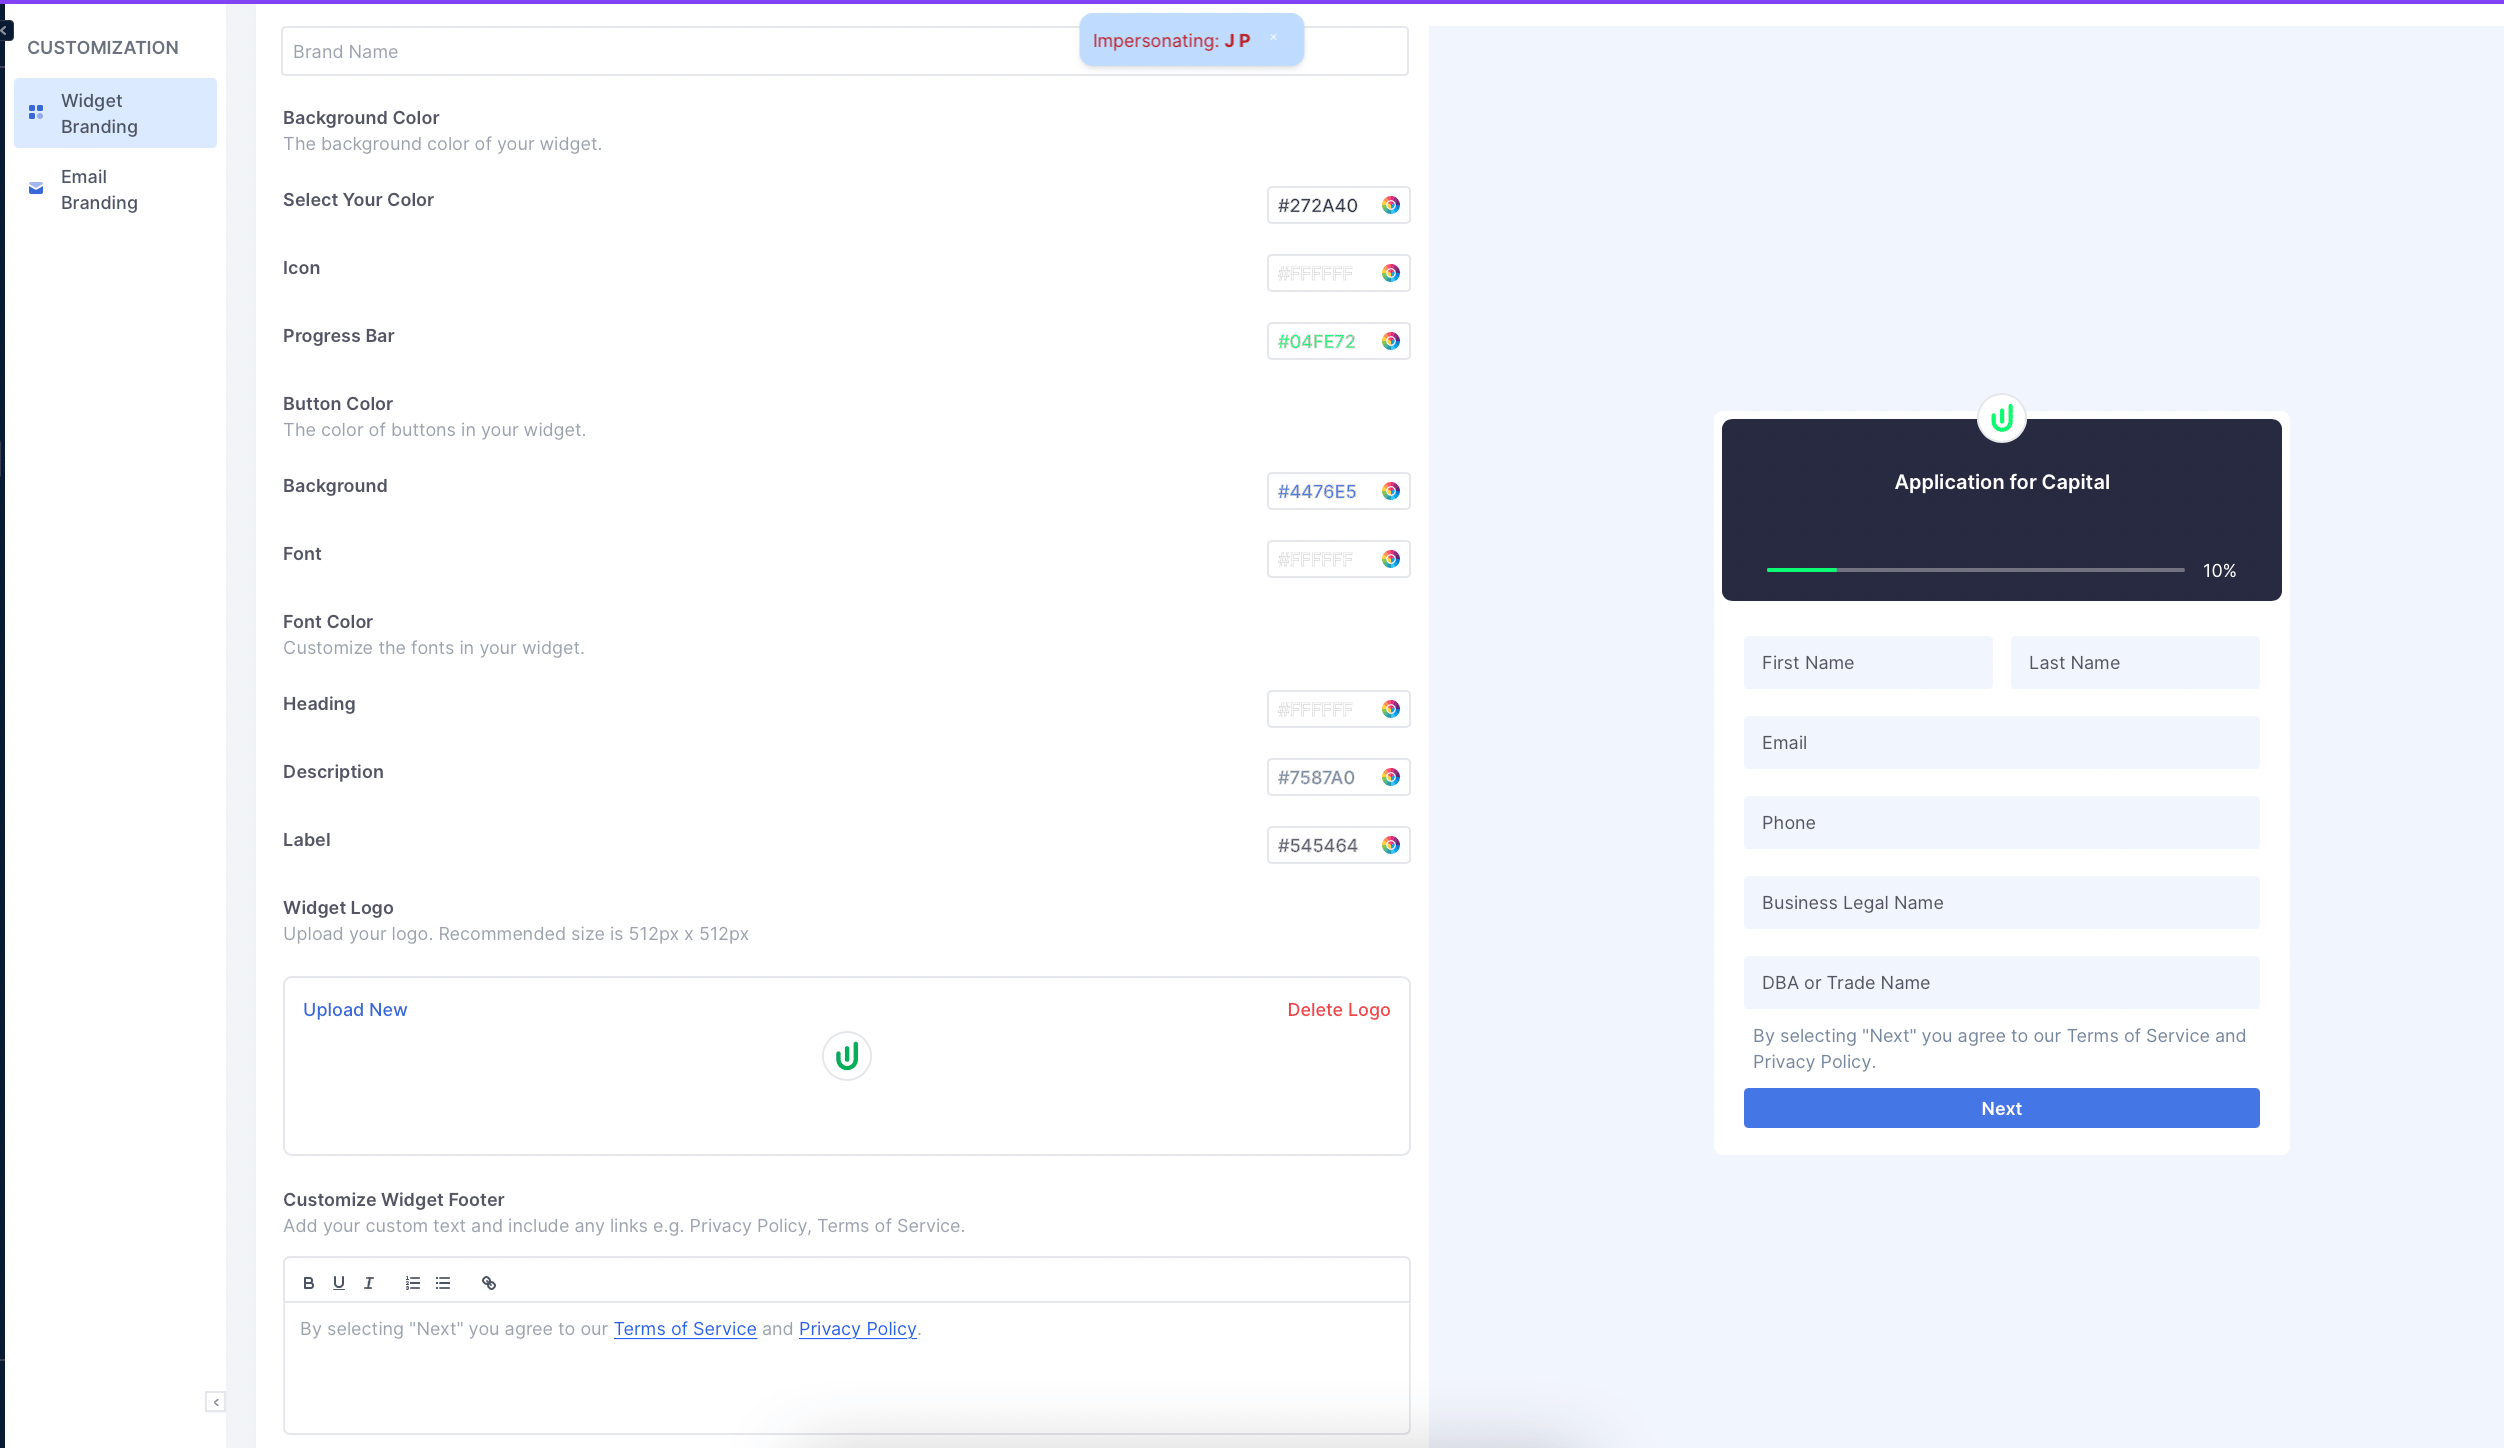
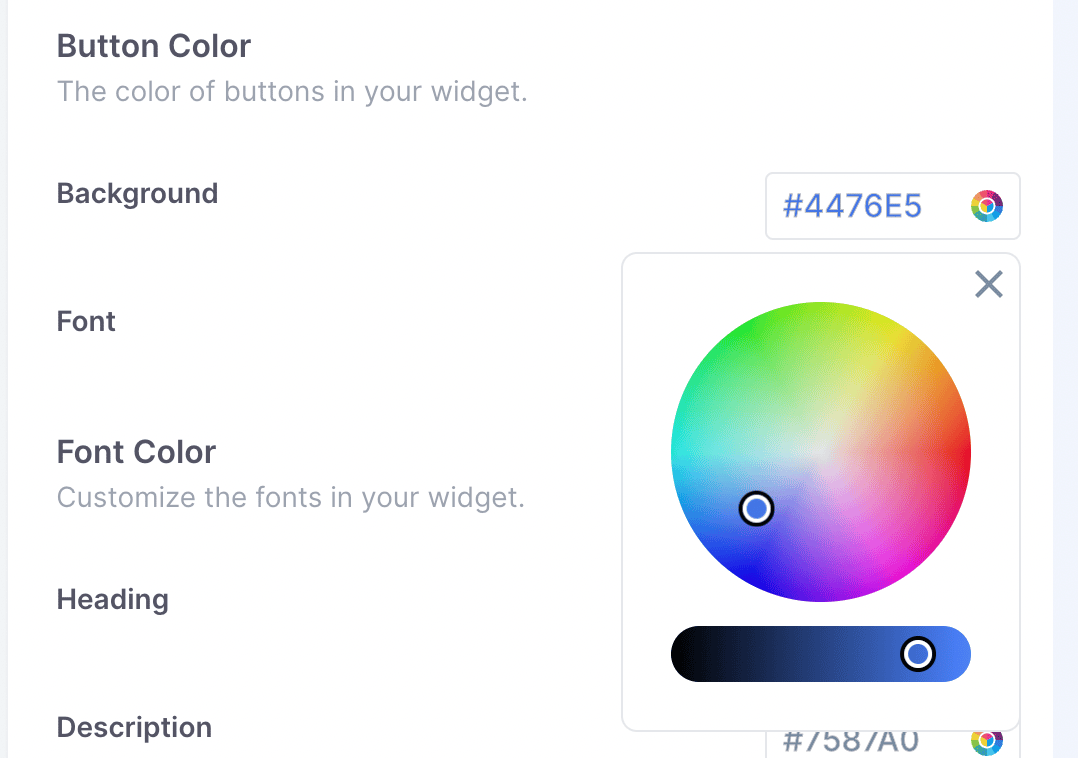
- Set a template name, select colors, and upload a logo. You can select colors from a color chart or enter them as hex codes.
- Customize the footer if you want applicants to see your own message, including links to your privacy policy, terms of service, and conditions. You can require applicants to check the footer box. If you do not edit the footer, the Lendflow default footer is used.
- Optionally click Set as Default. You do not need to set a template as default in order to use it. If you set a template as default, that template is used when no brand is selected on the Integrations tab in the left-side menu, then Widget Integration.
Create email branding
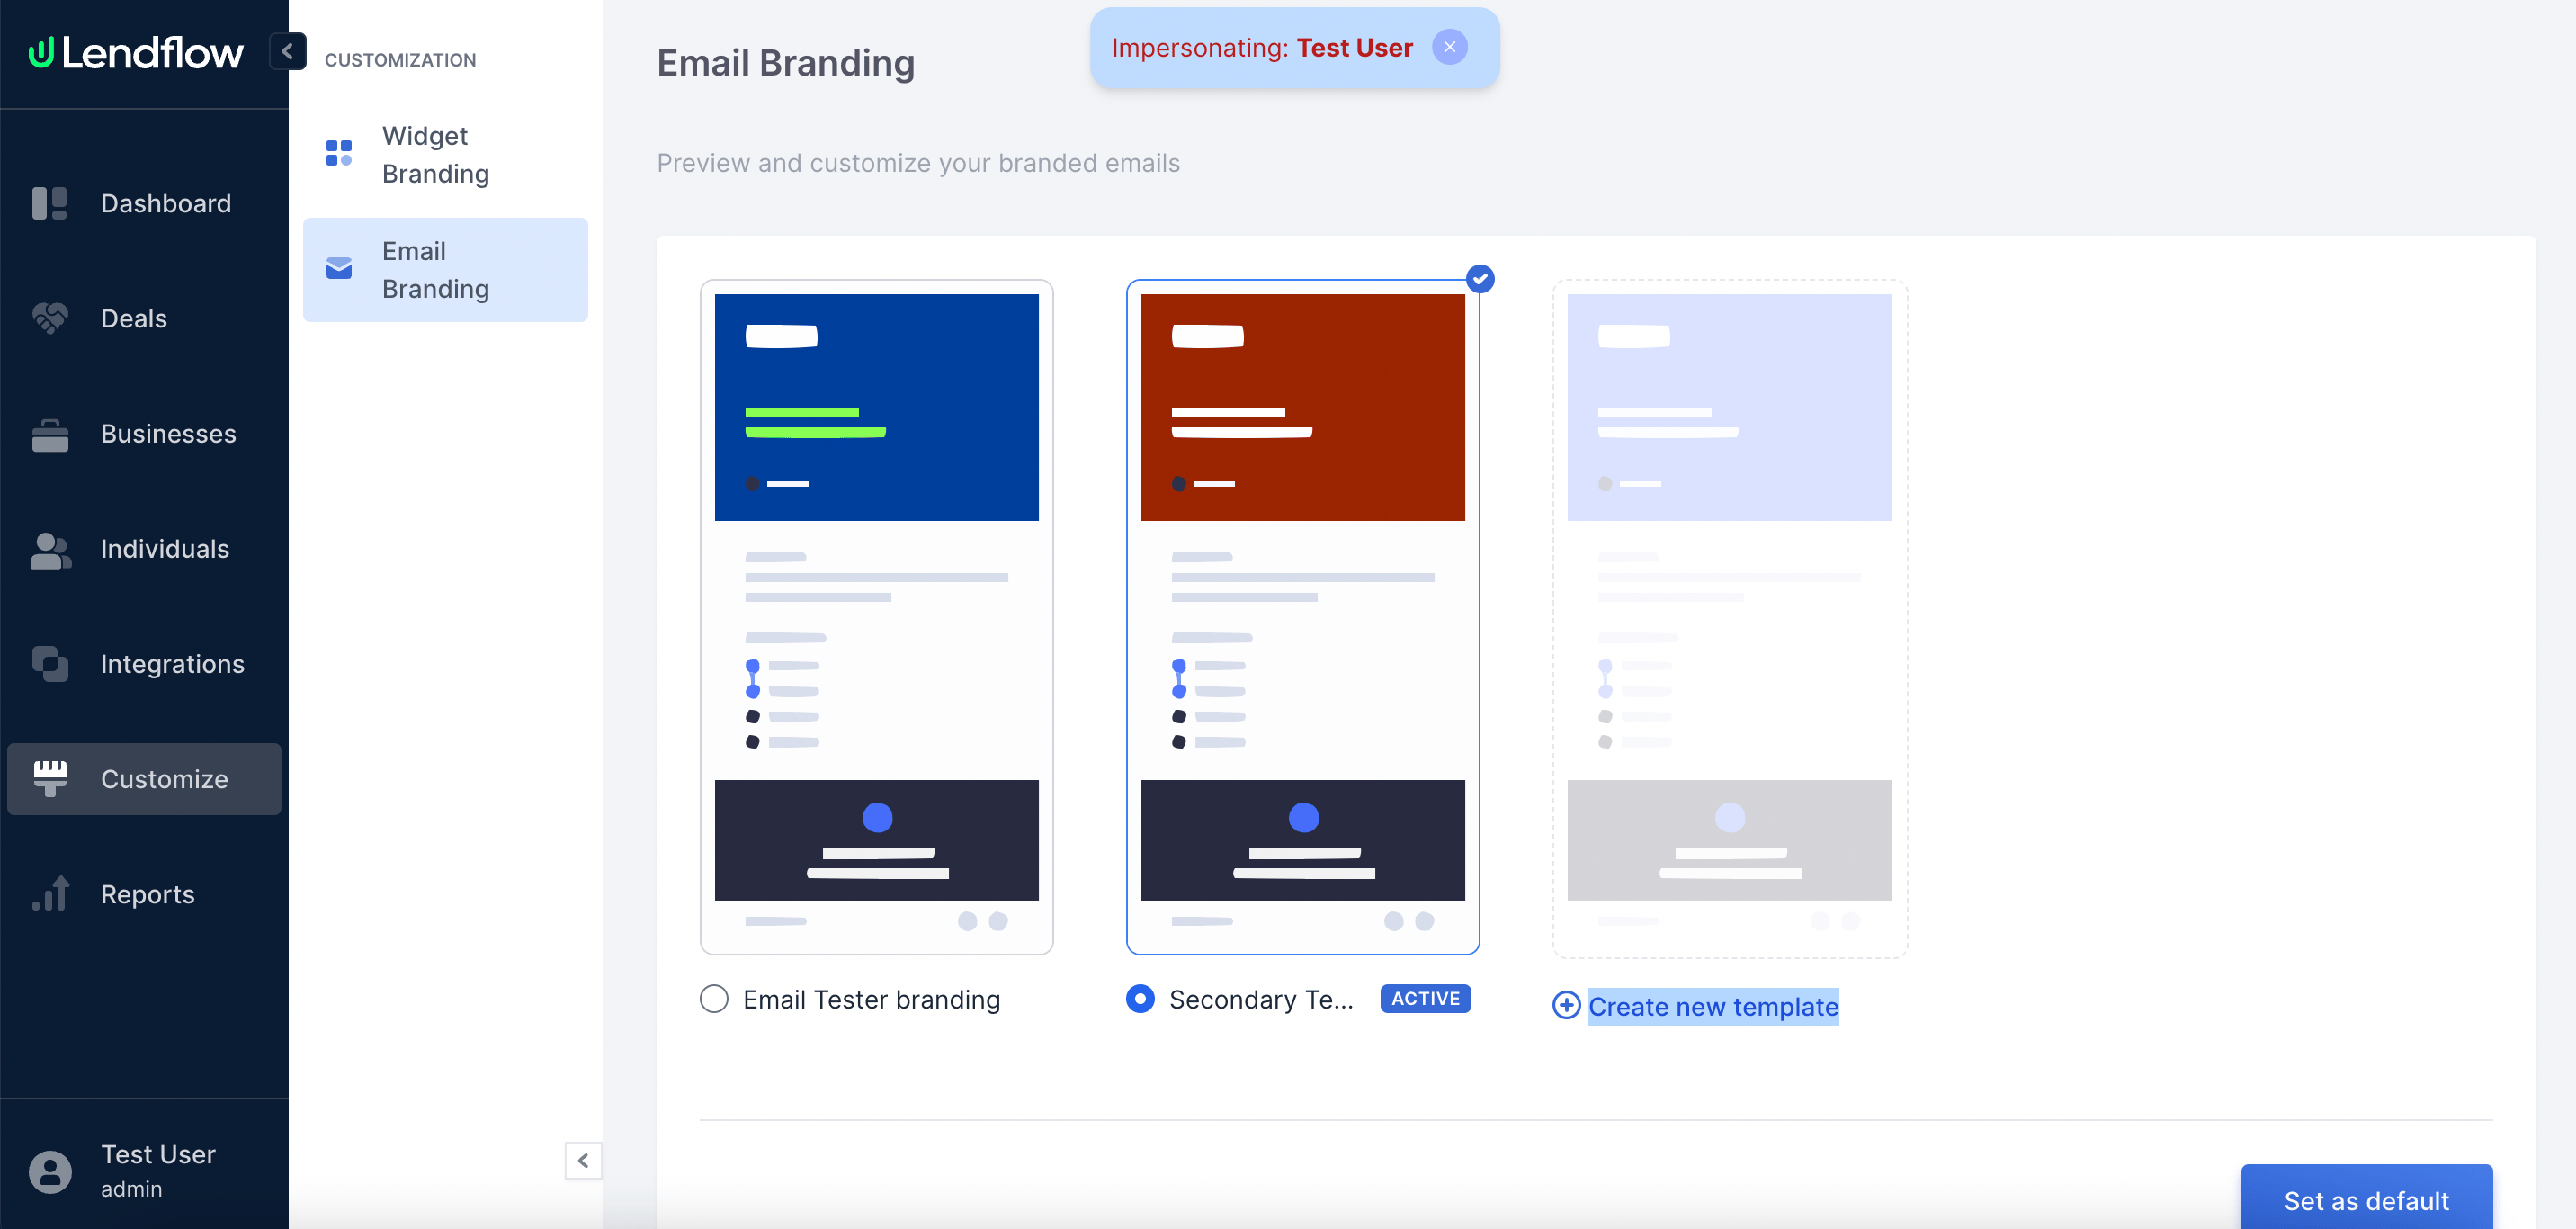
Email branding is used on automated emails that Lendflow sends to applicants. That includes emails such as Borrower Platform authentication emails.- Log in to Lendflow. In the left-side menu, open the Customize tab.
- Open Email Branding, then select Create new template.
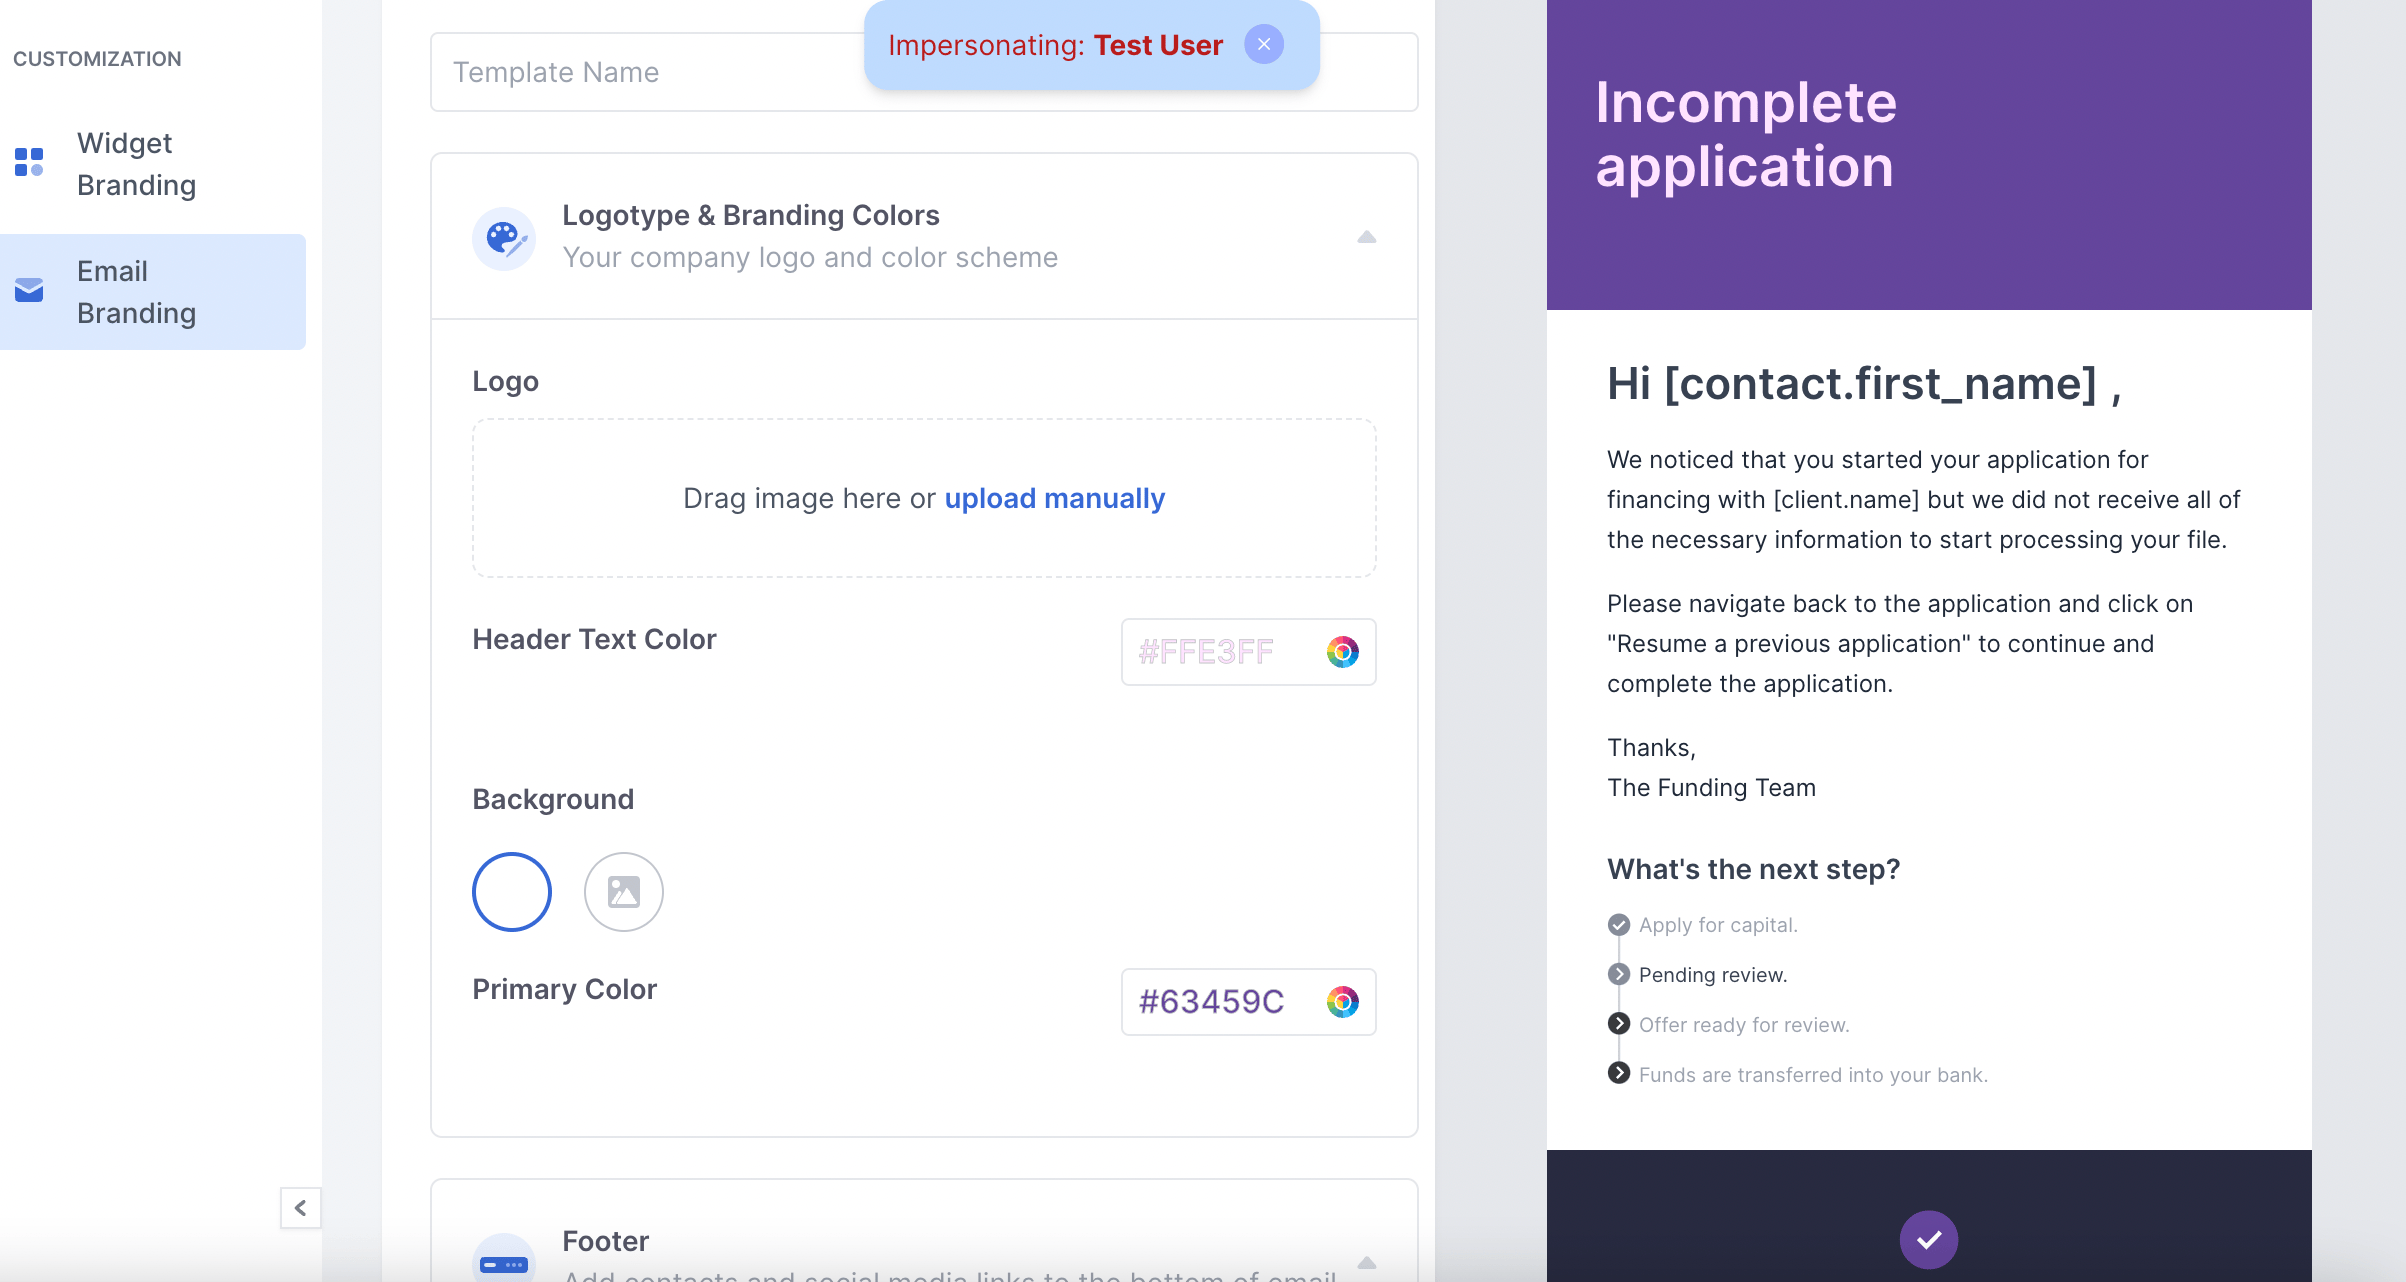
- Set colors for the header and the background, and upload a logo and a background image as needed.
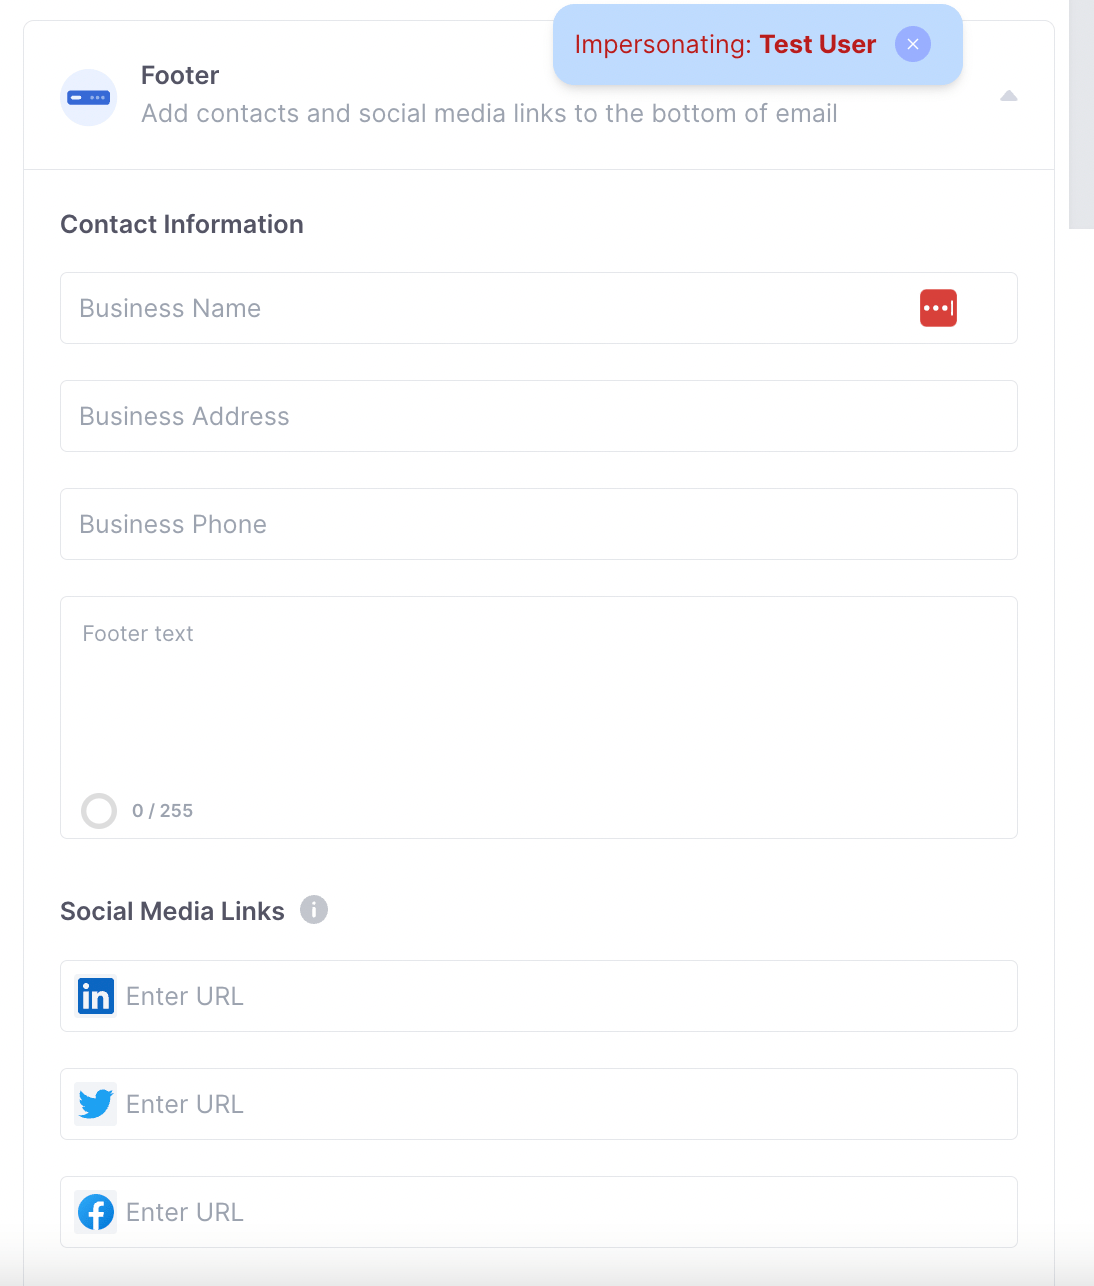
- Update the footer and the social media links with information about your company and capital program.
- Optionally click Set as Default. You do not need to set a template as default in order to use it. If you set a template as default, that template is used when no email brand is selected on the Integrations tab in the left-side menu, then Widget Integration.
Using White-label subdomains
By default, Application Widget links use Lendflow’s widget host:https://iw.lendflow.com. You can white-label that address so the widget links you copy start with your domain instead. For example, links can start with https://capital.test.com instead of https://iw.lendflow.com.
Applicants still complete the Lendflow widget. Only the address they see in the browser uses your domain.
White-labeling is optional. First add the integration script to the website that owns the domain. Then save the subdomain on the Integrations tab in the left-side menu, then Widget Integration.
- Log in to Lendflow. In the left-side menu, open the Integrations tab, then open Widget Integration.
- Add the integration script to the header of the website that has the domain you want in widget links. For example, if you want widget links to begin with
https://capital.test.com, add the integration script to the header of thecapital.test.compage. Complete this step before you save the subdomain in Lendflow. - After the script is on that website, return to the Integrations tab in the left-side menu, open Widget Integration, and enter the subdomain in the custom address section. New widget links use that subdomain.
- At the top of the Widget Integration page, copy the widget link from Step 7. The copied link now uses the custom address. You can share that link, or you can add it to a button on your website. To embed the widget on a page, use Step 8 in Embedding The Application Widget. If the widget is already embedded on your website, generate the snippet again and update the widget links or scripts where they are embedded.
FAQ
Do I have to brand the widget?
Do I have to brand the widget?
No. You do not have to create branding templates. If no branding template exists, Lendflow branding is used. If a template exists and is selected as default, that template is used when no selection is made on the widget set up.
I created a brand in the Customize tab. Why does the widget still look like Lendflow?
I created a brand in the Customize tab. Why does the widget still look like Lendflow?
Creating a template in the Customize tab does not apply it by itself. A new widget link must be created, then select the template under Widget Brand and Email Brand. If the widget is already embedded on your website, update the links or scripts where they are embedded.
Next steps
Embedding The Application Widget
In the left-side menu, open the Integrations tab, then open Widget Integration, and add Embedded or Pop-out to your website.
Widgets for Existing Deals
Attach a widget to an application that already exists, including declined deals.
Using the Deals Page
Search deals and expand offer or placement details.
Manage a Deal in Workflow Live
Open a deal from the Deals tab in the left-side menu to see workflow stages in Deal Progress.