> ## Documentation Index
> Fetch the complete documentation index at: https://docs.lendflow.com/llms.txt
> Use this file to discover all available pages before exploring further.
# Embedding The Application Widget
## Embedding The Application Widget
Use this guide to configure the Application Widget in Lendflow and add it to your website or product.
If you are going live for the first time, start with [Getting Started](/lendflow-external/docs/getting-started), then follow the steps below.
## Open the Widget Integration
Log in to Lendflow. In the left-side menu, open the **Integrations** tab, then open **Widget Integration**.
On this page, configure the widget on the left (Steps 1–6). Your widget link and integration script update on the right (Steps 7–8) as you make selections.
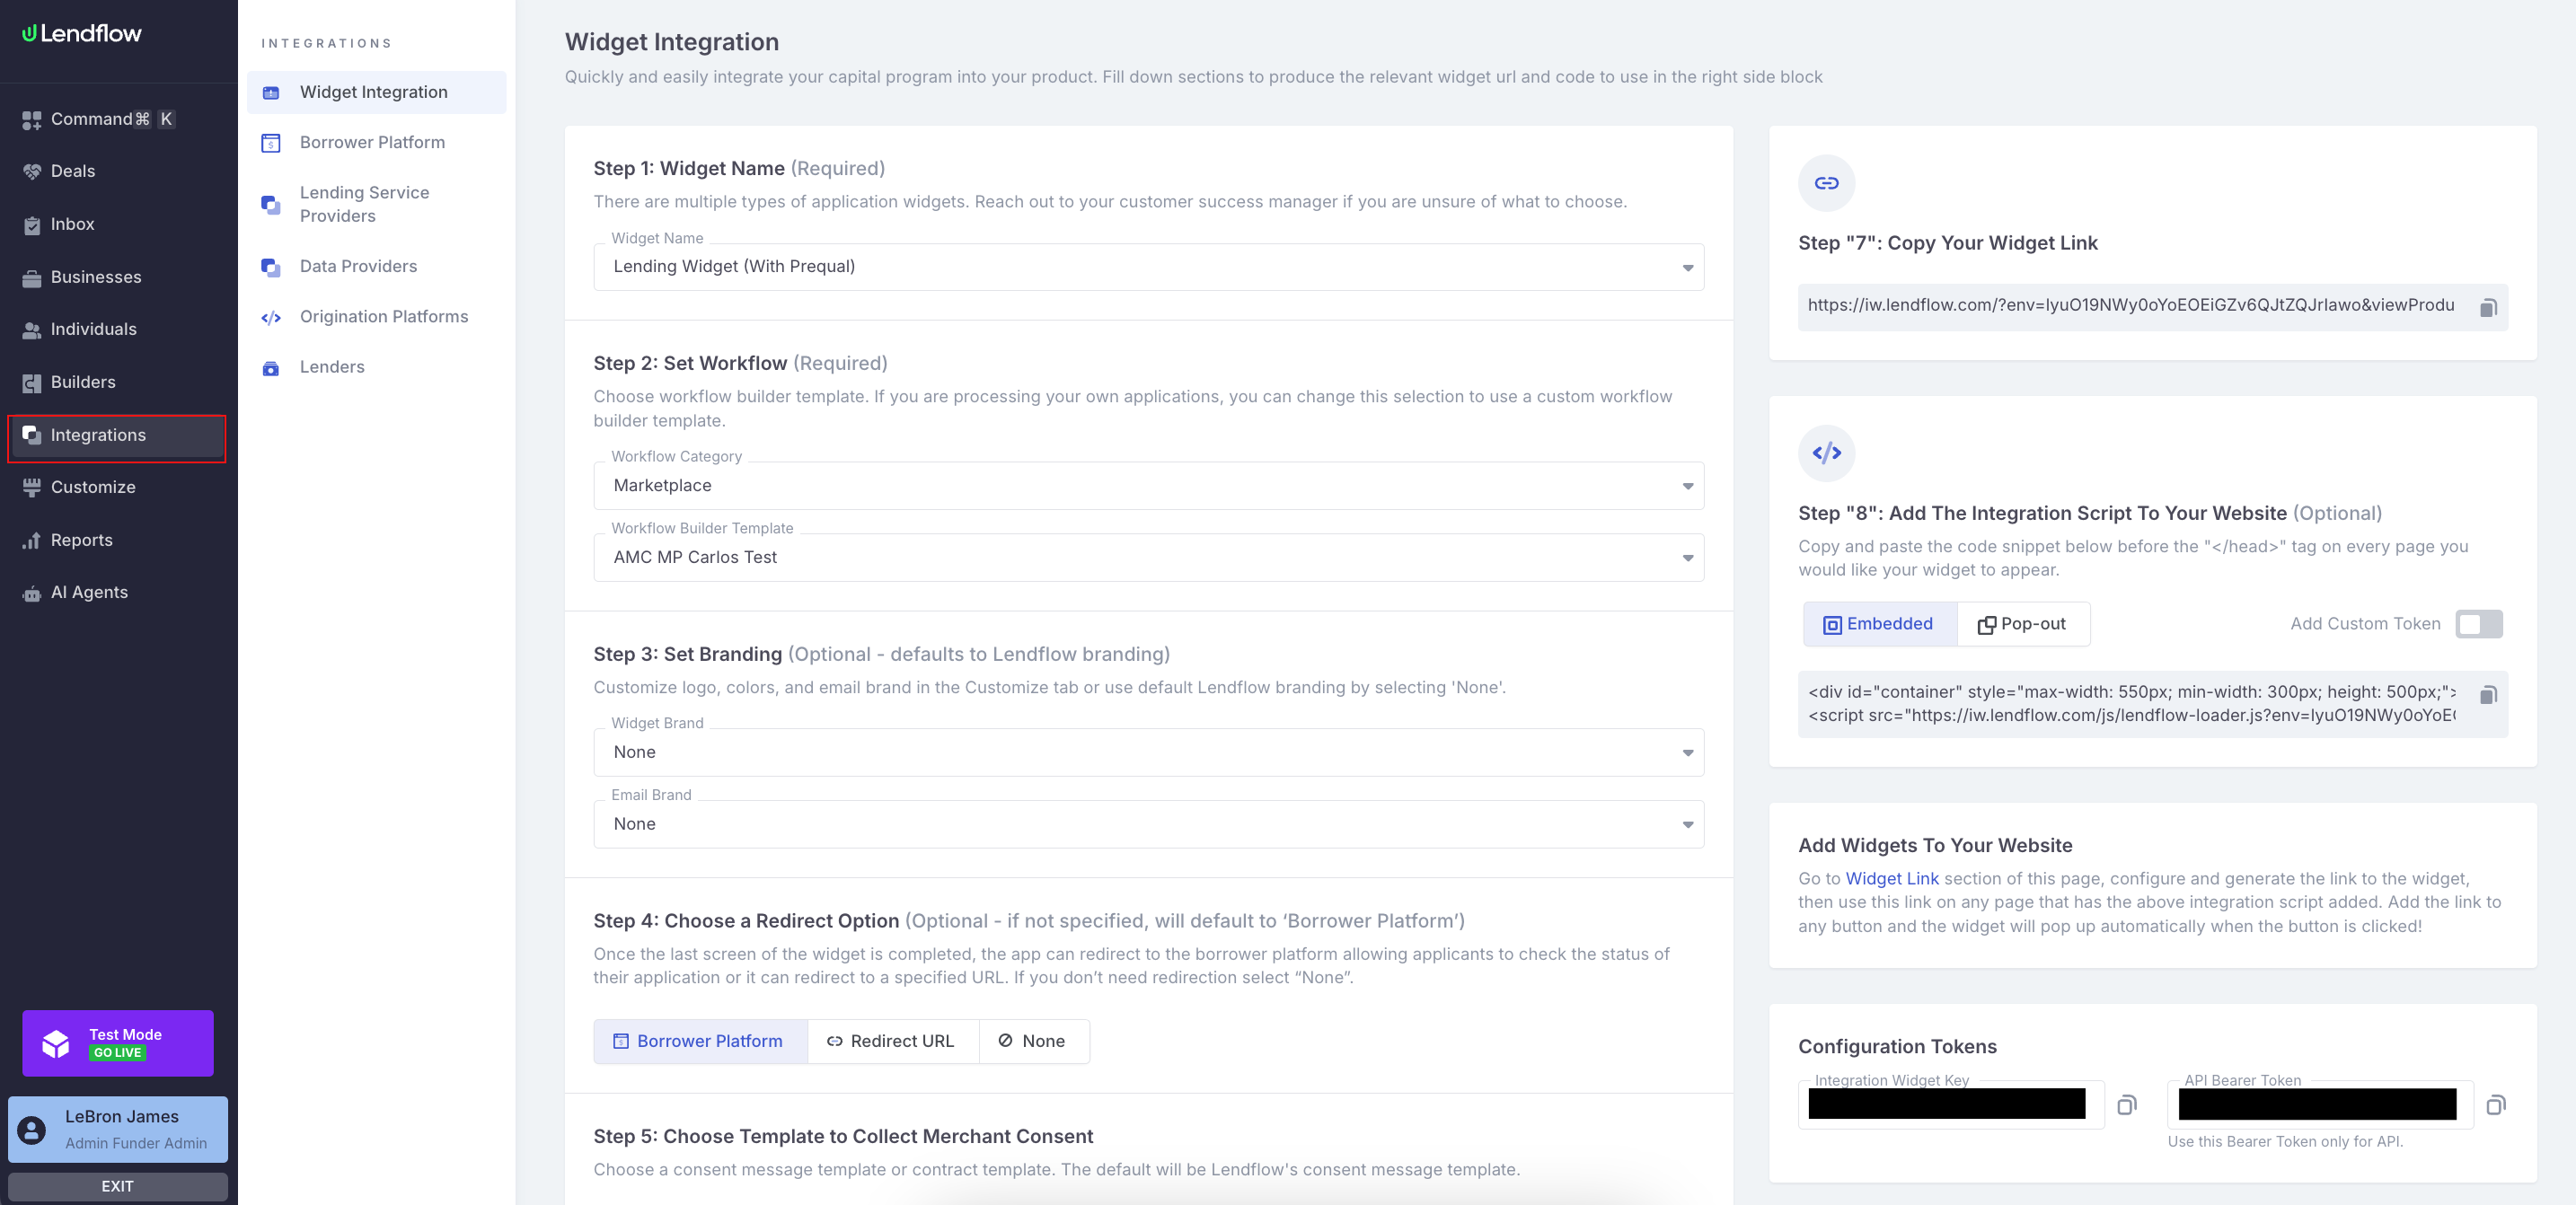
## Step 1: Widget Name
Select the widget type applicants will use.
Most partners use the **Lending Widget** (with Prequal). Other options include Lending without pre-qualification and Invoice Factoring. If you are unsure which to choose, contact your customer success manager.
## Step 2: Set Workflow
Choose how applications are processed after submission.
* **Workflow Category**: Determines the workflow type. **Marketplace** is most common when Lendflow processes applications and sends them to funders. **Internal funding** is typically used when your organization processes applications in Lendflow.
* **Workflow Builder Template**: Defaults to the global template for the selected category. If you process your own applications, select a custom workflow builder template. Learn more in [The Workflow Builder](/lendflow-external/docs/what-is-the-workflow-builder).
## Step 3: Set Branding
Branding is optional.
* **Widget Brand**: Logo and colors shown in the widget
* **Email Brand**: Branding for automated emails sent to applicants
Create branding templates in the **Customize** tab in the left-side menu. To use a template on a widget, select it under **Widget Brand** or **Email Brand**. If no branding template exists, Lendflow branding is used. If a template exists and is selected as default, that template is used when no selection is made. You can also select **None** to use Lendflow branding. See [Branding Your Widget](/lendflow-external/docs/application-widget#branding-your-widget).
## Step 4: Choose a Redirect Option
Redirect is optional. If you do not specify a redirect, applicants are sent to the **Borrower Platform**.
After the last widget screen, you can redirect applicants to:
* **Borrower Platform** — so they can check application status
* A **URL** you specify
* **None** — no redirect
## Step 5: Choose Template to Collect Merchant Consent
Choose a **Consent Template** (default) or a **Contract Template**. The default is Lendflow’s consent message template.
## Step 6: Subdomain (Optional)
Optionally set a custom address to white-label the domain used for widget links. See [Using White-label subdomains](/lendflow-external/docs/application-widget#using-white-label-subdomains).
## Step 7: Copy Your Widget Link (Optional)
On the right side of the page, **Step "7": Copy Your Widget Link** shows the generated URL. You can copy it if you also want to share the widget as a direct link. For adding the widget to your website, use Step 8.
## Step 8: Add The Integration Script To Your Website
On the right side of the same page, open **Step "8": Add The Integration Script To Your Website**.
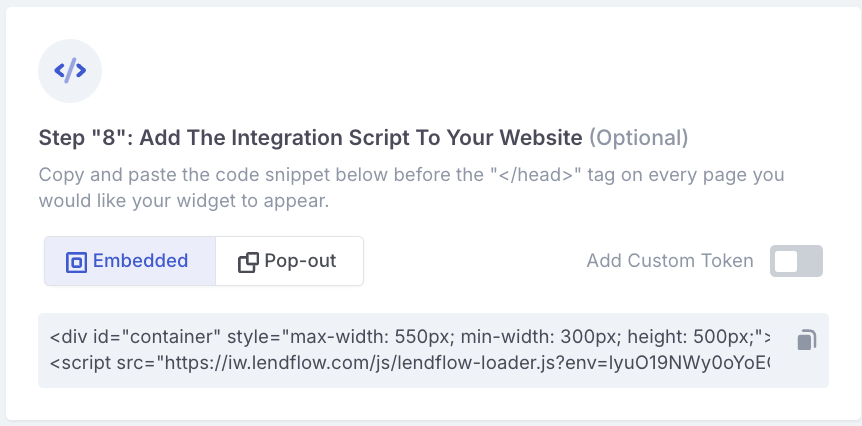
Step 8 has two modes. Copy the generated snippet into your HTML. It already includes your configuration from Steps 1–6.
| Mode | What the applicant sees | What you paste |
| - | - | - |
| **Embedded** | The widget inside a `div` on the page | A container `div` plus a `script` |
| **Pop-out** | A **Start Funding** link. The widget opens from that link | An `` link plus a `script` |
### Embedded
Select **Embedded** in Step 8.
The Embedded snippet includes two parts:
1. A container `div` — this is where the widget appears on the page
2. A `script` — this loads the widget into that container
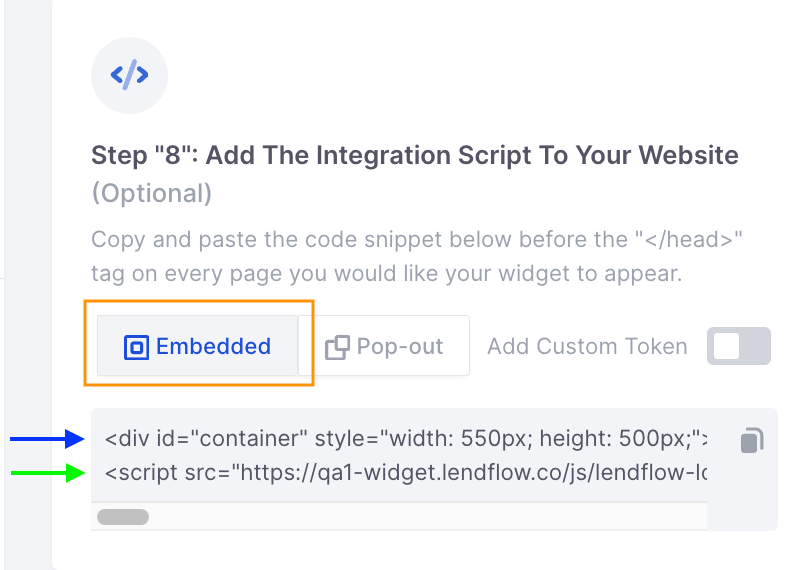 * **Orange square** → Make sure **Embedded** is selected
* **Blue arrow** → The `div` container that will be filled with the widget. Place it where you want the widget to render. You can adjust the inline `style` if needed.
* **Green arrow** → The `script` that loads the widget into that container. The part of the `src` after `?` is your configuration from Steps 1–6 (including `targetId=container`). Paste the script before the closing `` or `` tag.
**Example container:**
```html theme={"system"}
* **Orange square** → Make sure **Embedded** is selected
* **Blue arrow** → The `div` container that will be filled with the widget. Place it where you want the widget to render. You can adjust the inline `style` if needed.
* **Green arrow** → The `script` that loads the widget into that container. The part of the `src` after `?` is your configuration from Steps 1–6 (including `targetId=container`). Paste the script before the closing `` or `` tag.
**Example container:**
```html theme={"system"}