

Online Checkout
Online Checkout guides an applicant through the remaining requirements after accepting an offer in the Borrower Platform. Your organization can collect information and documents, obtain contract or consent signatures, complete supported verification steps, and show a final confirmation without relying on manual handoffs.Before you begin
Online Checkout connects several parts of the Lendflow platform:- A checkout template defines the applicant experience.
- An applicable internal-funding offer template determines which checkout template starts after acceptance.
- A Checkout block in the workflow’s Closing stage lets your team review progress.
- The workflow’s Borrower Platform configuration makes checkout available to applicants.
Create a checkout template
- In the Lendflow Dashboard, open Builders > Checkout.
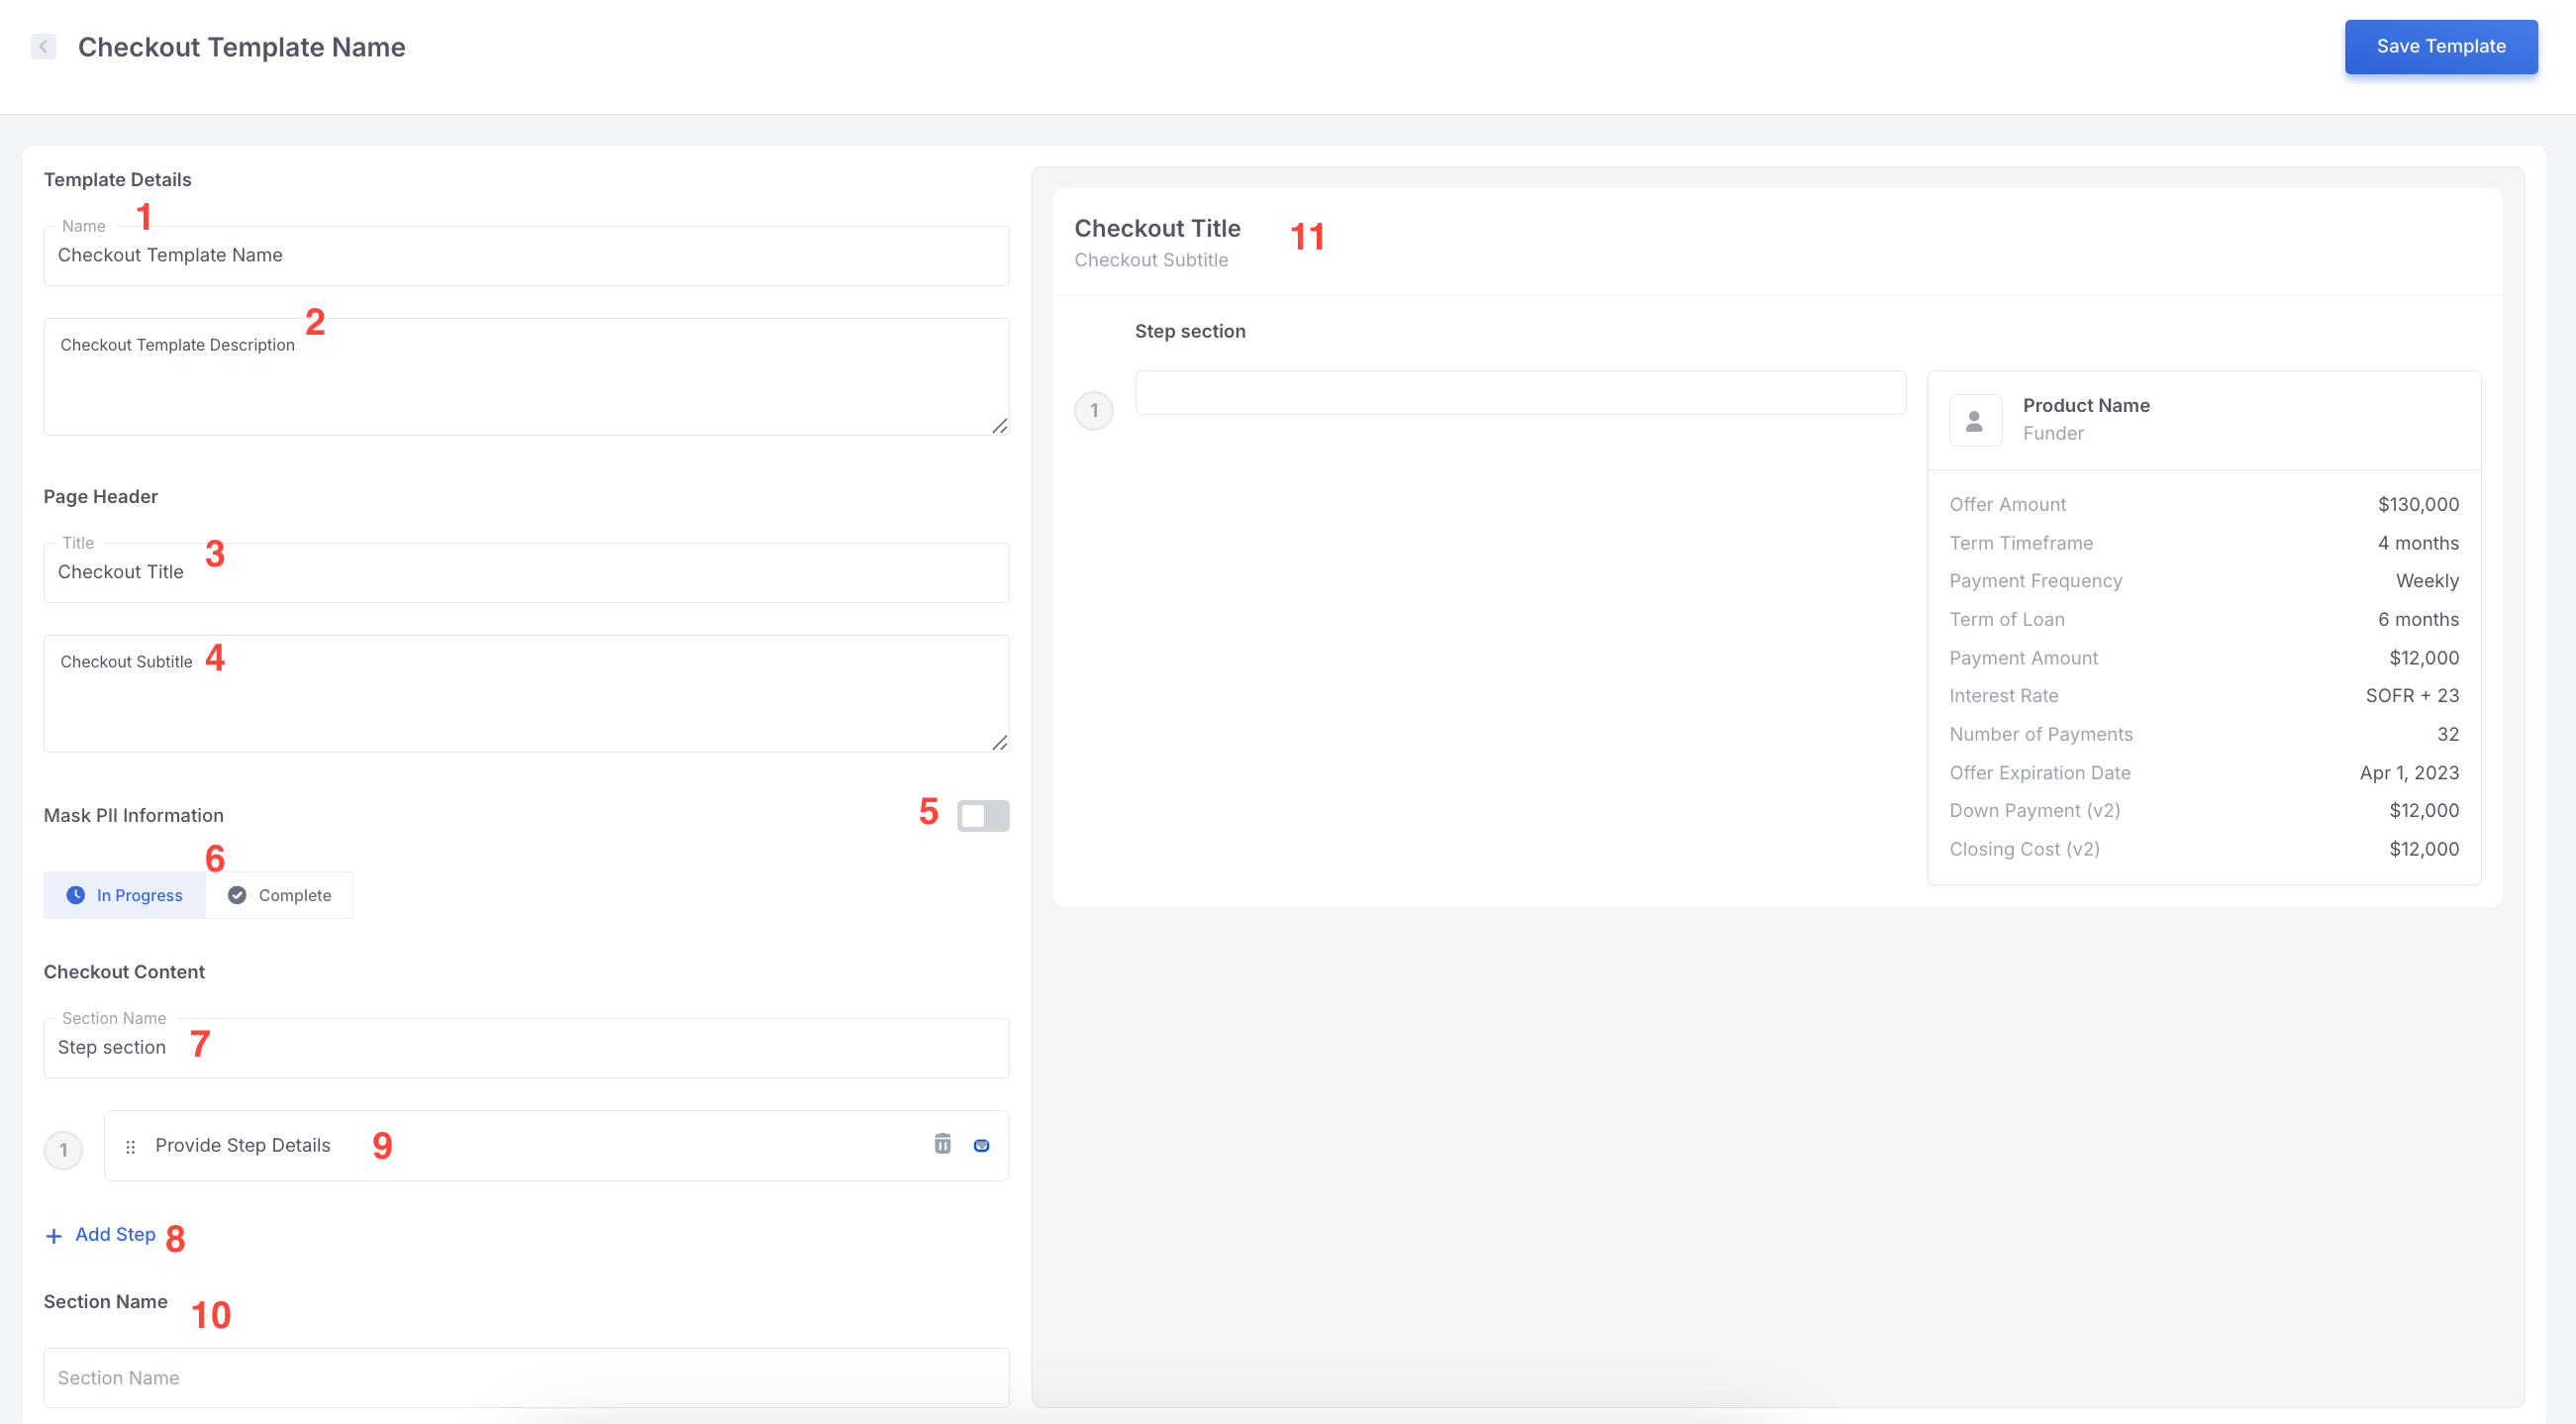
- Select Add New Checkout Template.
- Enter a title and description to identify the template in Lendflow.
- Configure the page header title and subtitle shown to applicants.
- Turn on Mask PII Information if personally identifiable information entered in Data steps should be hidden in Workflow Live by default.
- Configure the In Progress experience shown while steps remain incomplete.
- Configure the Complete experience, including the title and message shown after every step is complete.
- Name the checkout content and offer-summary sections.
- Add and configure the required steps.
- Review the live preview, then select Save Template.
Add checkout steps
For each step, provide the applicant-facing title and description, select the step type, and complete the settings required by that type. Use the preview to confirm how the step will appear.
Connect checkout to an offer
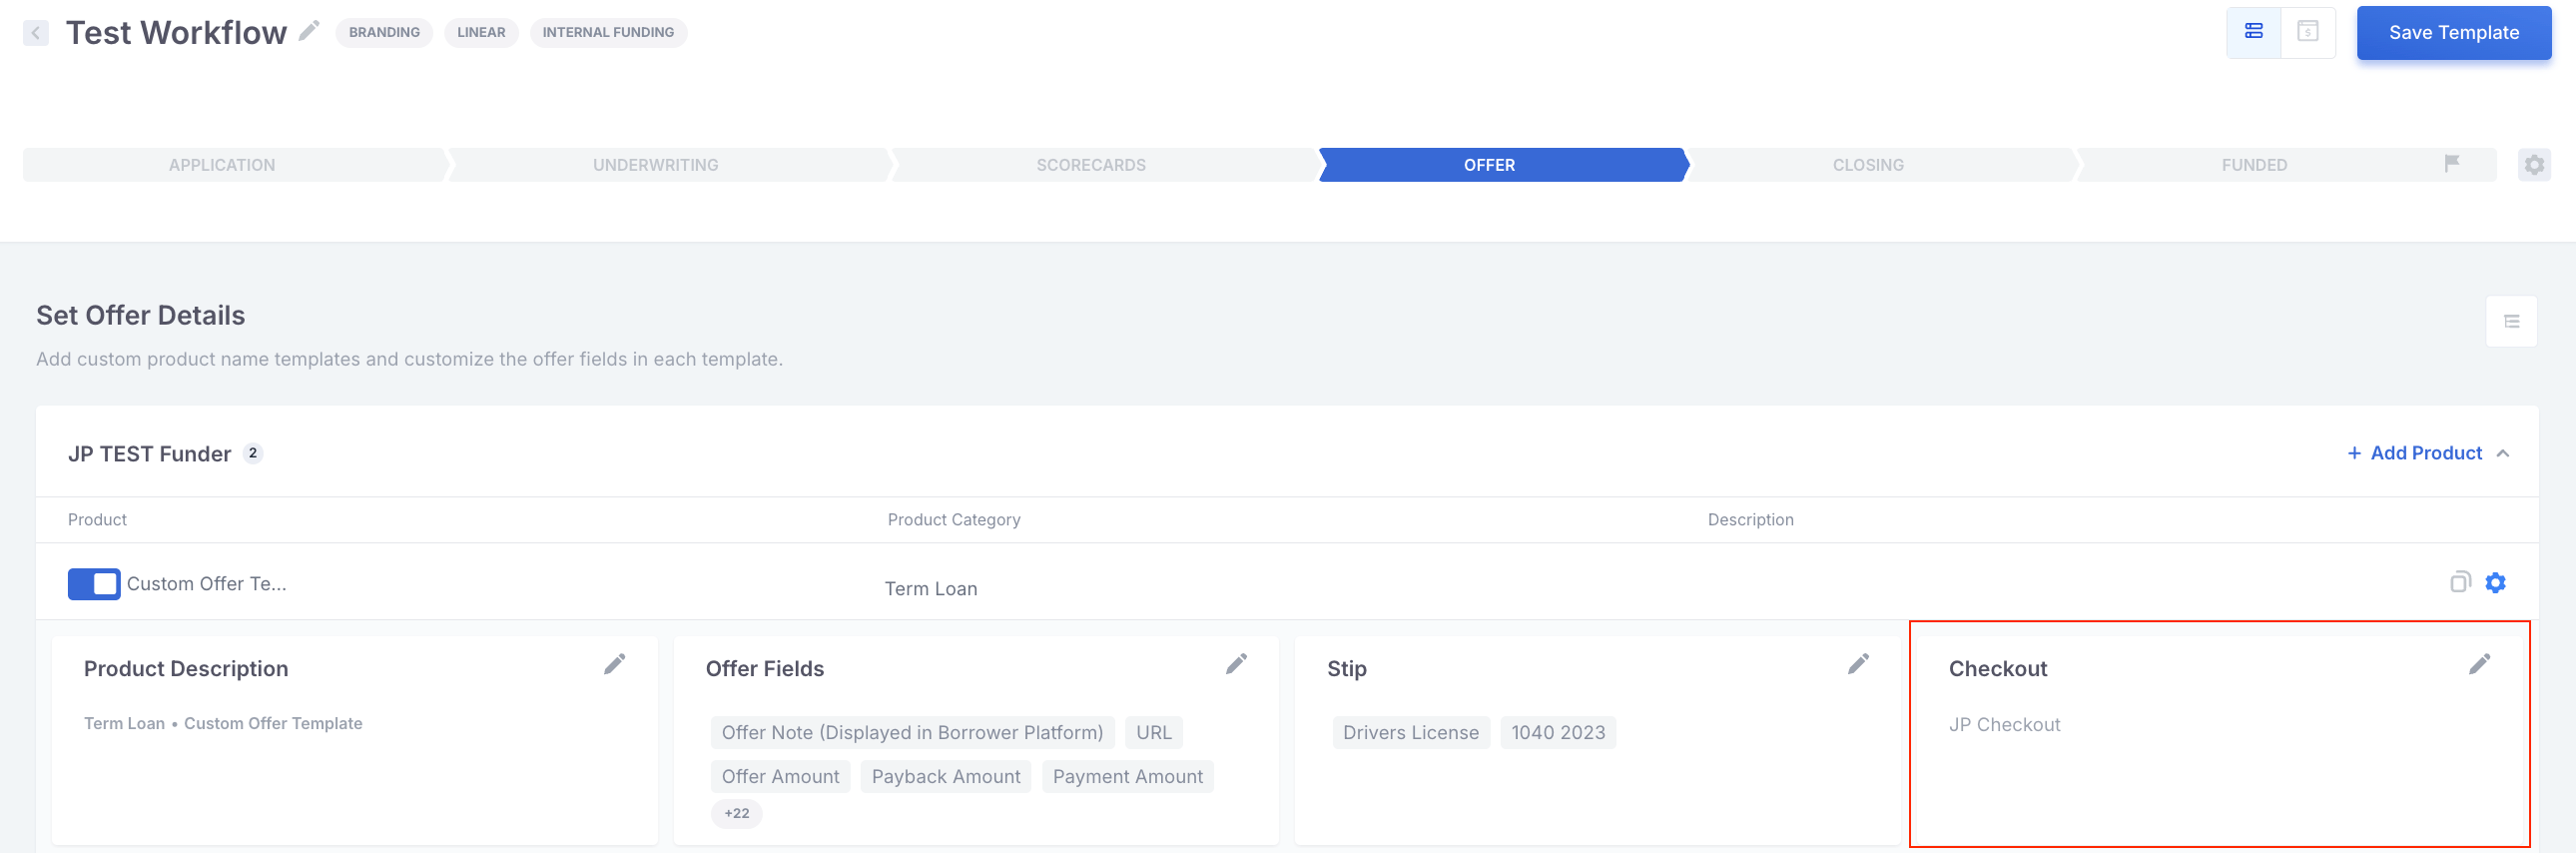
Checkout is available on applicable internal-funding offer templates.- Open Builders > Workflow and edit the applicable workflow template.
- Open the Offer stage.
- Open the offer template that should start checkout.
- In its Checkout section, select the checkout template.
- Save the workflow template.
Configure the Closing stage
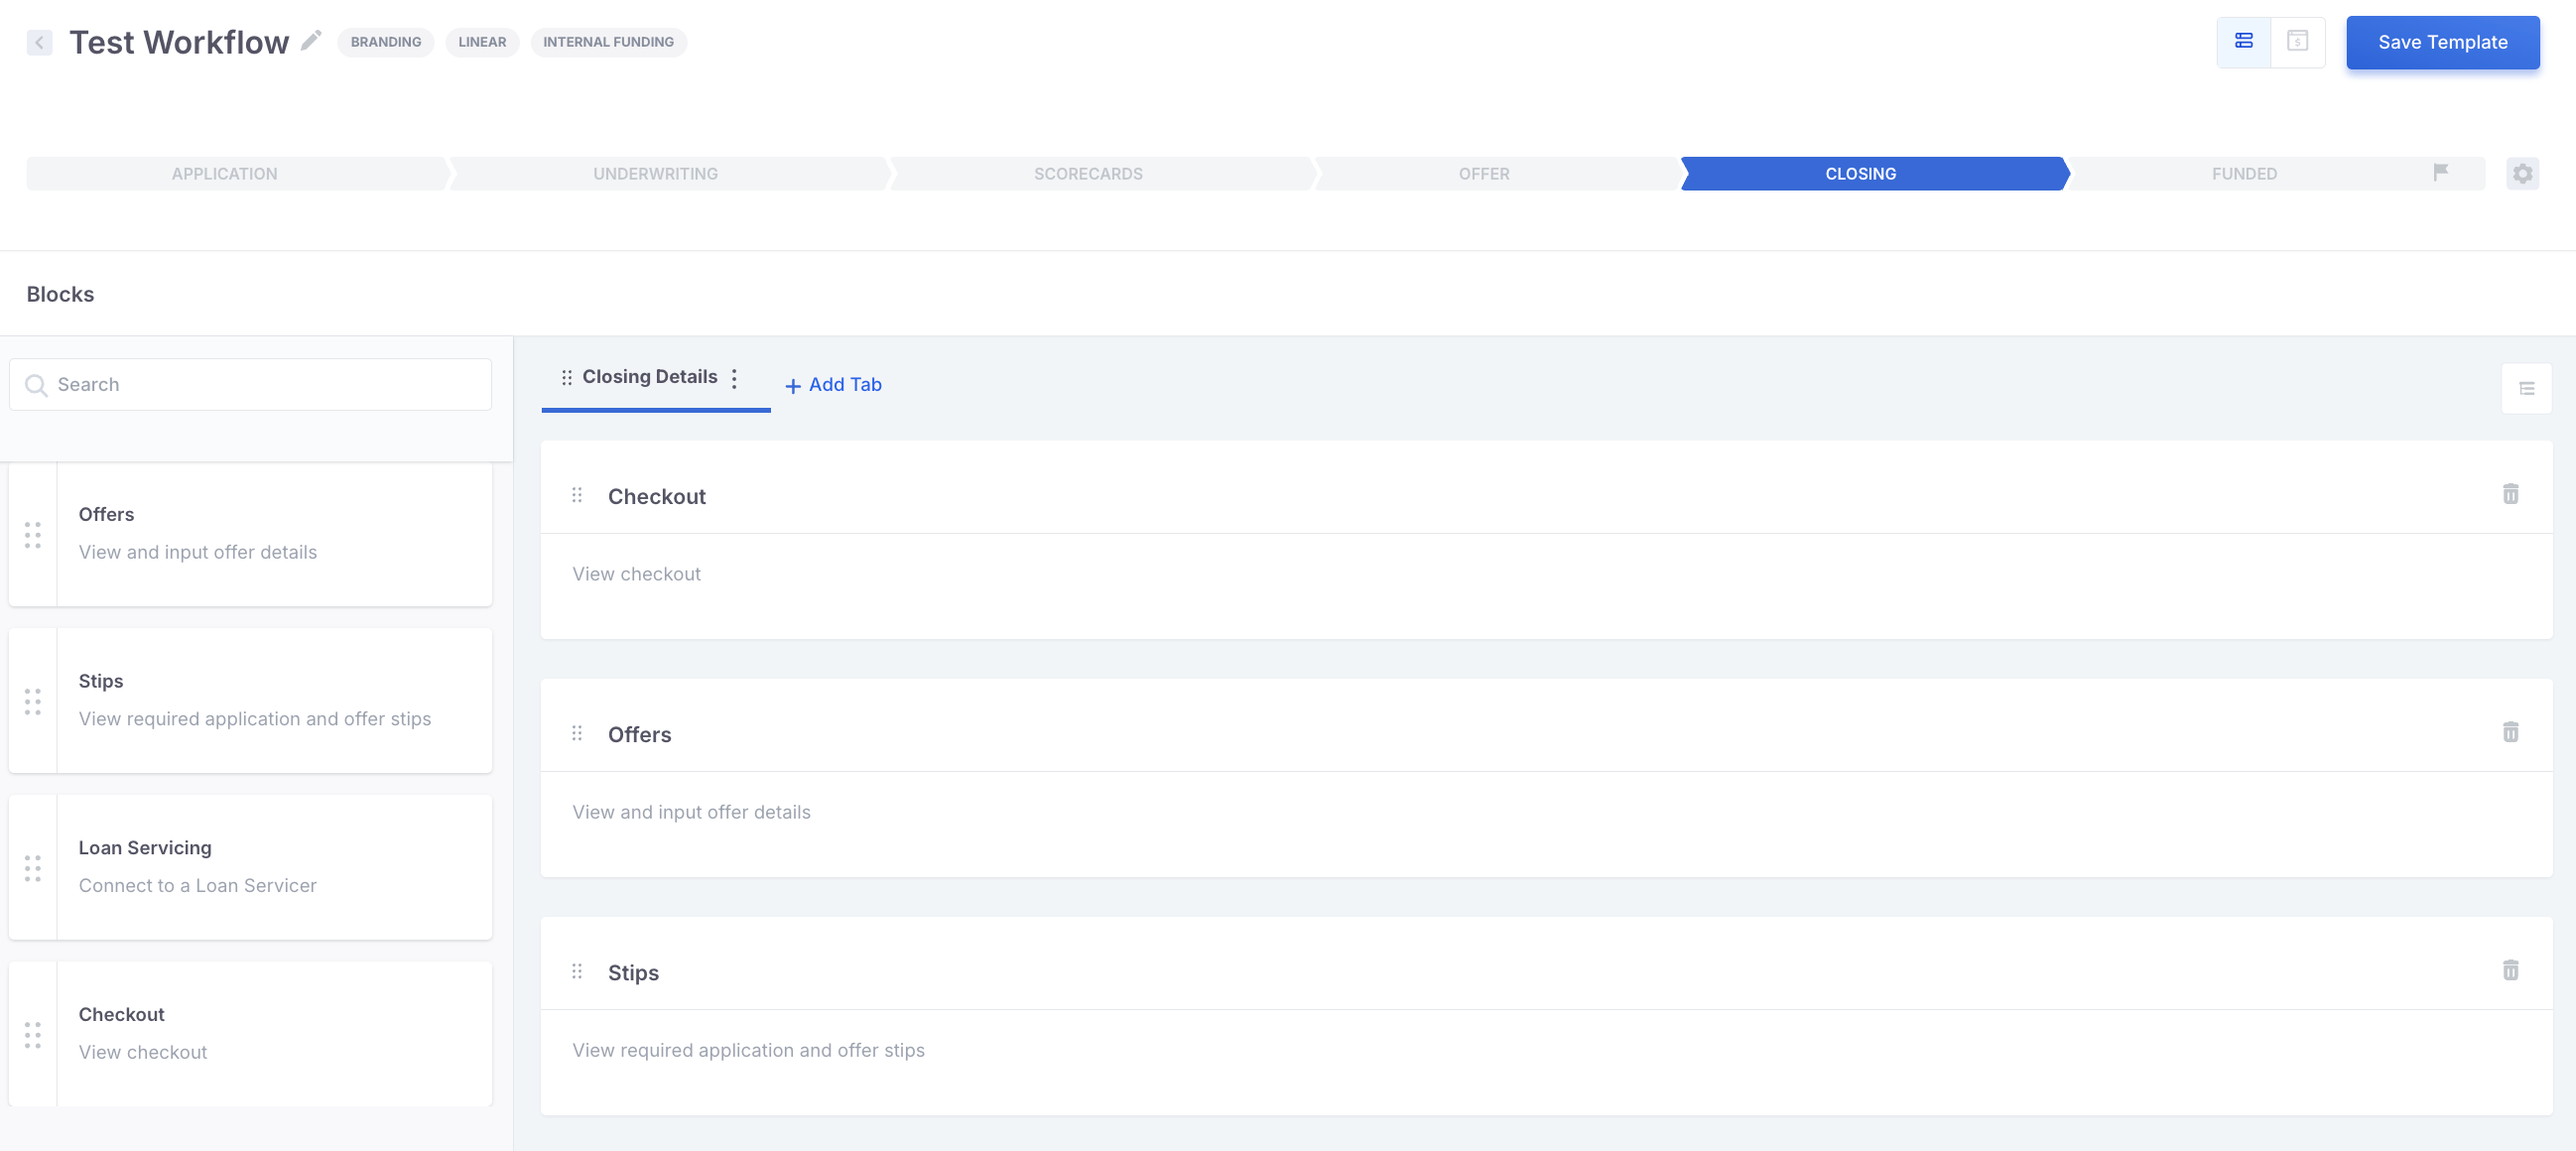
- In the same workflow template, open the Closing stage.
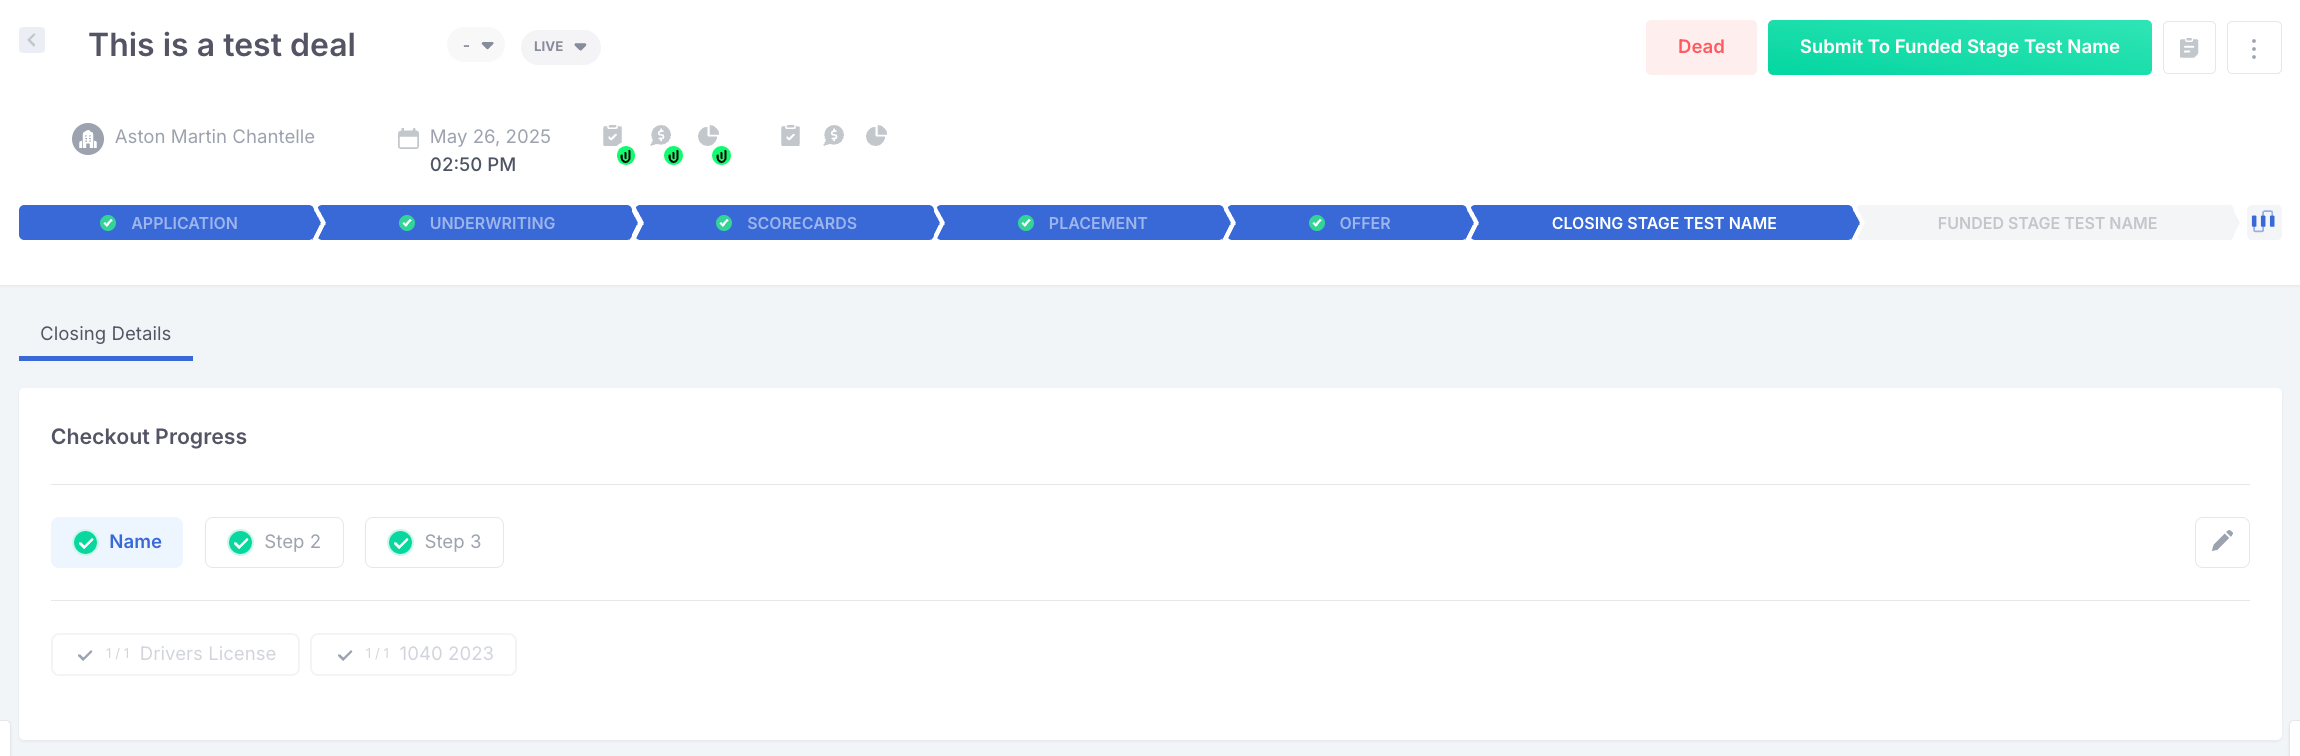
- Add the Checkout block. This block displays checkout progress in Workflow Live.
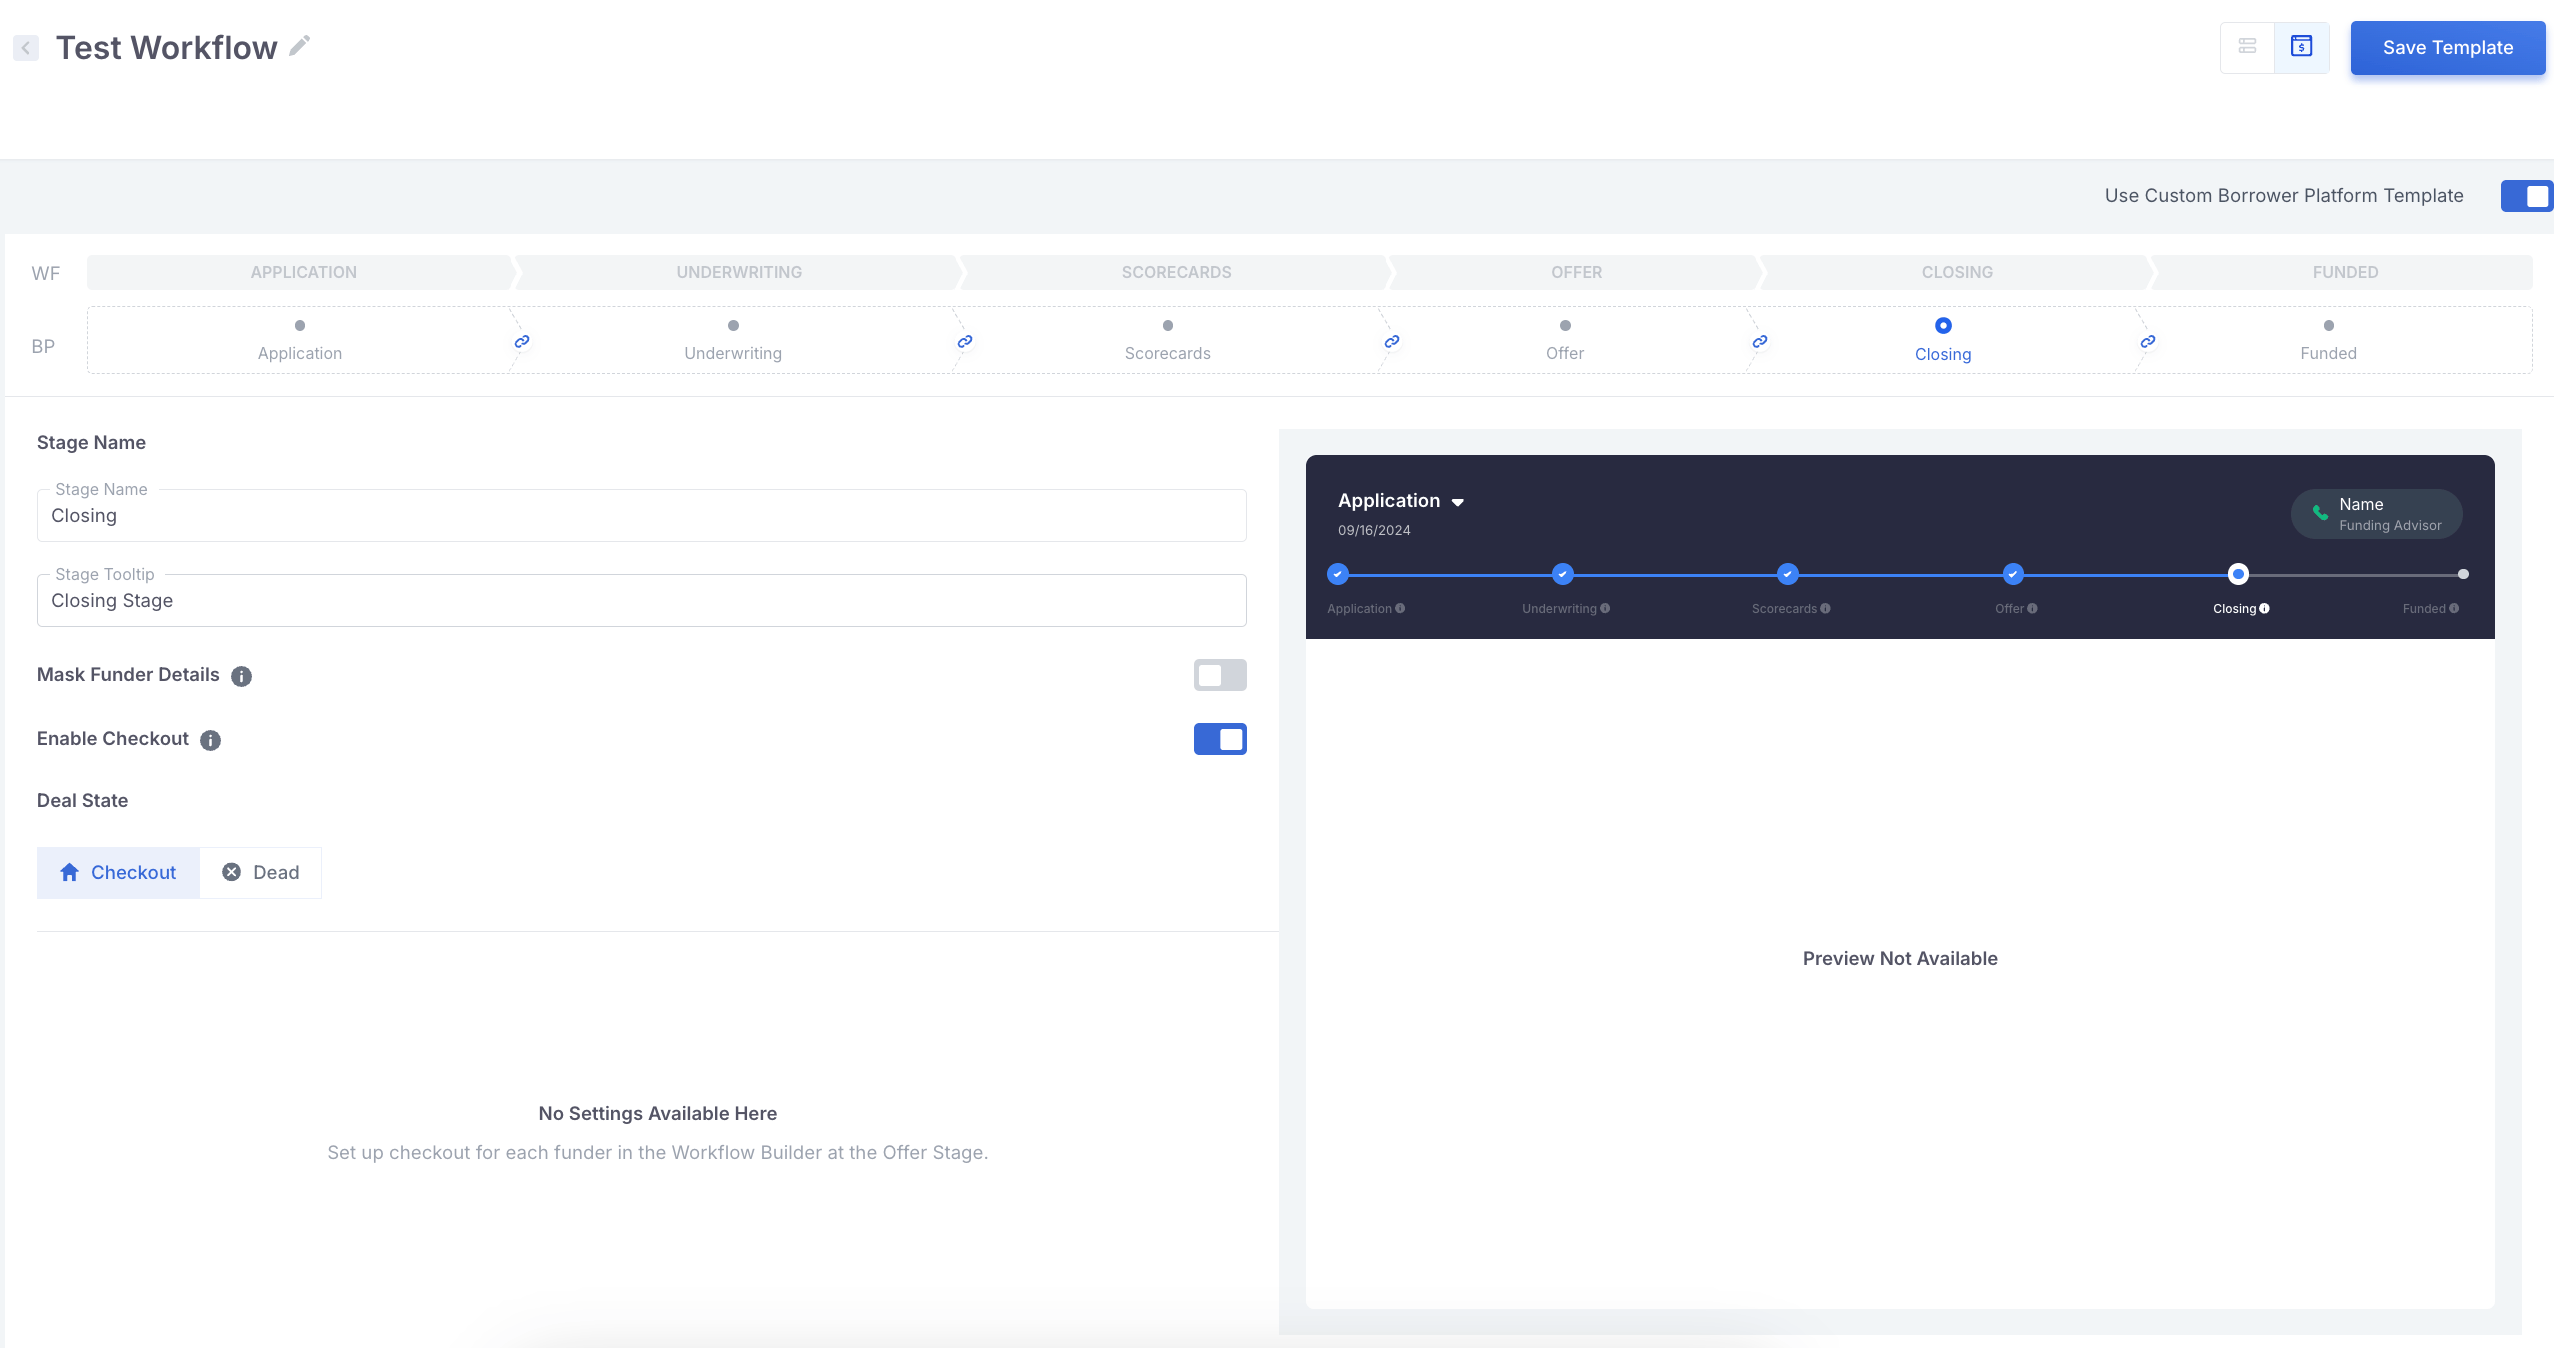
- Open the Borrower Platform configuration for the Closing stage.
- Confirm that the Closing stage includes an offer-stipulation or checkout state.
- Turn on Enable Checkout.
- Save the workflow template.
Review checkout progress
After checkout begins, open the deal’s Closing stage and review the Checkout Progress block. It shows:- Whether each step is complete or incomplete.
- Required and completed documents.
- Information supplied through Data steps.
- Contract and consent signature status.
- Masked PII, with an unmask option for authorized users.
API alternative: Use Get Offer Checkout to retrieve an offer’s checkout details and Update Offer Checkout to update that offer’s checkout snapshot.
Applicant experience
After accepting the applicable offer, the applicant enters checkout in the Borrower Platform. Applicants can complete the available steps in any order. When every required step is complete, the Borrower Platform displays the Complete title and message configured in the template.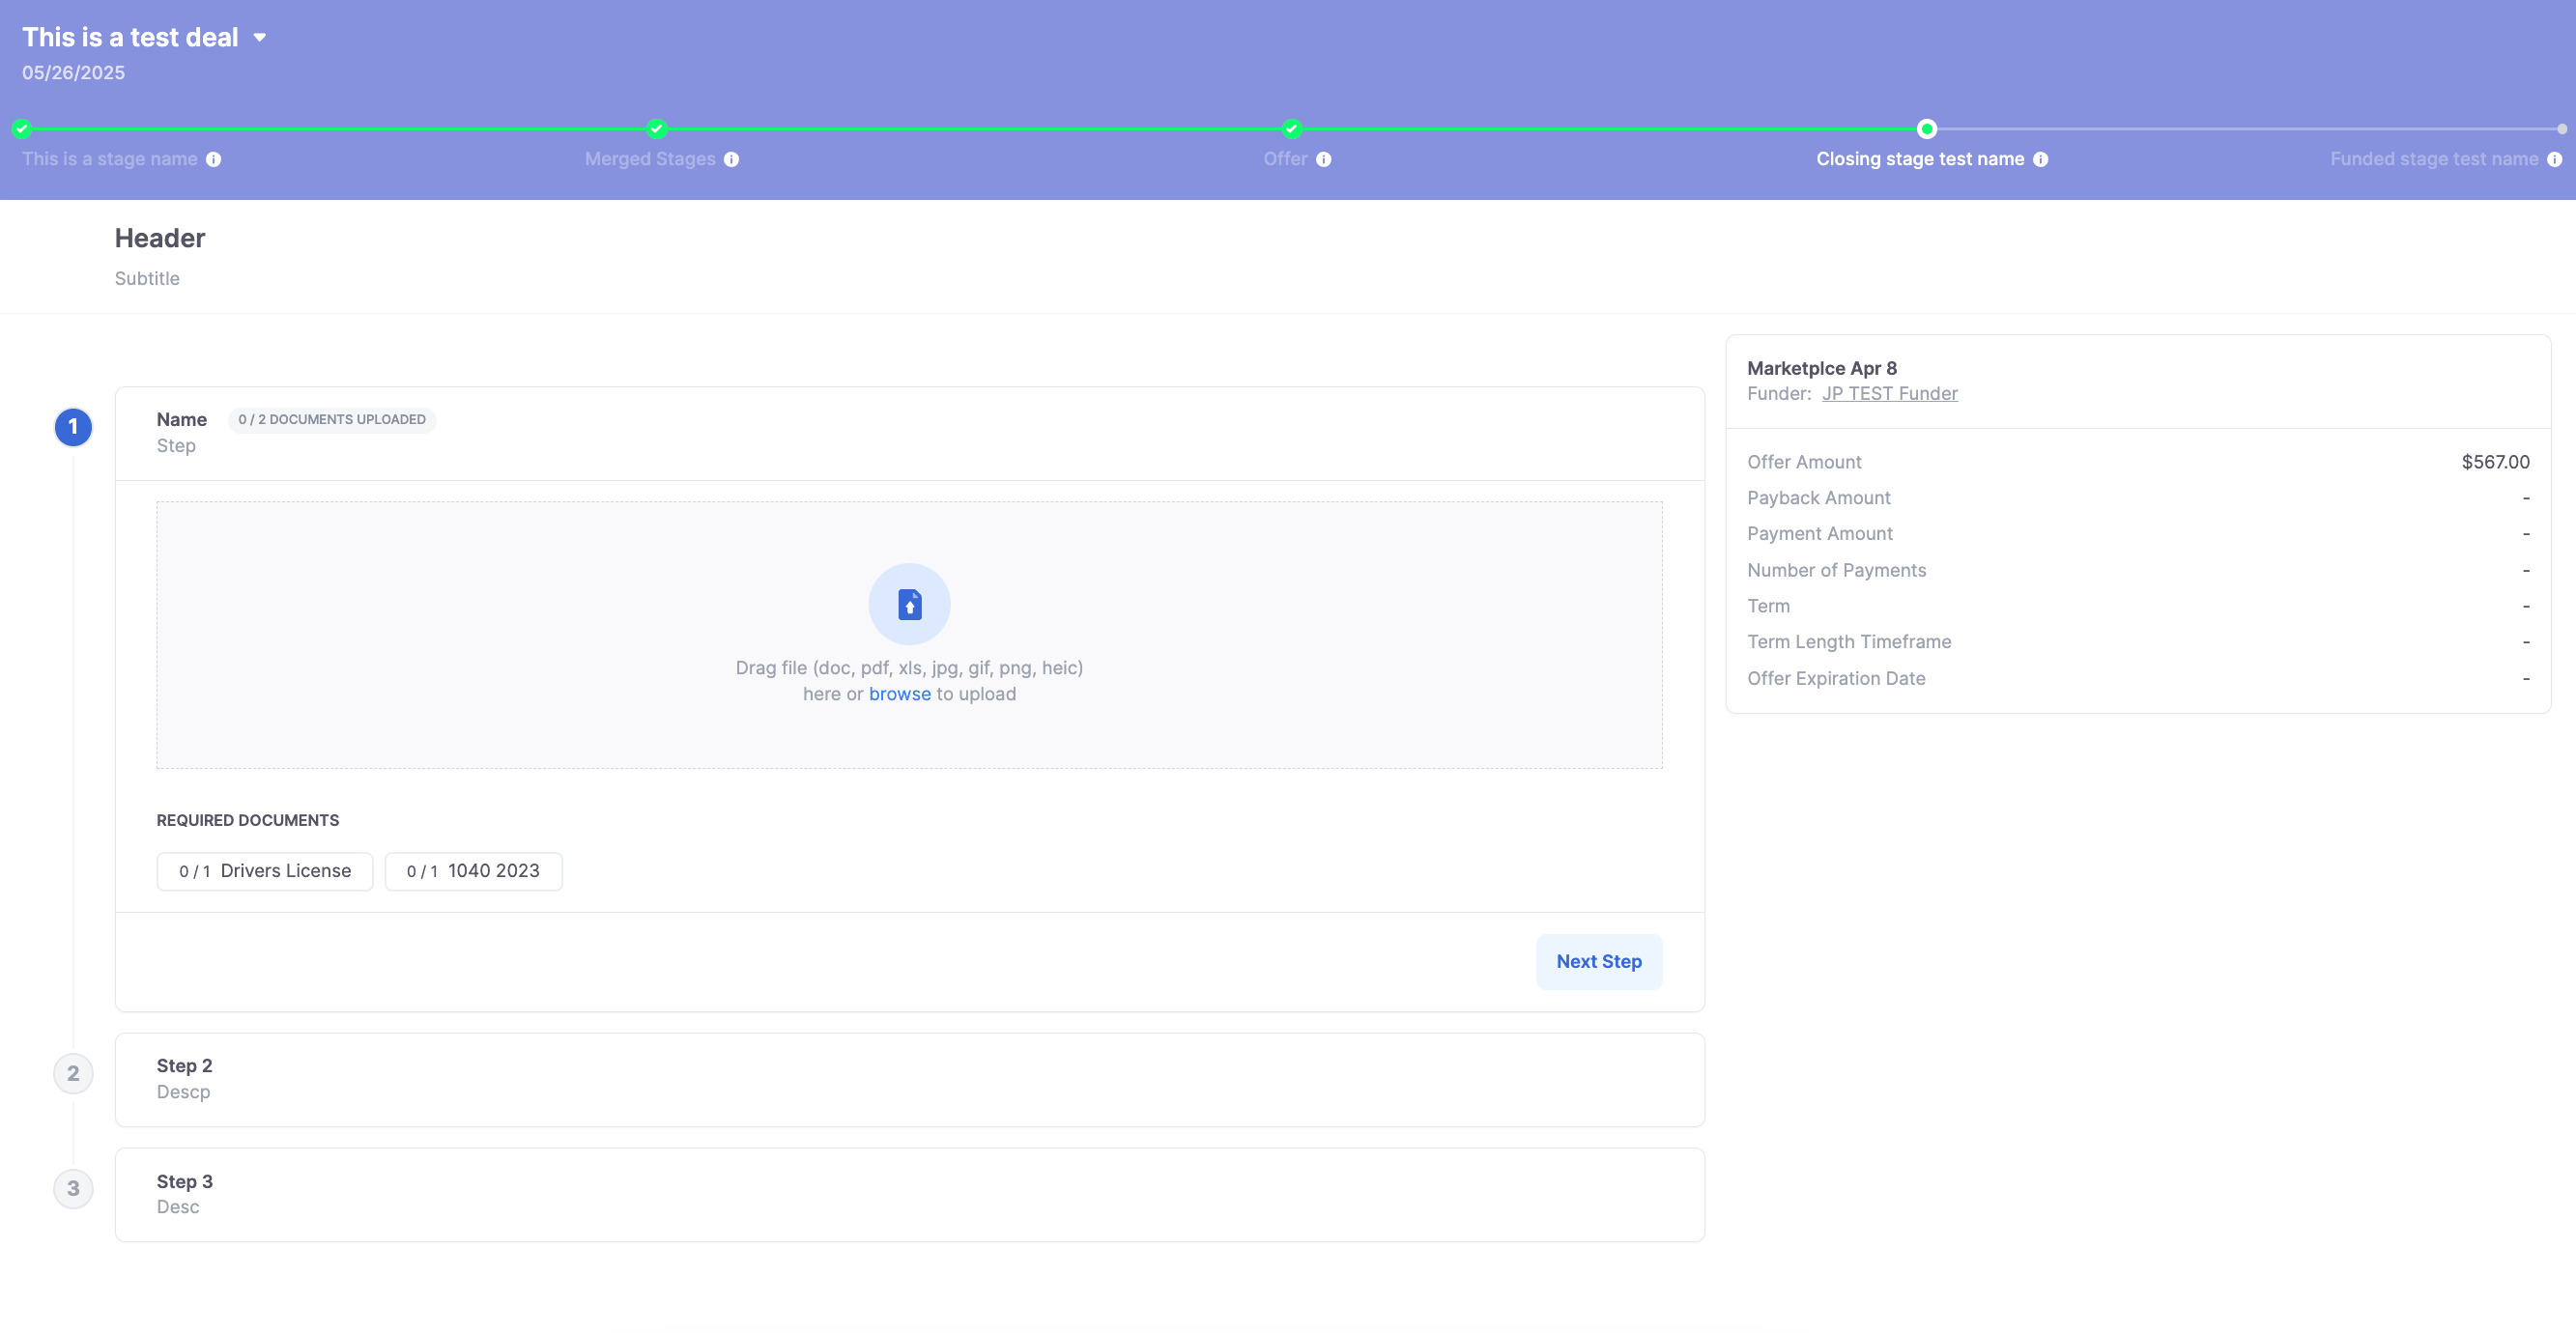
Checkout webhooks
Configure Custom Workflow Webhooks to receive:FAQ
Why does checkout not appear after an offer is accepted?
Why does checkout not appear after an offer is accepted?
Confirm that the checkout template is attached to the accepted offer’s template, the workflow Closing stage includes a Checkout block, and Enable Checkout is turned on in the Closing-stage Borrower Platform configuration.
Do applicants have to complete checkout steps in order?
Do applicants have to complete checkout steps in order?
No. Applicants can complete the available steps in any order.
Can I change checkout for one deal without changing the template?
Can I change checkout for one deal without changing the template?
Yes. Select the pencil icon in the deal’s Checkout Progress block and update the checkout snapshot for that deal.
What happens when Mask PII Information is enabled?
What happens when Mask PII Information is enabled?
Personally identifiable information entered through Data steps is hidden by default in Workflow Live. Authorized users can use the unmask control when they need to review it.
Next steps
Borrower Platform
Configure the applicant experience used to accept offers and complete checkout.
The Workflow Builder
Configure the Offer and Closing stages that support checkout.
Custom Offer Products and Dynamic Offers
Configure the offer templates that can start checkout.
Custom Workflow Webhooks
Receive notifications as applicants complete checkout.