> ## Documentation Index
> Fetch the complete documentation index at: https://docs.lendflow.com/llms.txt
> Use this file to discover all available pages before exploring further.
# The Workflow Builder
## The Workflow Builder
The Workflow Builder lets you configure the stages, responsibilities, data, and actions used to process a deal. Build and manage workflows from the Lendflow Dashboard without engineering resources.
When a template is active and a deal uses it, the configured experience inside the deal is called Workflow Live. Users can review data, make decisions, and progress the deal through its stages.
## Create a workflow template
1. In the Lendflow Dashboard, open the **Builders** tab in the left-side menu.
2. Select **Workflow**, then select **New Template**.
3. Enter the template name and an optional description.
4. Select the workflow category.
5. Save the template.
## Approve and activate a template
A template must be approved before it can be activated.
| Approval status | Meaning |
| - | - |
| **Draft** | The template is still being configured. |
| **Awaiting Approval** | The template is ready for review by Lendflow. |
| **Approved** | The template can be activated. |
| **Declined** | The template was not approved or is no longer relevant. |
After Lendflow approves the template, return to the **Workflow** page and change its **Active Status** to **Active**.
Changes to an active template apply to new deals created with that template. Existing deals retain the workflow configuration they received when they were created.
## Configure stages, tabs, and blocks
Use stages to define the major steps in the workflow. Within each stage, use tabs to organize the blocks that users interact with in Workflow Live.
### Stage categories
Select the category that matches the job the stage performs:
| Stage category | Purpose |
| - | - |
| **Application** | Collect business, individual, bank, document, and application information. |
| **Underwriting** | Review applicant information and use data services or other underwriting tools to evaluate the deal. |
| **Scorecards** | Run Scorecards or Scorecard Groups and review their results. |
| **Placement** | Select funders and submit the deal for consideration. |
| **Offer** | Create, review, and present offers from funders. |
| **Closing** | Complete the requirements and stipulations for an accepted offer. |
| **Funded** | Record and review the final funding details after closing. |
### Stages
* Select the **+** button between stages to add a stage.
* Enter its name, select its category, and choose whether Lendflow, your organization, or both are responsible for completing it.
* Open the stage menu to edit or delete the stage.
* Drag a stage to change its position in the workflow.
The selected responsibility affects which users can perform actions within that stage.
### Tabs and blocks
1. Open the stage you want to configure.
2. Select **Add Tab**, enter a name, then save it.
3. Select the tab.
4. Drag blocks from the left pane into the tab.
5. Drag tabs or blocks when you need to reorder them.
6. Select **Save Template**.
## Placement stage
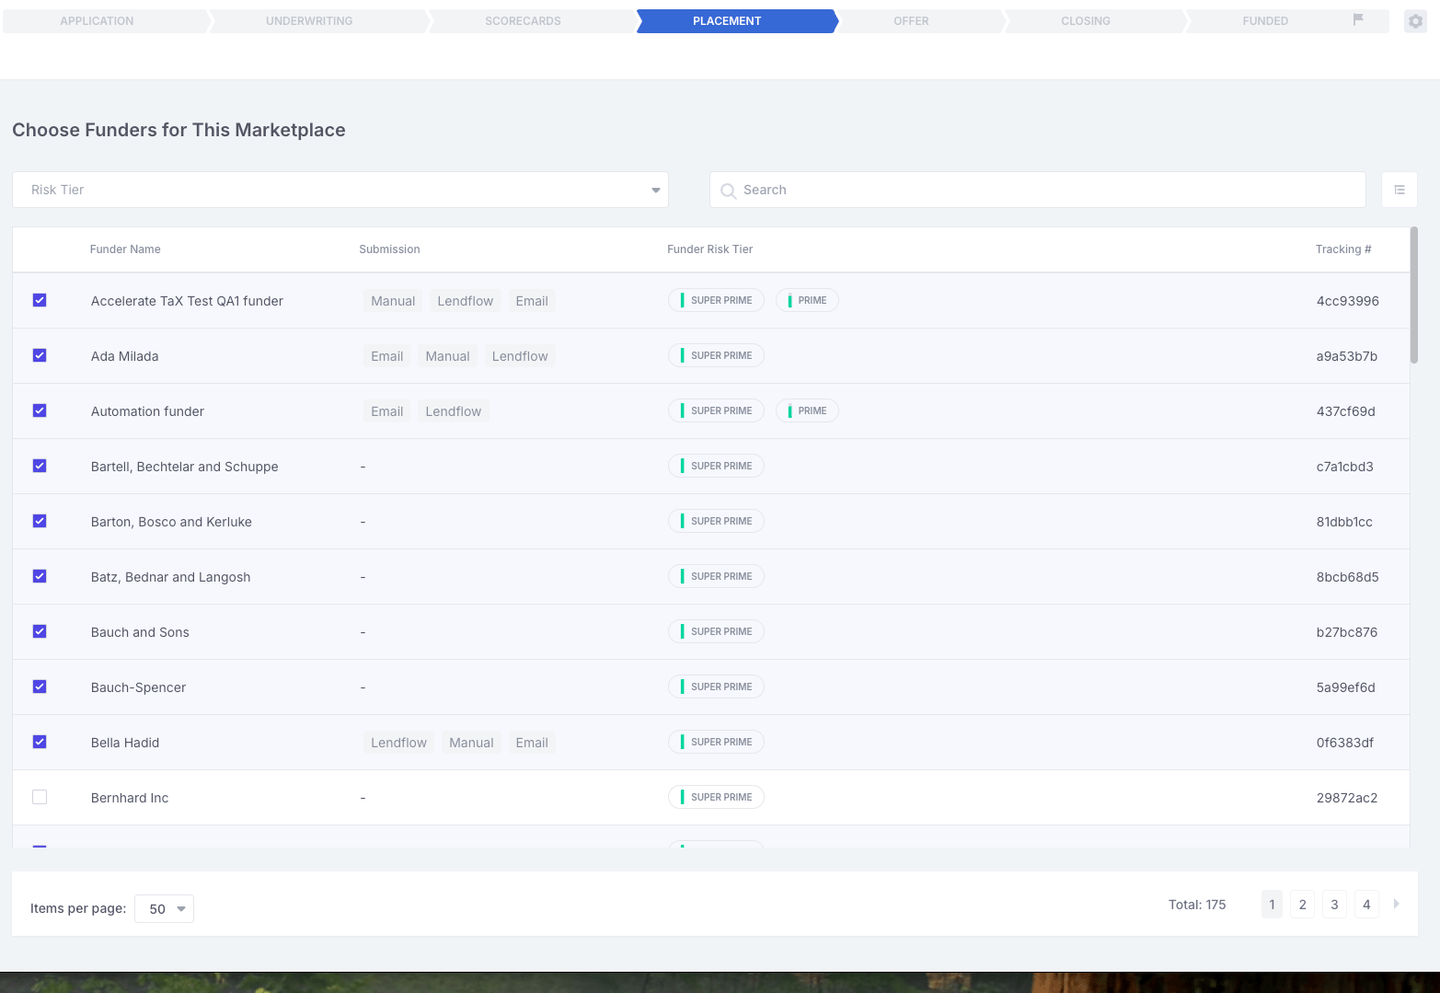
Use the Placement stage to choose the funders that users can submit deals to:
1. Open the Placement stage in the workflow template.
2. Use search or the **Risk Tier** filter to find funders.
3. Select the funders that should be available for placements.
4. Select **Save Template**.
The available funders come from your organization’s [Lender Network](/lendflow-external/docs/lender-network). Each selected funder receives its own section in the Offer stage.
 ## Offer stage
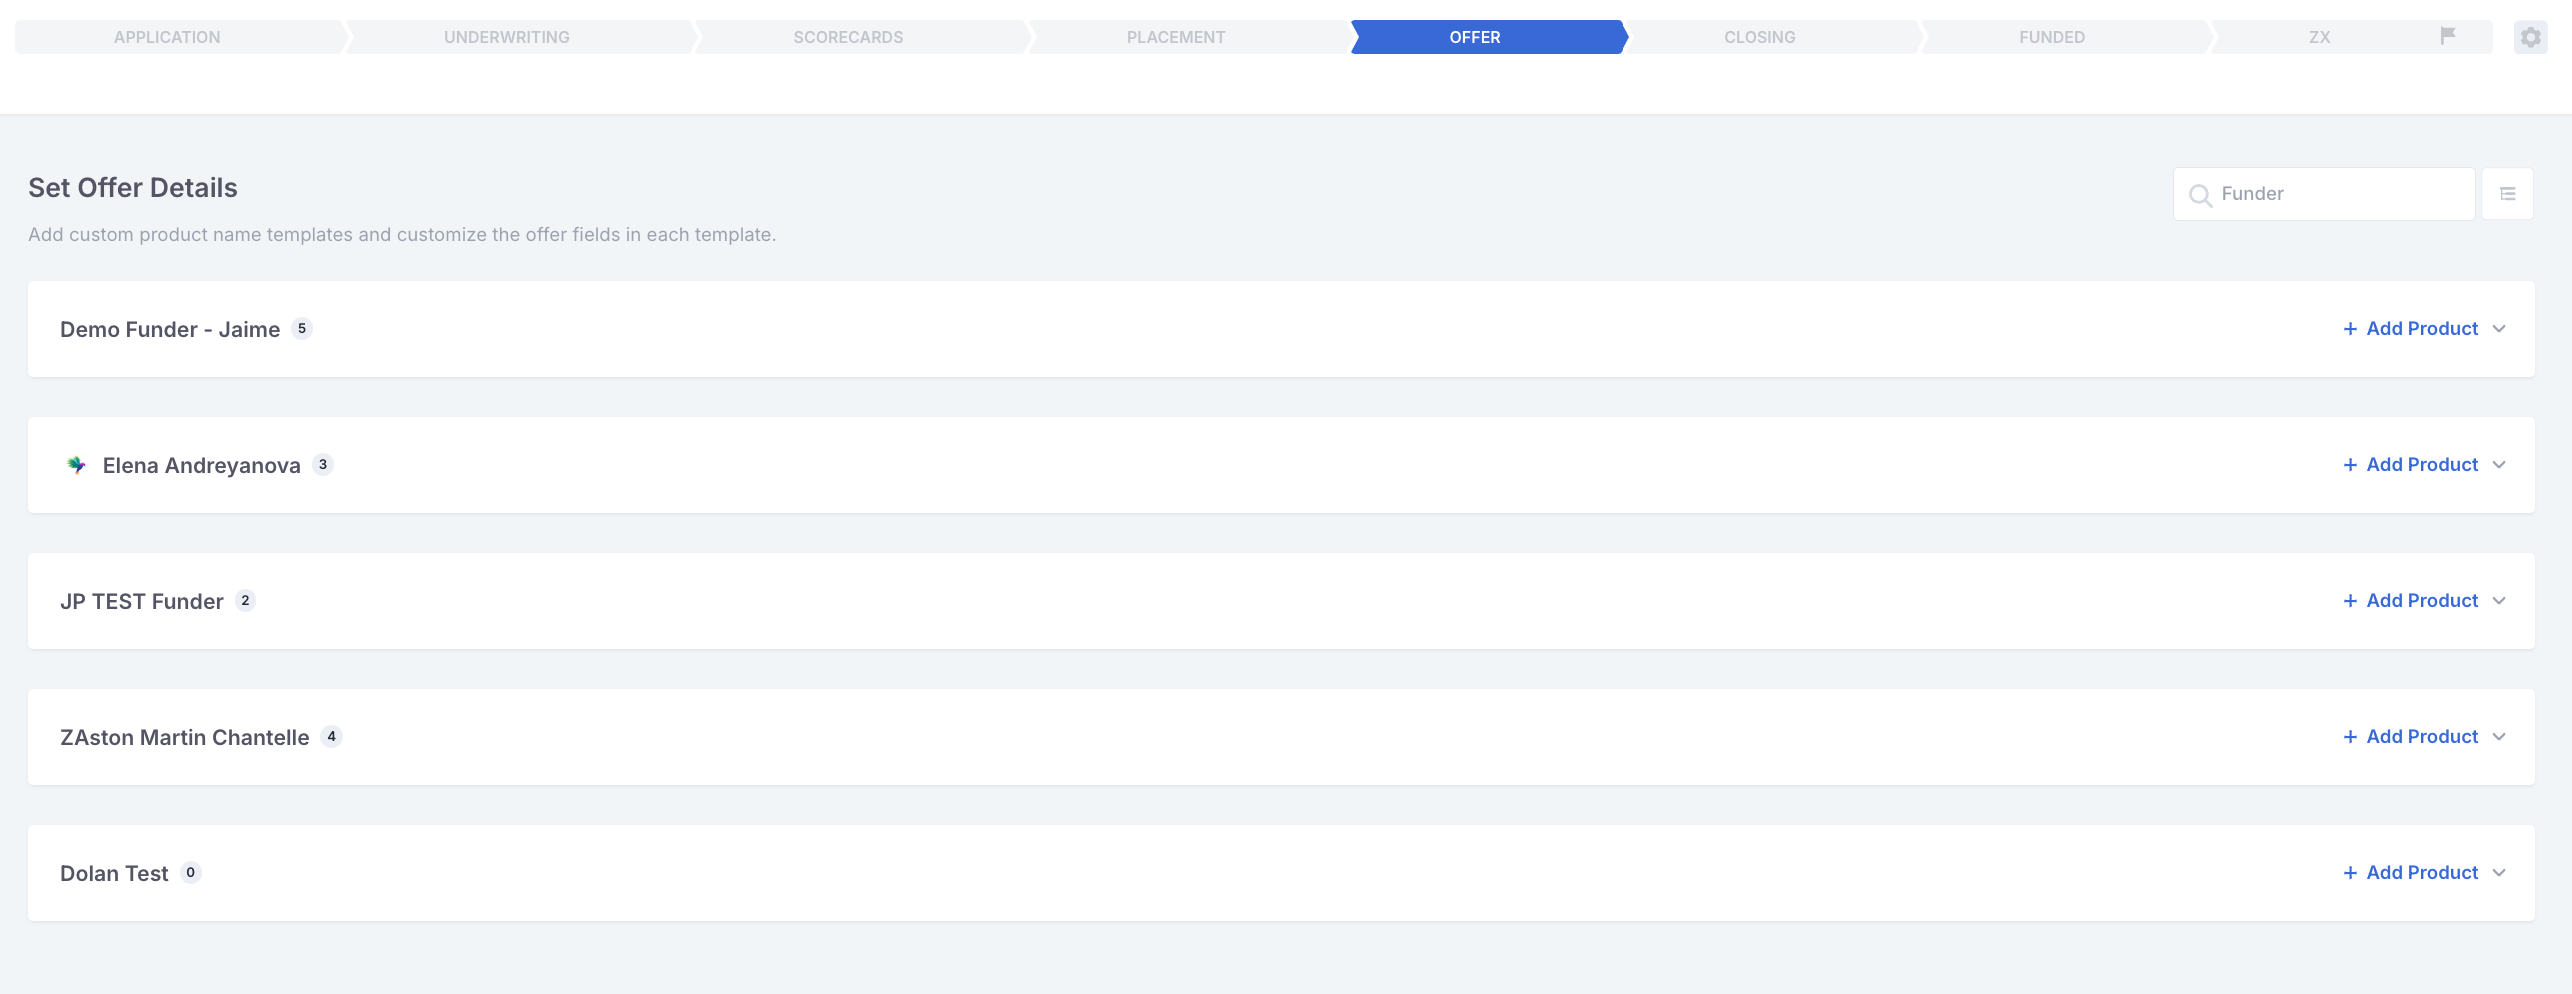
Use the Offer stage to configure the products and offer fields available for each selected funder:
1. Open the Offer stage in the workflow template.
2. Expand a funder to review its product templates.
3. Use an existing product template or select **Add Product**.
4. Configure the product and its offer fields.
5. Select **Save Template**.
### Fallback and custom products
If you do not create a custom product for a funder, the workflow uses the available fallback product templates. Fallback templates use Lendflow’s standard products and fields.
## Offer stage
Use the Offer stage to configure the products and offer fields available for each selected funder:
1. Open the Offer stage in the workflow template.
2. Expand a funder to review its product templates.
3. Use an existing product template or select **Add Product**.
4. Configure the product and its offer fields.
5. Select **Save Template**.
### Fallback and custom products
If you do not create a custom product for a funder, the workflow uses the available fallback product templates. Fallback templates use Lendflow’s standard products and fields.
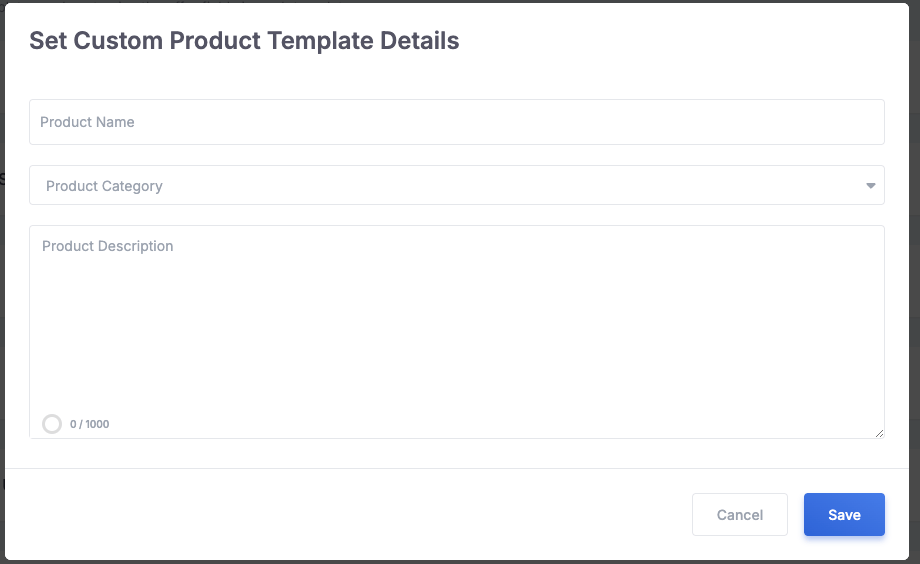
 To create a custom product:
1. Select **Add Product** beside the funder.
2. Enter the product name, product category, and description.
3. Save the product.
To create a custom product:
1. Select **Add Product** beside the funder.
2. Enter the product name, product category, and description.
3. Save the product.
 ### Configure offer fields
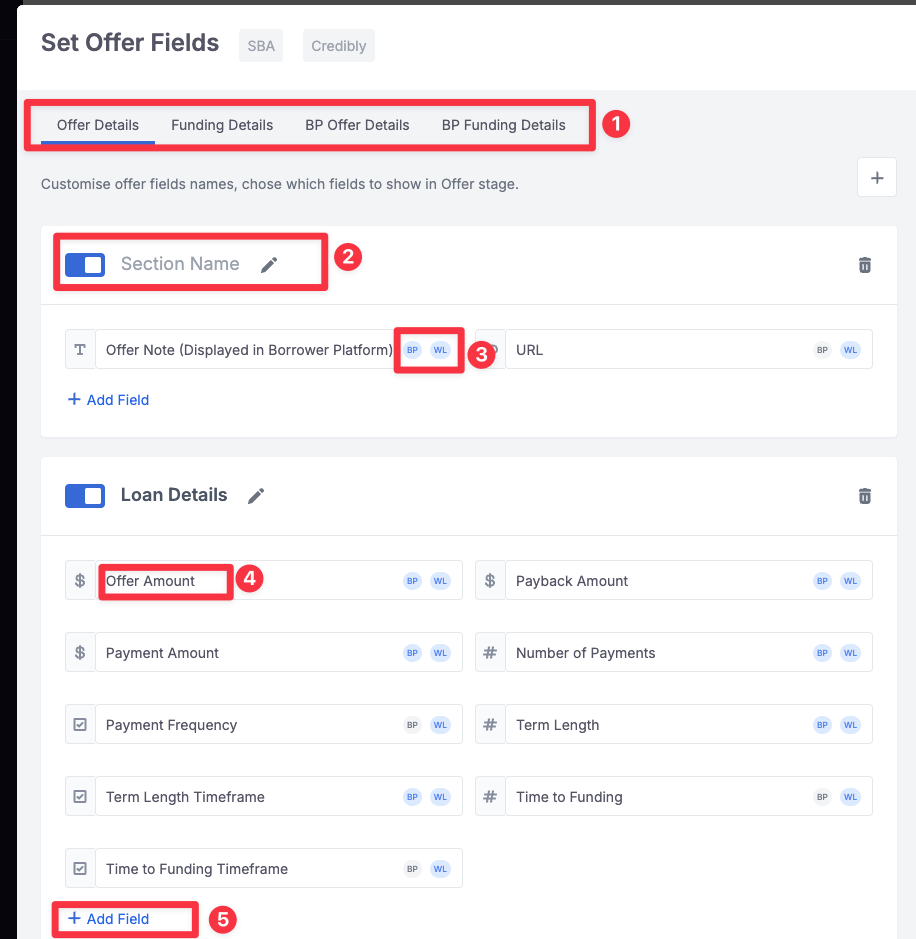
Select the pencil icon beside **Offer Fields** to configure the fields for the product.
| Tab | Where its fields appear |
| - | - |
| **Offer Details** | The offer details shown to users in Workflow Live. |
| **Funding Details** | The final funding details shown in the Closing and Funded stages. |
| **BP Offer Details** | The offer details shown to applicants in the Borrower Platform during the Offer stage. |
| **BP Funding Details** | The funding details shown to applicants in the Borrower Platform during the Closing and Funded stages. |
Within these tabs, you can:
* Rename fields and sections.
* Add custom fields or supported fields for the selected product category.
* Reorder fields.
* Control whether a field appears in Workflow Live or the Borrower Platform.
* Choose which Borrower Platform fields appear as primary or expanded details.
The Borrower Platform supports up to six primary detail fields. Additional visible fields can appear in the expanded details.
### Configure offer fields
Select the pencil icon beside **Offer Fields** to configure the fields for the product.
| Tab | Where its fields appear |
| - | - |
| **Offer Details** | The offer details shown to users in Workflow Live. |
| **Funding Details** | The final funding details shown in the Closing and Funded stages. |
| **BP Offer Details** | The offer details shown to applicants in the Borrower Platform during the Offer stage. |
| **BP Funding Details** | The funding details shown to applicants in the Borrower Platform during the Closing and Funded stages. |
Within these tabs, you can:
* Rename fields and sections.
* Add custom fields or supported fields for the selected product category.
* Reorder fields.
* Control whether a field appears in Workflow Live or the Borrower Platform.
* Choose which Borrower Platform fields appear as primary or expanded details.
The Borrower Platform supports up to six primary detail fields. Additional visible fields can appear in the expanded details.
 When applicable, select the funder’s Workflow Builder template and funder product. These selections allow information from the funder’s deal and offer to map back to this workflow.
## Dynamic offers
Dynamic offers group multiple offers for the same product and funder in the Borrower Platform so applicants can compare their options in one place.
1. Open the workflow template’s **Borrower Platform Settings**.
2. In the Offer-stage settings, turn on **Enable Dynamic Offers**.
3. Return to the custom product in the Offer stage.
4. Use **BP Offer Details** and **BP Funding Details** to choose and order the fields used in the dynamic offer experience.
5. Save the template.
When applicable, select the funder’s Workflow Builder template and funder product. These selections allow information from the funder’s deal and offer to map back to this workflow.
## Dynamic offers
Dynamic offers group multiple offers for the same product and funder in the Borrower Platform so applicants can compare their options in one place.
1. Open the workflow template’s **Borrower Platform Settings**.
2. In the Offer-stage settings, turn on **Enable Dynamic Offers**.
3. Return to the custom product in the Offer stage.
4. Use **BP Offer Details** and **BP Funding Details** to choose and order the fields used in the dynamic offer experience.
5. Save the template.
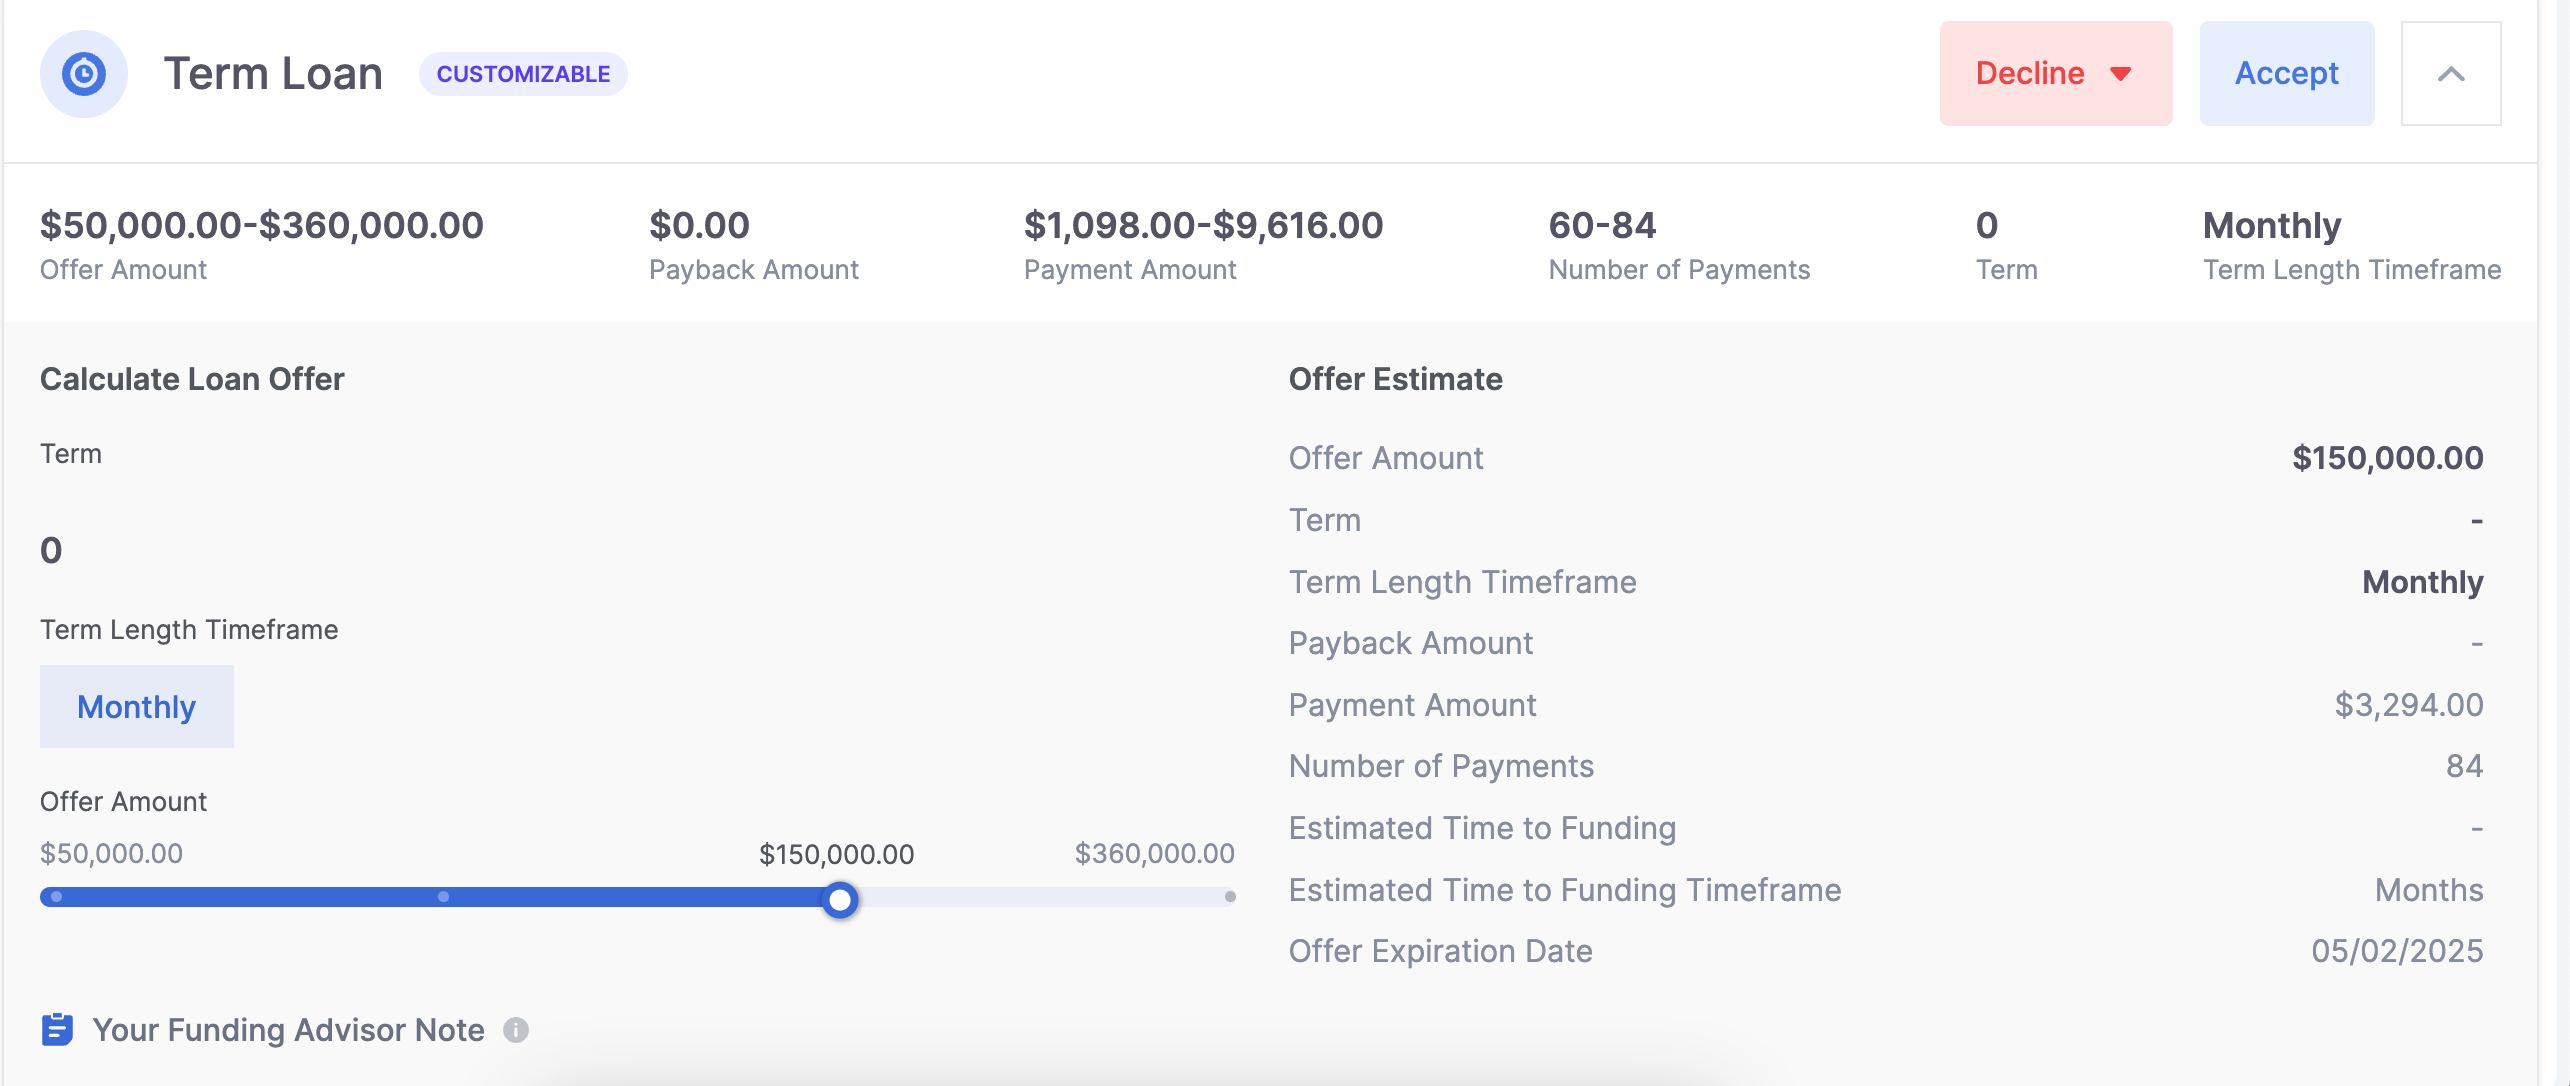
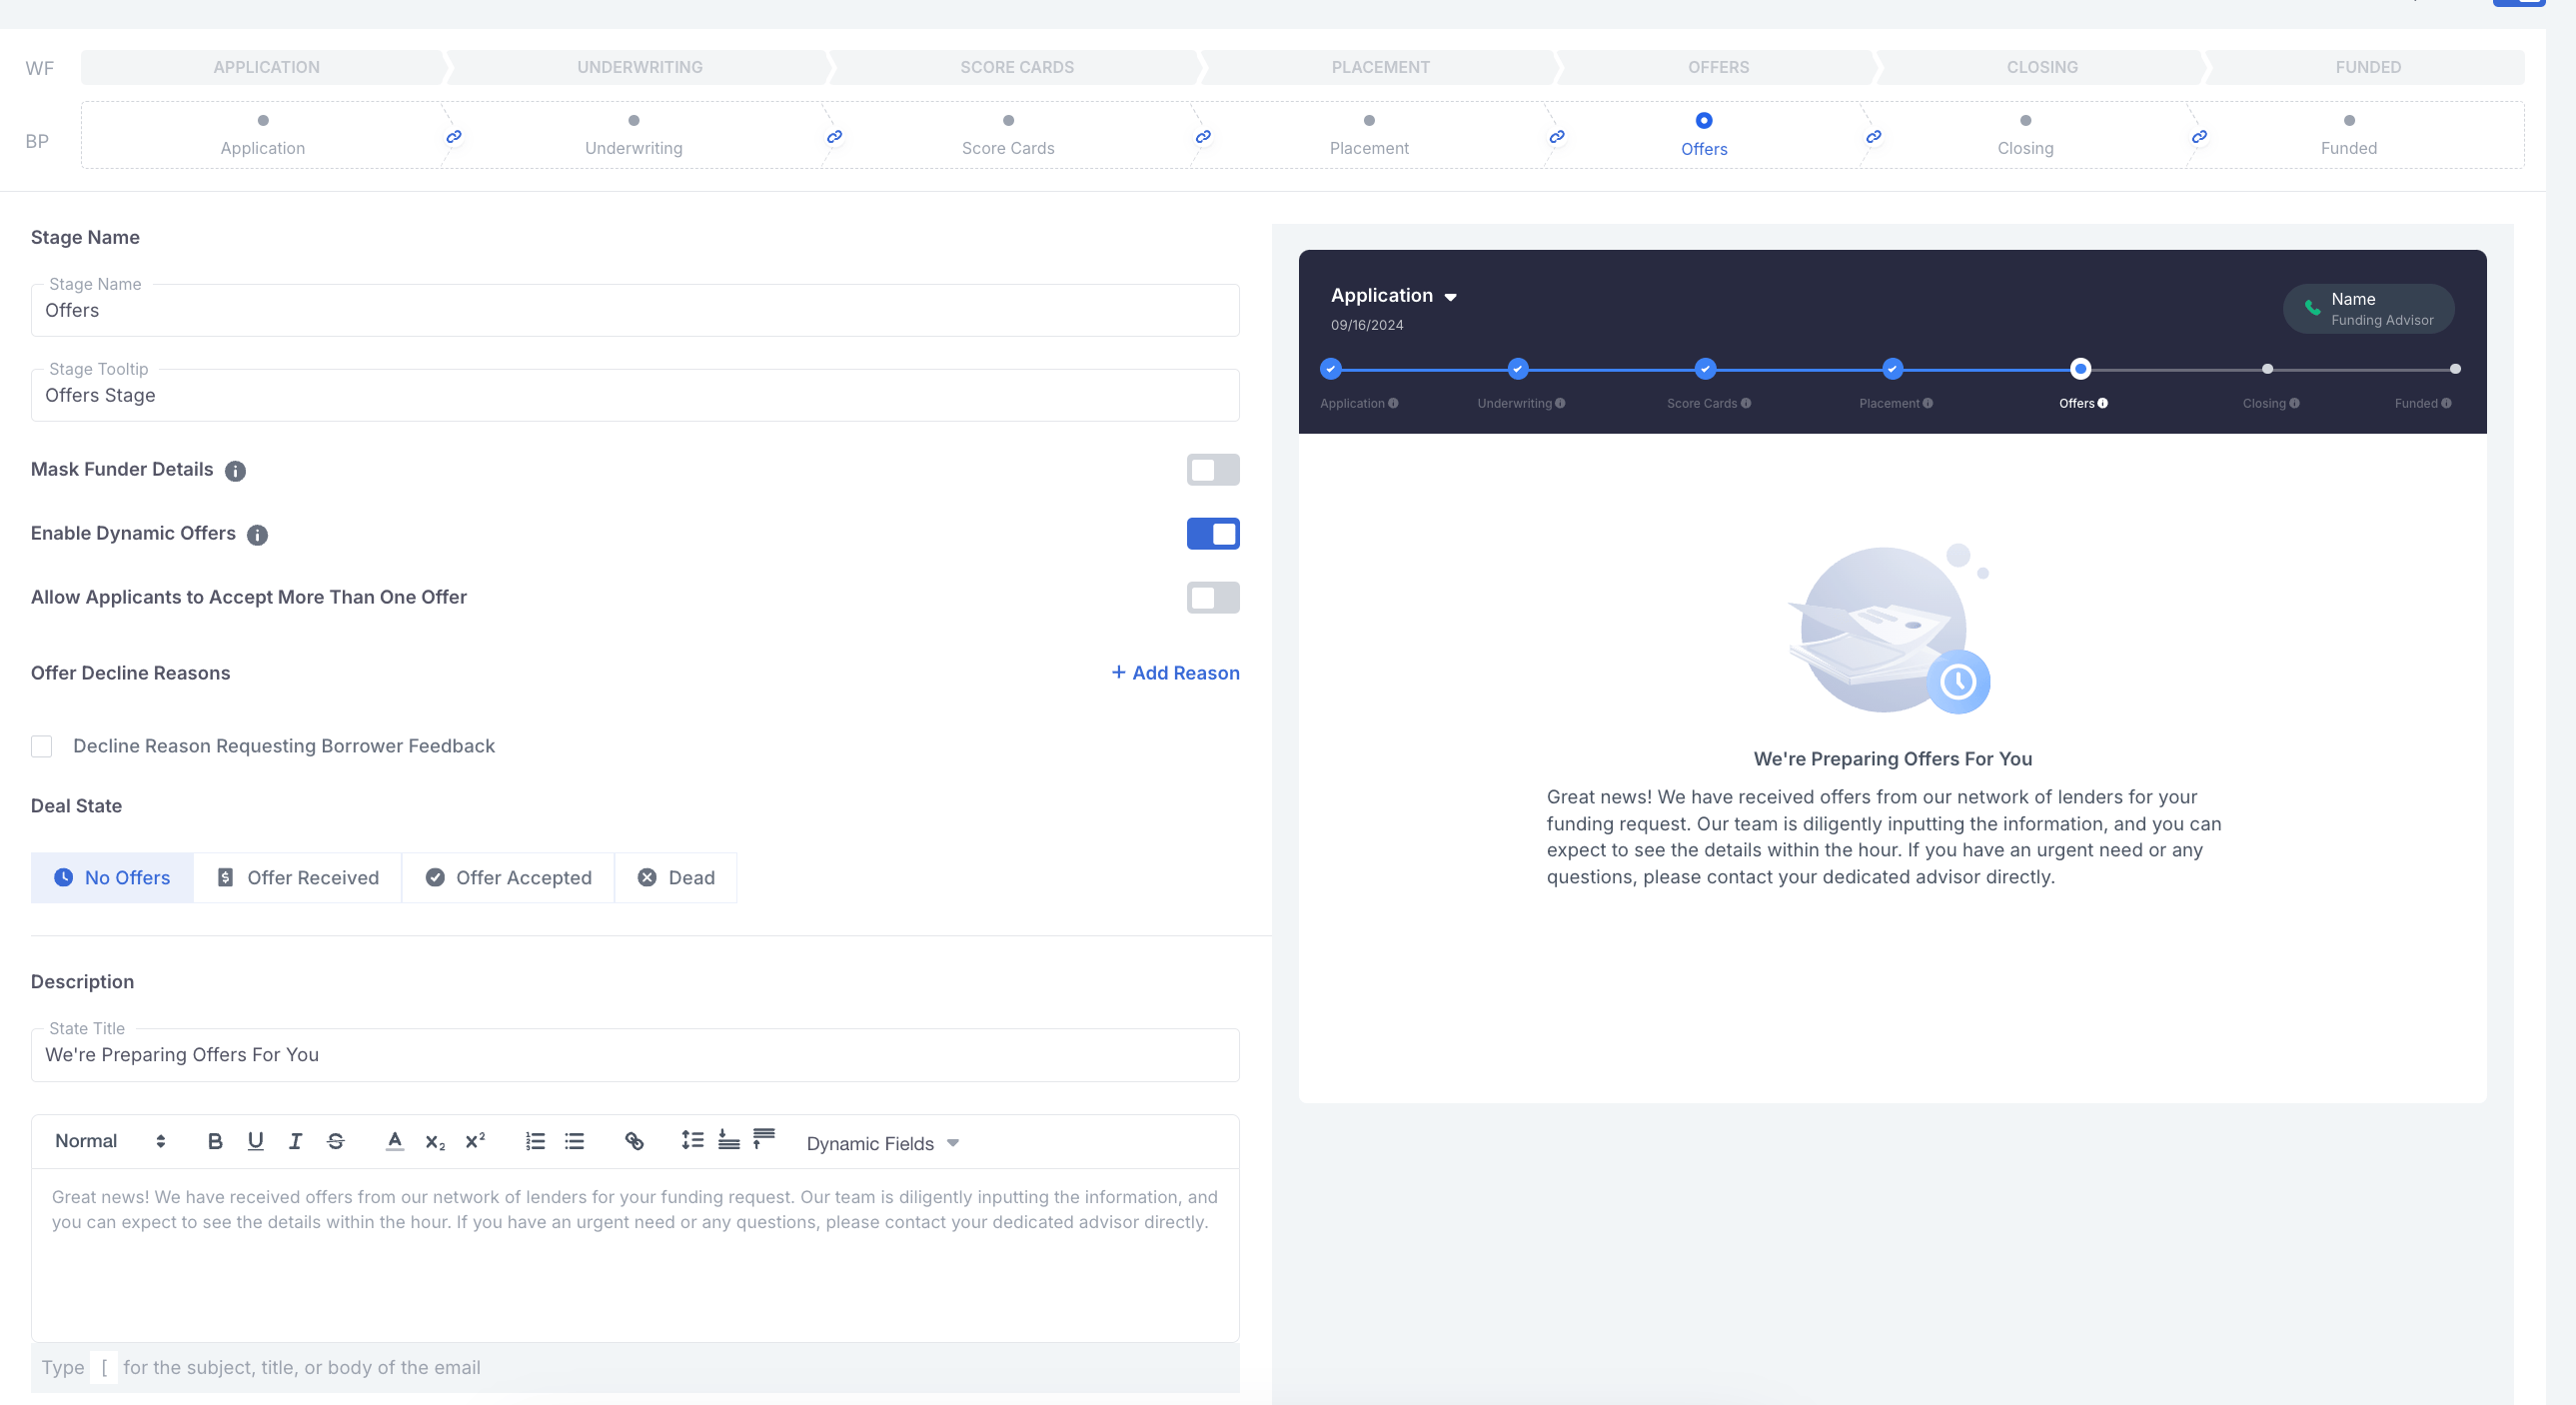
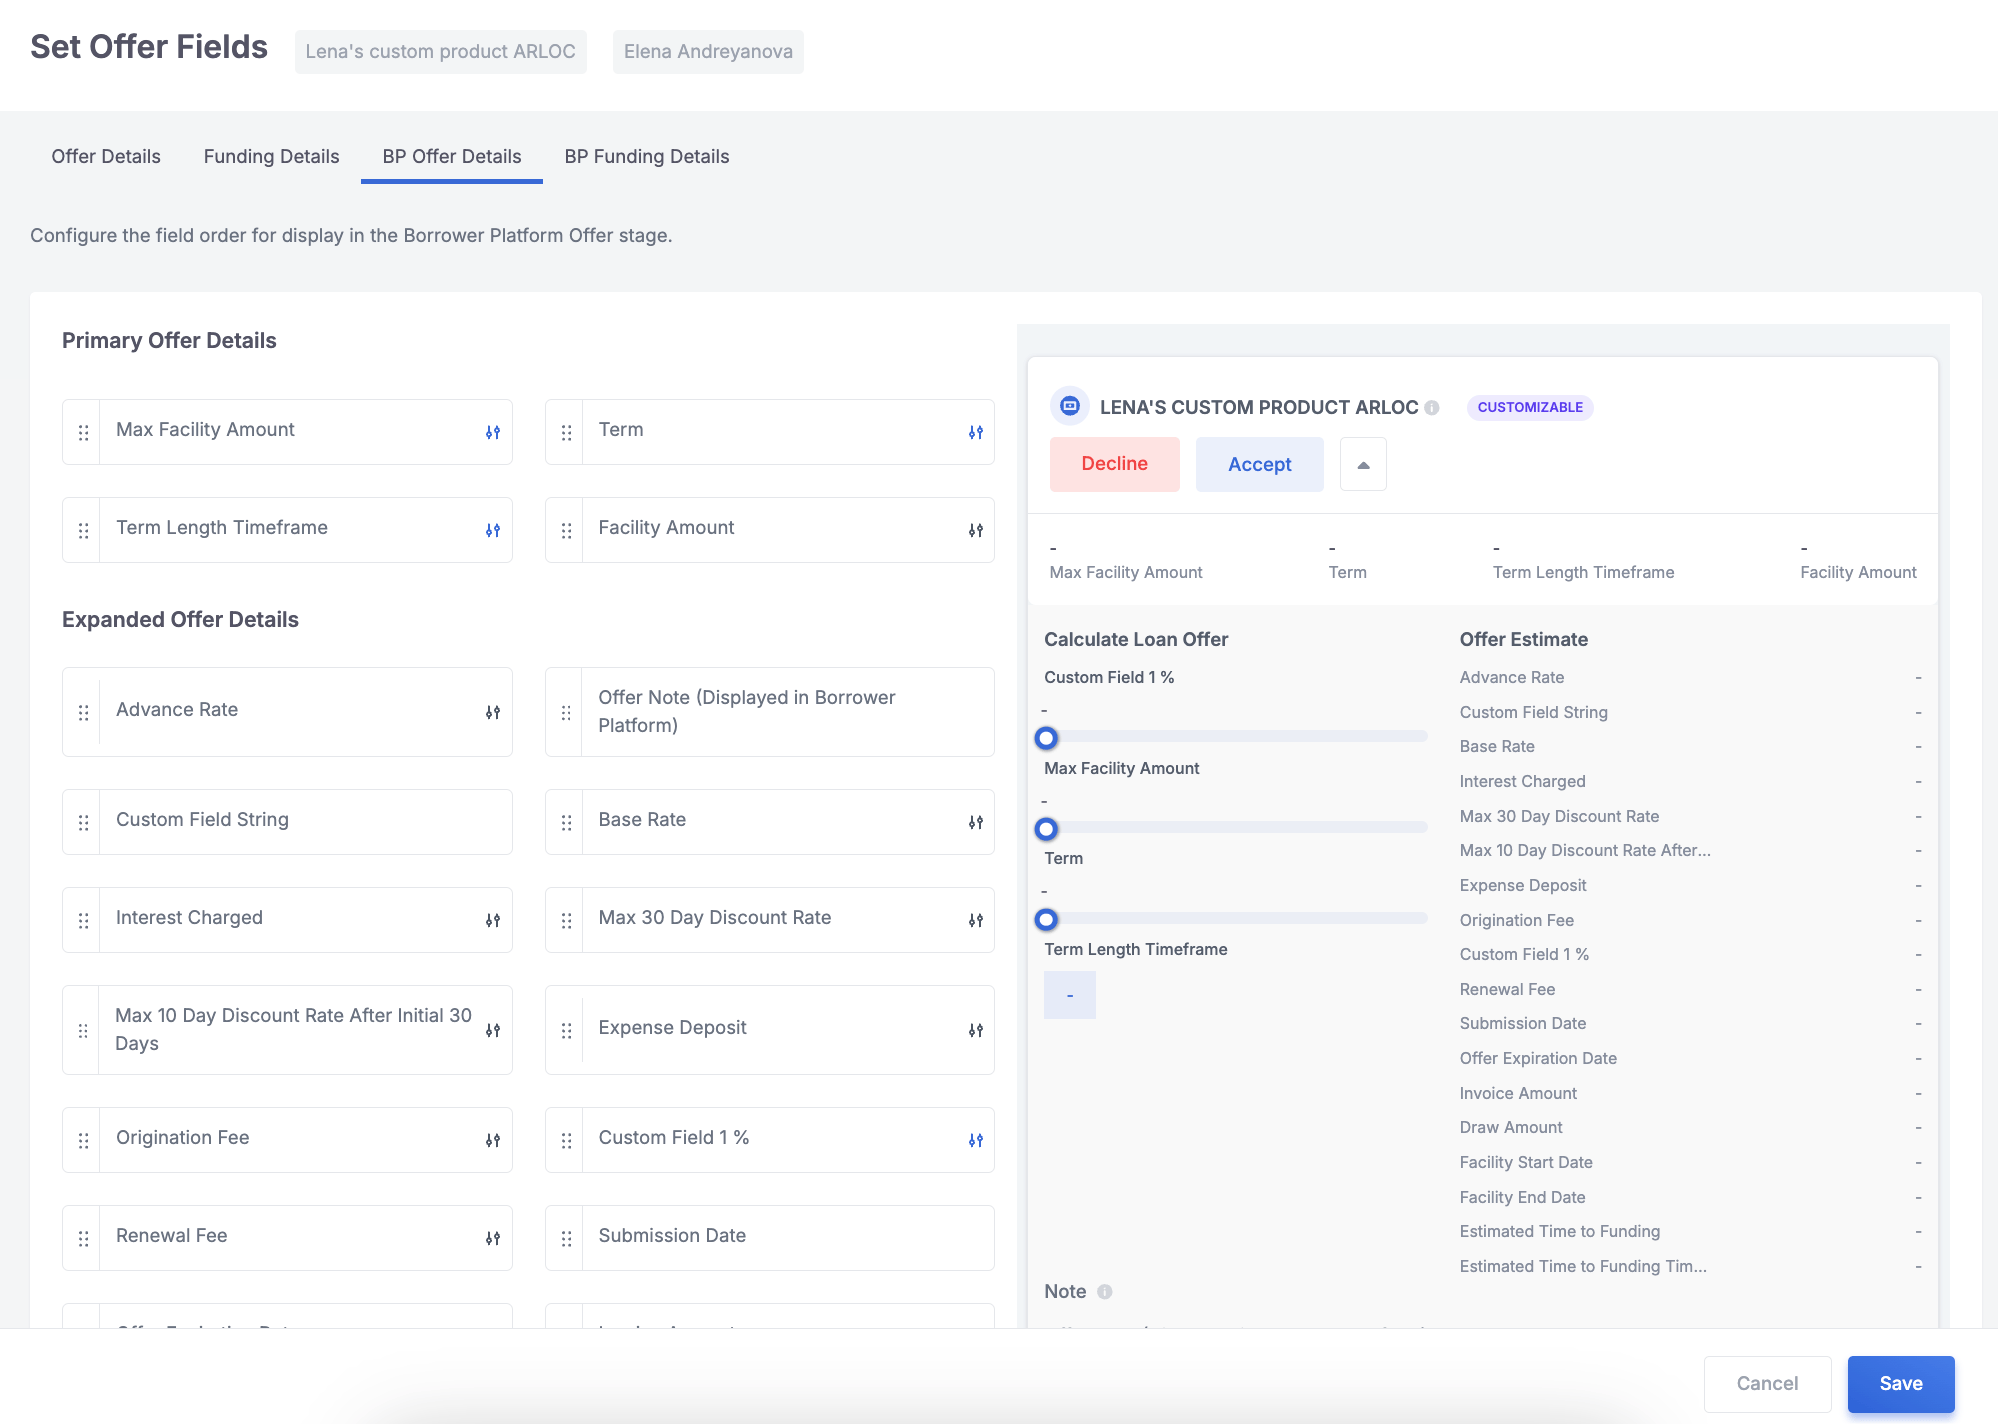 The fields available for dynamic offers come from the product’s Offer Details and Funding Details configuration. A field must be visible in the Borrower Platform before it can be presented to the applicant.
## FAQ
Open the template from **Builders** → **Workflow**, edit its settings, then select **Save Template**.
On the **Workflow** page, open the three-dot menu beside the template, then select **Duplicate** or **Delete**. The available actions depend on your permissions.
The duplicate is created for your organization; it does not become another global template.
Yes. Discovery questions configured in Workflow Builder are available to deals using that template, and authorized users can also add a discovery question in Workflow Live.
No. Existing deals retain their current workflow configuration. The updated template applies to new deals created with it.
## Next steps
Configure statuses and sub-statuses for live and dead deals.
Configure applicant and organization email notifications for a workflow.
Send workflow events and application updates to external systems.
Use the configured stages, statuses, assignments, and notes while processing a deal.
The fields available for dynamic offers come from the product’s Offer Details and Funding Details configuration. A field must be visible in the Borrower Platform before it can be presented to the applicant.
## FAQ
Open the template from **Builders** → **Workflow**, edit its settings, then select **Save Template**.
On the **Workflow** page, open the three-dot menu beside the template, then select **Duplicate** or **Delete**. The available actions depend on your permissions.
The duplicate is created for your organization; it does not become another global template.
Yes. Discovery questions configured in Workflow Builder are available to deals using that template, and authorized users can also add a discovery question in Workflow Live.
No. Existing deals retain their current workflow configuration. The updated template applies to new deals created with it.
## Next steps
Configure statuses and sub-statuses for live and dead deals.
Configure applicant and organization email notifications for a workflow.
Send workflow events and application updates to external systems.
Use the configured stages, statuses, assignments, and notes while processing a deal.