

Embed The Borrower Platform Into Your Product
Use this guide to configure the Borrower Platform in Lendflow and embed it on your website or product. If you are going live for the first time, start with Getting Started, then follow the steps below. Applicants use the Borrower Platform to check the status of their application, contact their funding advisor, and more.Open Borrower Platform Integration
Log in to Lendflow and open the Integrations tab in the left panel, then open Borrower Platform. On this page, configure branding and template on the left. Your Borrower Platform link and integration script update on the right as you make selections.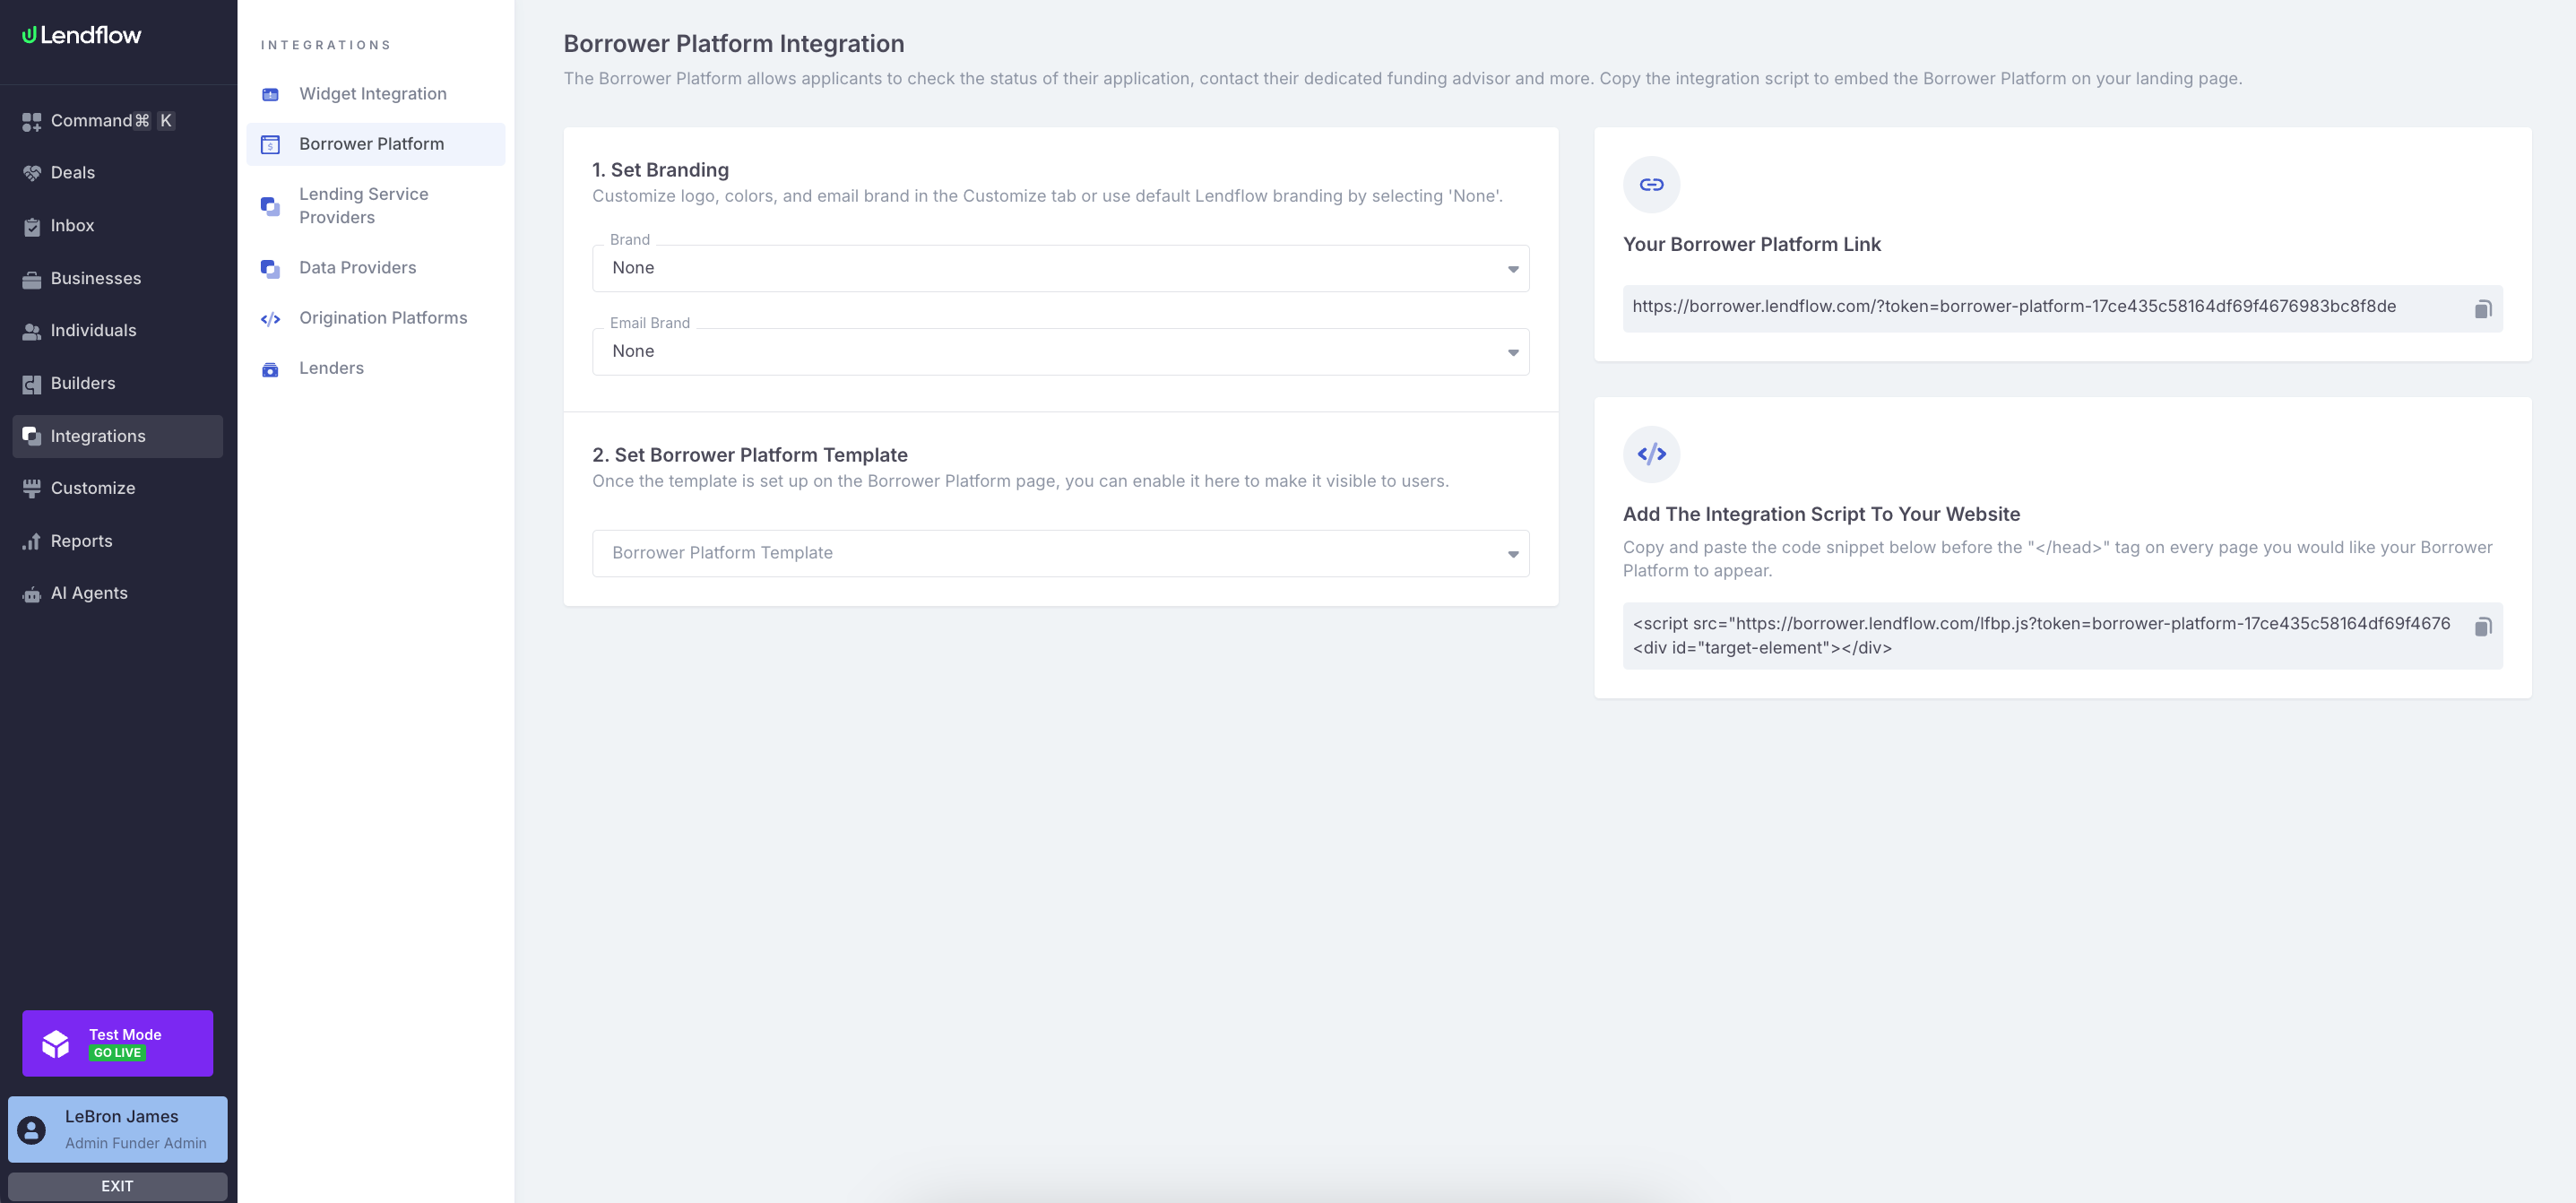
Step 1: Set Branding
Optional — defaults to Lendflow branding.- Brand: Logo and colors for the Borrower Platform (same brand options used for the Widget)
- Email Brand: Branding for emails associated with the Borrower Platform
Step 2: Set Borrower Platform Template
Select the Borrower Platform Template applicants should see. Once the template is set up on the Borrower Platform page, enable it here to make it visible to users.Your Borrower Platform Link (Optional)
On the right side of the page, Your Borrower Platform Link shows the generated URL. You can copy it to share the Borrower Platform directly with applicants (for example by email). For embedding on your site, use the integration script below.Add The Integration Script To Your Website
On the right side of the same page, open Add The Integration Script To Your Website. Copy the generated snippet from the dashboard. It already includes your branding and template selections. The snippet includes two parts:- A
script— loads the Borrower Platform. Your settings are included in the script URL (for exampletoken, and branding or template parameters when selected). Thetargetquery parameter is set to the id of the container element (by defaulttarget-element). Whentargetis present, the Borrower Platform initializes into that element automatically. - A container
div— this is where the Borrower Platform appears on the page. You can change theidif needed, as long as it matches thetargetvalue in the script.
script in the <head> (or before </body>). Place the container div in the <body> where you want the Borrower Platform to appear. The width and height of the Borrower Platform match the size of the target element.
Example page before integration:
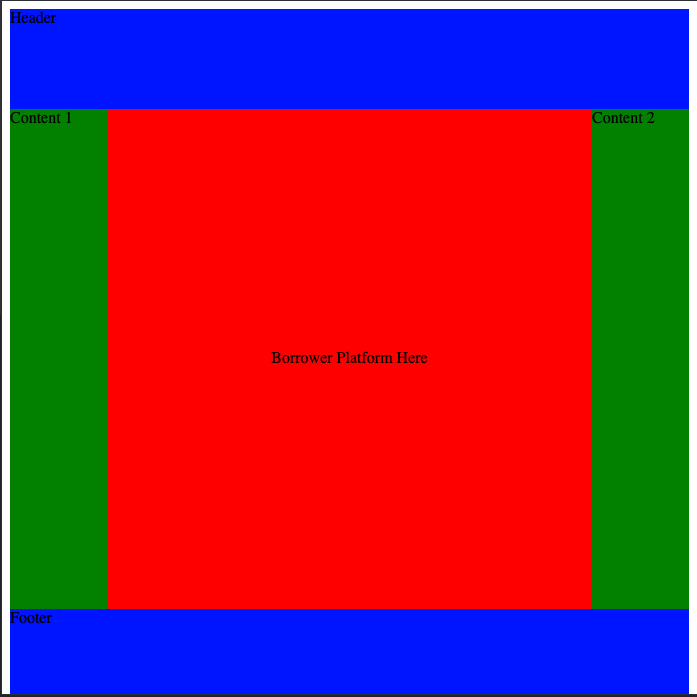
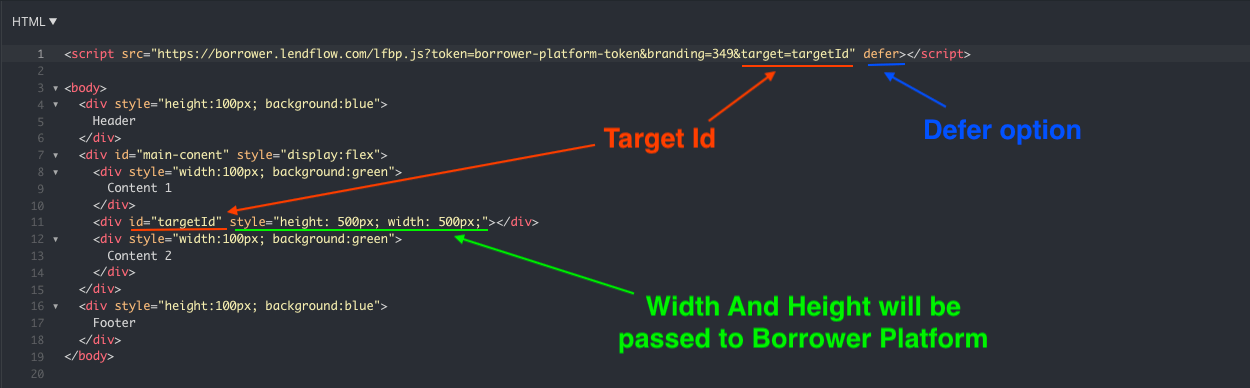
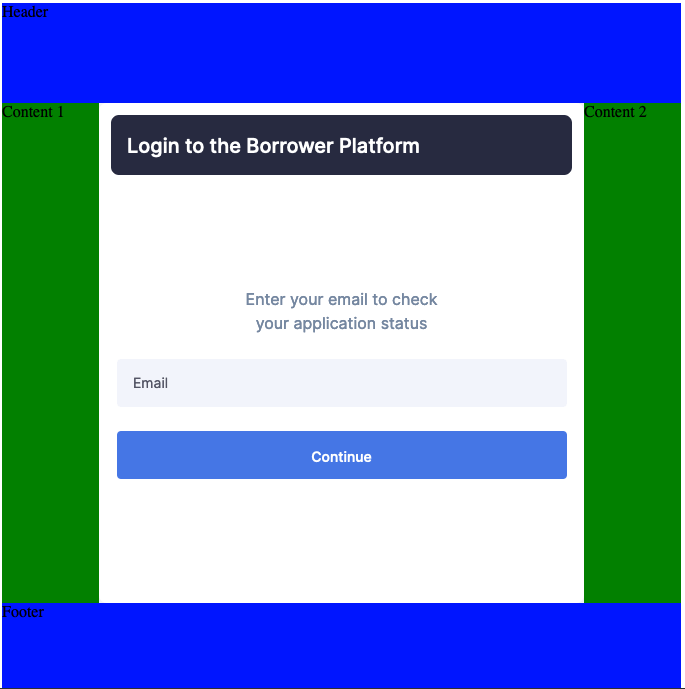
The width and height of the target element are inherited by the Borrower Platform.
Optional: Redirect from the Application Widget
To send applicants to the Borrower Platform after they finish the widget, open Widget Integration and set Choose a Redirect Option to Borrower Platform. See Embedding The Application Widget. After the widget is completed, eligible applicants can land in the Borrower Platform without a separate login when their email was collected in the widget. Some widget types redirect automatically (for example Lending Widget with Prequal). Contact your customer success manager if you are unsure about your widget type.Optional: Share a deal-level Borrower Platform link
From a deal on the Deals page, open the Application Links tab to copy a Borrower Platform link for that applicant. Opening this link can skip the login step because the applicant is identified from the deal.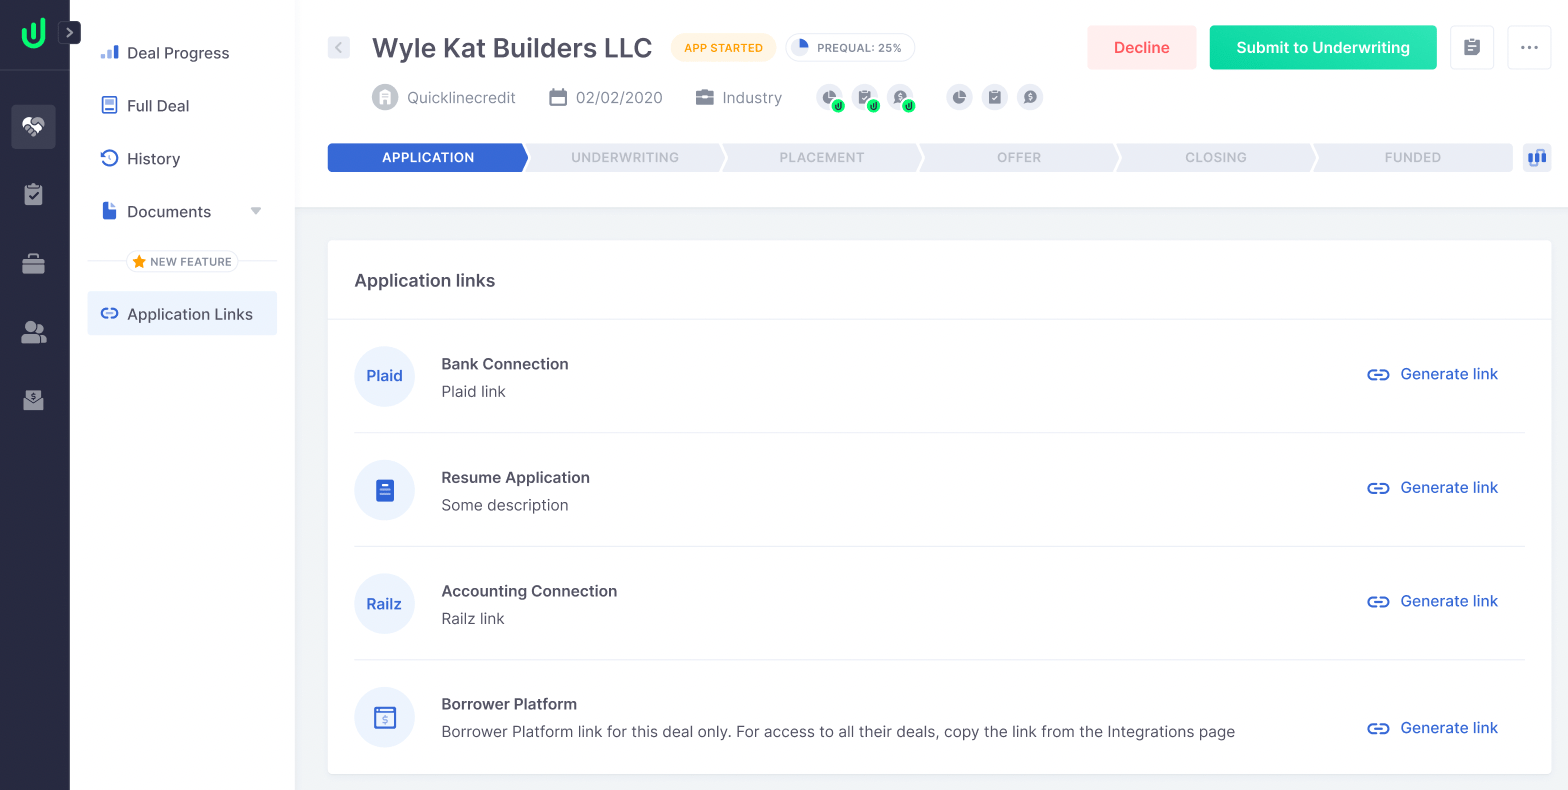
Optional: Authenticate users from your product
If you need to log users into the Borrower Platform from your own product with a JWT, see Authenticate Users Against The Borrower Platform.Next steps
Smartviews
Smartviews are saved views of the Deals page.
Using the Deals Page
Search deals and expand offer or placement details.