

Getting Started with Lendflow
This guide walks you through going live with Lendflow: authenticate, submit an application via API, optionally embed the Application Widget, and embed the Borrower Platform.Step 1: Get Your Bearer Token
Lendflow uses Bearer Token authentication. Obtain a token from the Get Bearer Token endpoint using the email and password registered with Lendflow. For security, always request a Bearer Token through this endpoint. Using a Static Bearer token is not recommended for security purposes, you can find your static Bearer Token in the Integrations tab on the left side menu, then go into Widget Integration and you’ll find your static token in the bottom right section of the page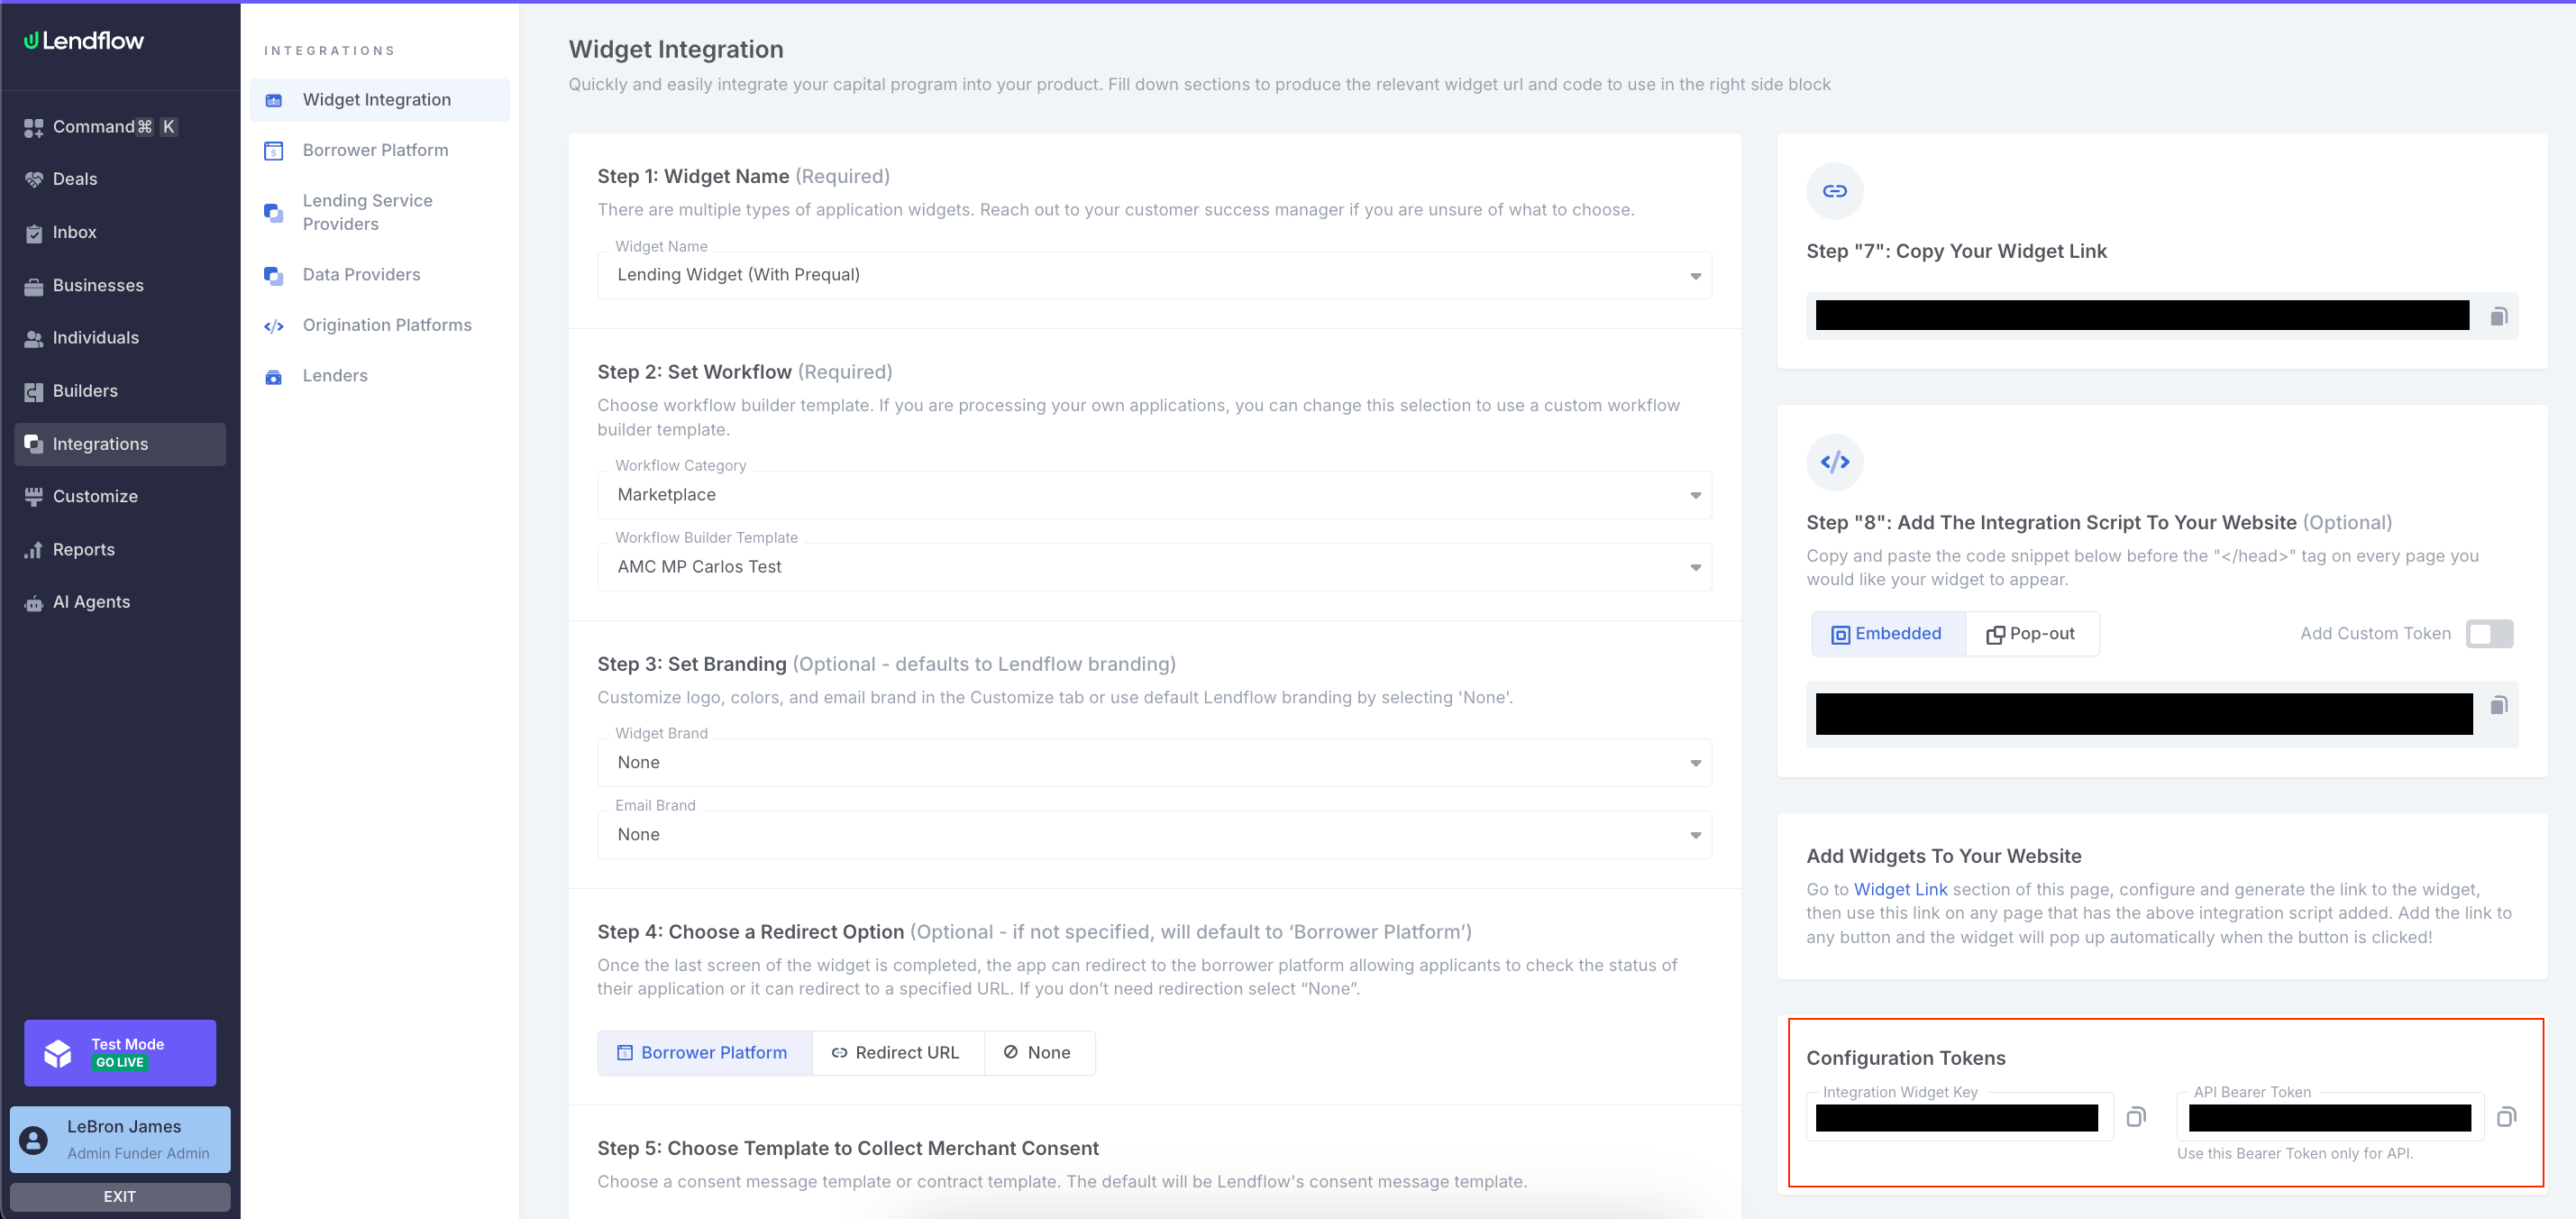
Authorization: Bearer <token> header on all subsequent API requests. Tokens expire after 2 hours and can be refreshed via the Refresh Access Token endpoint.
Step 2: Submit a New Application via the API
Once authenticated, submit applications using Submit A New Application Via The API. Three things are required:- Bearer Token — from Step 1
- Deal Payload — the application data (business info, personal info, funding details)
- Workflow Template ID — a global or custom template ID
Minimal Example Payload
Replace the sample values with your actual application data. Setworkflow_template_id to the template ID provided by your customer success manager (or your own custom template ID).
Your Workflow Template ID
Contact your customer success manager to get the Workflow Template ID(s) for your account. You can use a Lendflow global template or your own custom template.Step 3 (Optional): Embed the Application Widget
If you prefer applicants to submit through a widget instead of the API, you can embed it on your webpage.- Log in to your Lendflow account and open Integrations in the left panel, then open Widget Integration.
- Configure the widget (widget name, workflow category and template, branding, redirect option, and consent template as needed).
- Optionally copy the widget URL to share directly with applicants.
- Under Add The Integration Script To Your Website, select Embedded, copy the snippet, and add it to your page HTML.
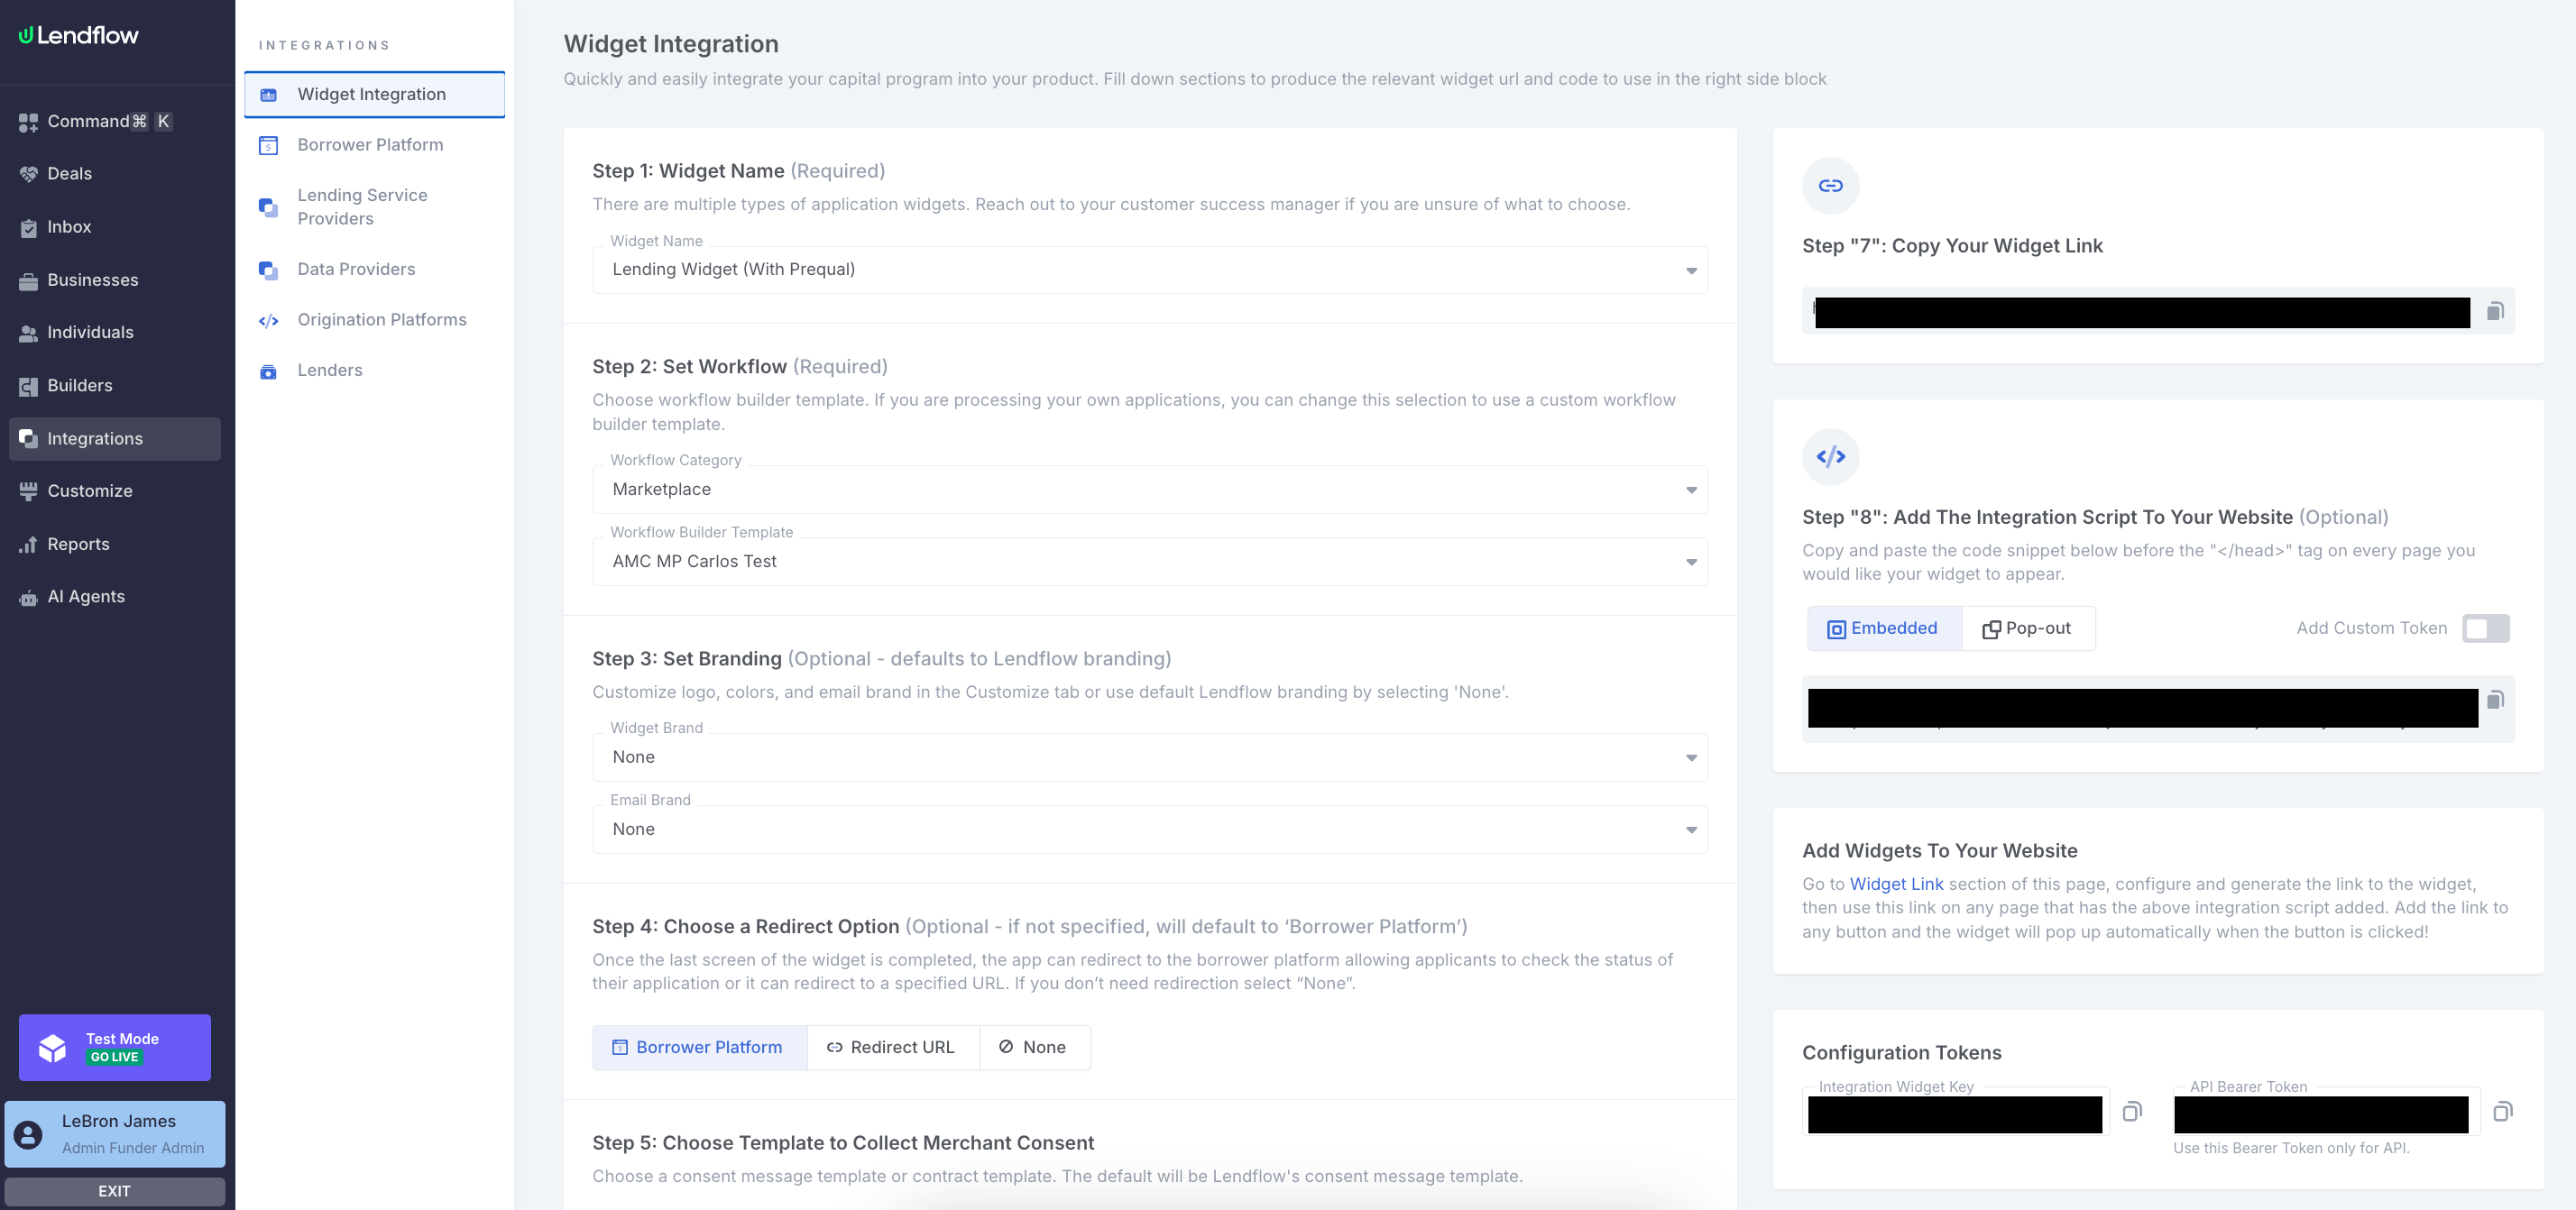
data-customer-token to track applications (for example marketing campaigns or CRM IDs) on the Deals page.
See the full guide: Embedding The Application Widget. To customize branding or white-label widget links, see Application Widget. To attach a widget to a deal that already exists, see Widgets for Existing Deals.
Step 4: Embed the Borrower Platform
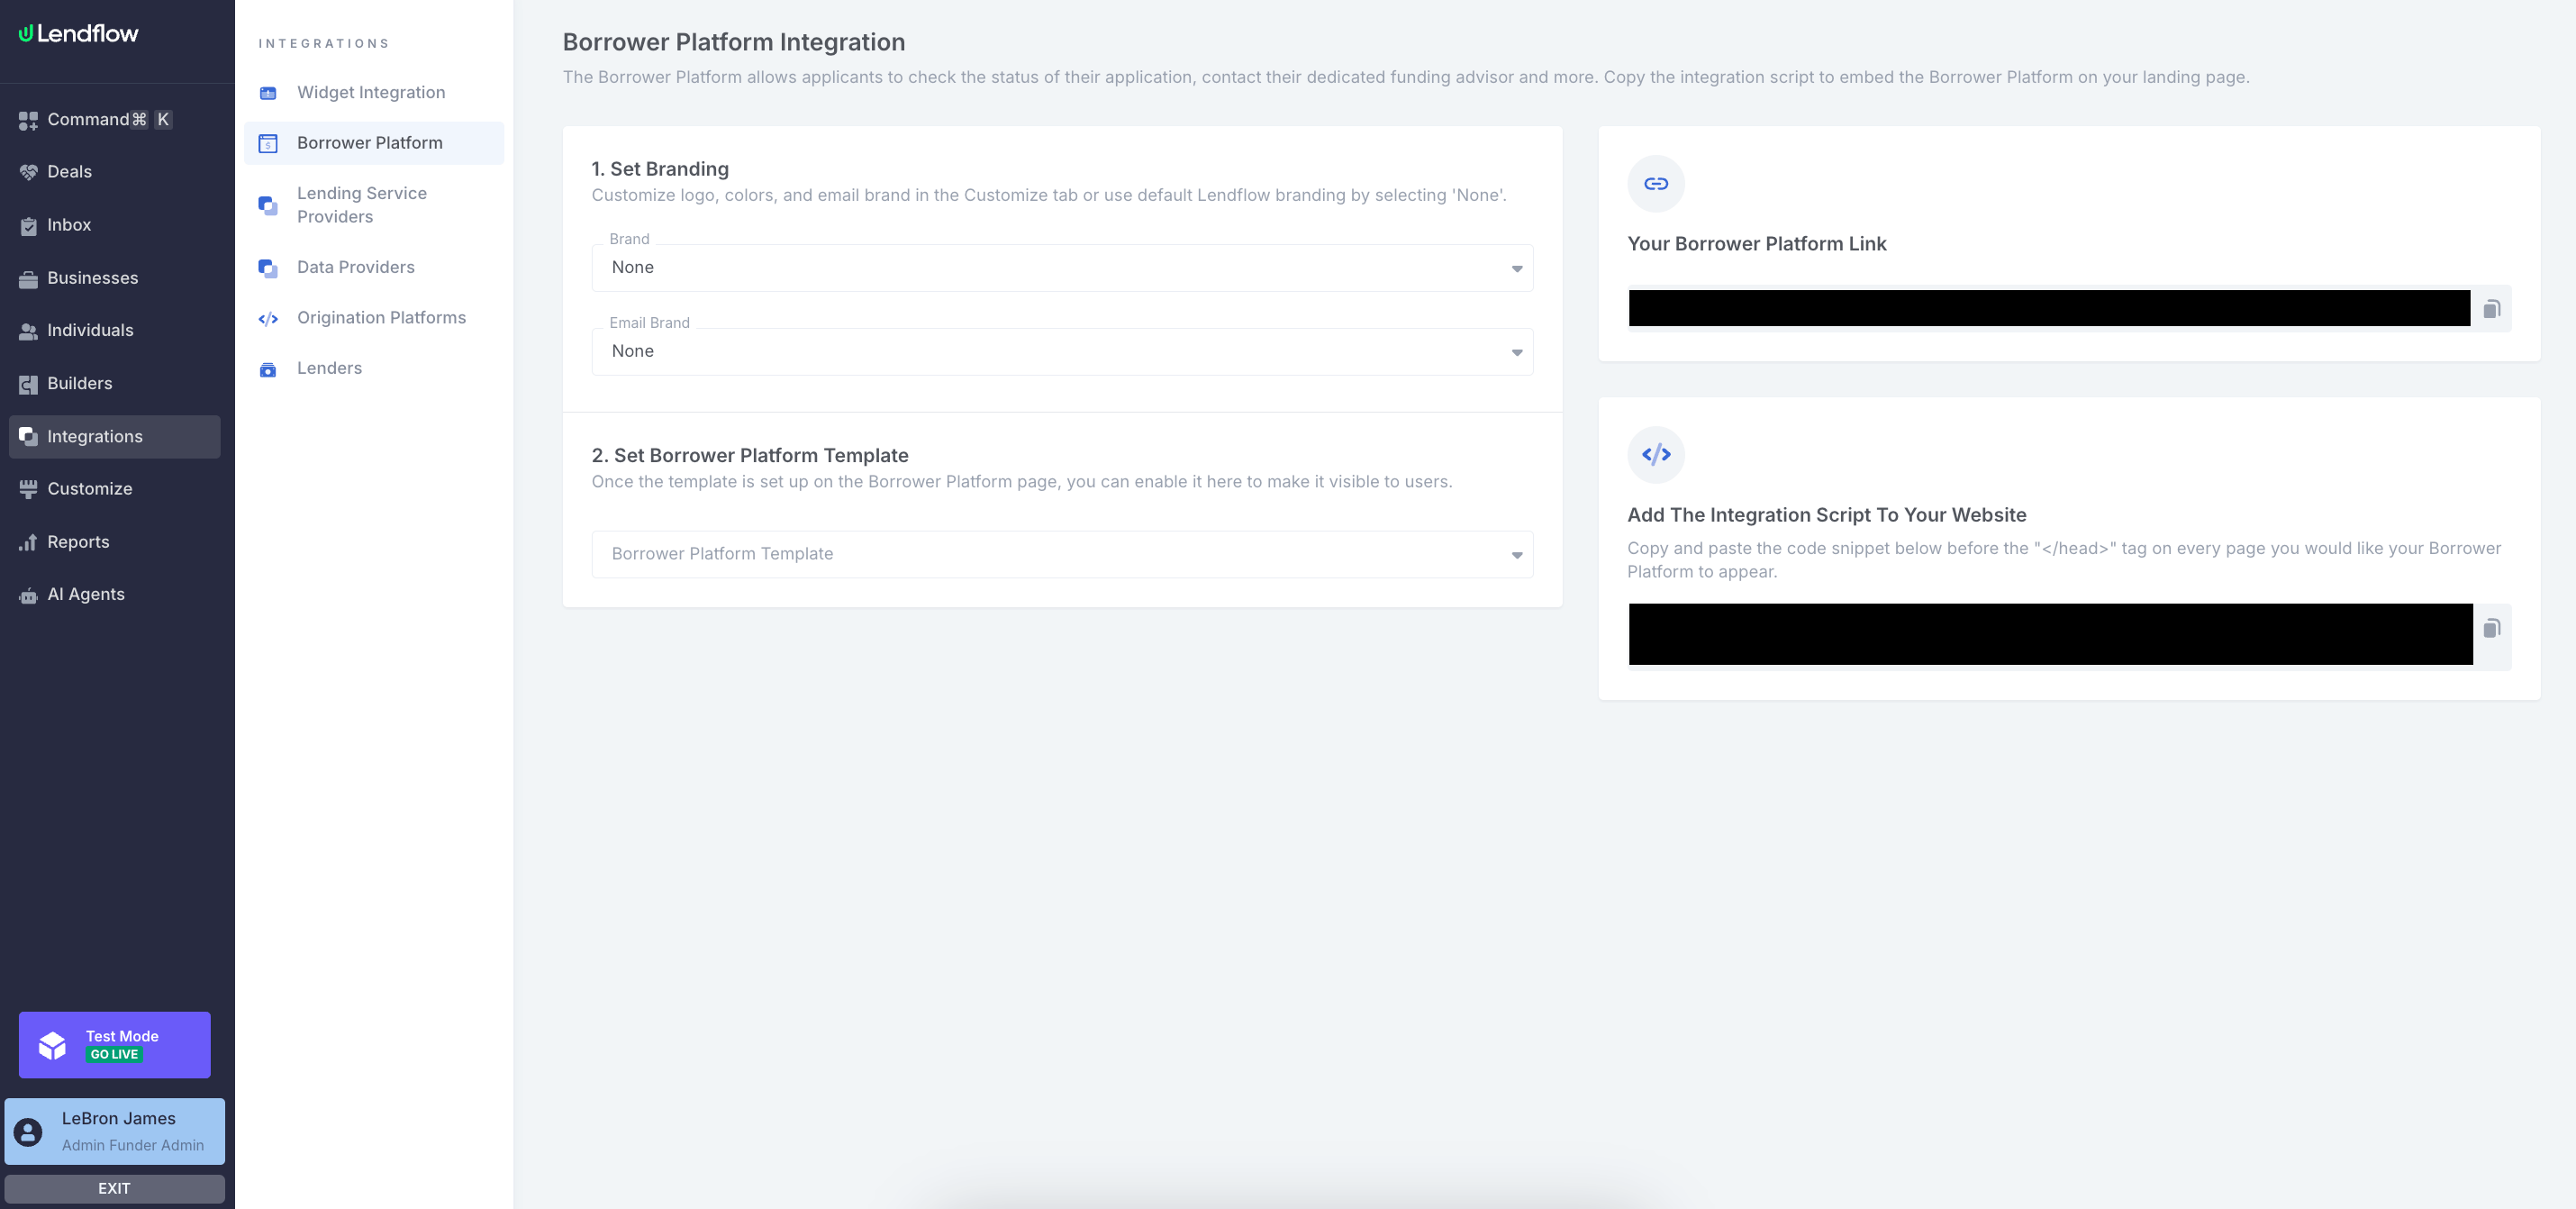
The Borrower Platform is an applicant-facing portal where borrowers can track their application, contact their funding advisor, and more.- Log in and open Integrations > Borrower Platform.
- Set branding and your Borrower Platform template as needed.
- Copy the integration script and container
div, then add them to your HTML. Place the script in the<head>and the containerdivin the<body>where you want the Borrower Platform to appear. The Borrower Platform inherits the width and height of the target element.
Tip: Redirect from Widget to Borrower Platform
In Widget Integration, set Choose a Redirect Option to Borrower Platform. After an applicant completes the widget, eligible applicants can land in the Borrower Platform without a separate login when their email was collected during the widget flow. See the full guide: Embed The Borrower Platform Into Your Product.Next steps
Embedding The Application Widget
Configure the Application Widget in Lendflow and add it to your website or product.
Application Widget
Brand the widget and white-label widget links.
Widgets for Existing Deals
Attach a widget to an application that already exists, including declined deals.
Embed The Borrower Platform Into Your Product
Configure the Borrower Platform in Lendflow and embed it on your website or product.
Submit A New Application Via The API
Submit an application with a Bearer token, deal payload, and Workflow Template ID.